caramel apple jam

Thanks mom for sending me this recipe!

MMMMmmmm….so delicious and warm and soothing and inviting.  Funny for a “jam” to be all that but it is!  Caramel, vanilla, and apples delightfully and simply combined.  Warm this up and pour over some vanilla ice cream and you have a winner.  Equally good on the savory side if you serve as a sweet side relish for pork or chicken.  Alison Roman, the creator of this apple jam, also suggests ice cream (like me) – but topped with crushed Nilla wafers.  And I say, sounds great, but make home made vanilla wafers (coming next)  and add a little whipped cream.

Use a variety of apples, makes for a more interesting outcome because different apples break down differently and this will provide texture and fun!

apple jam (from Bon Appetite Oct 24th):

Original recipe and write up are here.

1 cup sugar
3 pounds apples, use a variety if you can, peeled, cored and cubed about 3/4 inch thick.
1/2 vanilla bean (scraped)
1 tablespoon lemon juice
cinnamon stick or powder
kosher salt

Place 3 tablespoons water in a large saucepan.  Add the sugar and mix.  Heat on medium high and boil – and continue to cook until the sugar caramelizes.  It will turn a dark amber color – but be careful as it all happens very fast, and it is HOT.  Seriously hot.

Add the apples and the vanilla seeds and bean to the pot and cook on medium heat.  The caramel may seize up at the start (because the apples cool it down) but soon it will dissolve again.  Add a 1/2 cinnamon stick (if you don’t have a stick, wait and add some ground cinnamon to taste at the end.)

Continue to cook for about 20-25 m, stirring occasionally until some of the apples are translucent and some still have their shape, and most of the liquid is dissolved.  You can keep cooking btw, if you like your apples super soft, or remove them earlier if you like them super chunky.

Remove from heat.  Add lemon juice and a pinch of kosher salt.  Store in a glass jar or container for up to a month in fridge.


steel cut oats (the very best) don’t skip

Never ever ate any kind of hot cereal as a child, wanted to like it in my 30’s, enjoyed it in my 40’s but wow…at 47 I have found the exact hot cereal (n my case steel cut oats) that I craved (and didn’t even know I was craving it!)   I didn’t know that oats could be so nuanced with delicious flavors and so toothsome!  Seriously.  These oats are unlike the oats I’ve made for myself (every week) for the past year or so.  I recently bought the book Whole-grain Mornings and Megan Gordon (the author) really opened my eyes.  I looked forward to my morning bowl, but now, I can’t wait.  Please don’t beoats turned off by the tad of butter and the extra step of toasting your oats because it is WELL WORTH IT.  Really.  The result is super scrumptious.  My breakfast feels decadent.  This IMG_7184
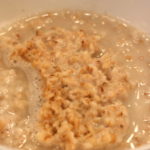
recipe is enough for 6 days.  Each morning I cut a serving, add a little water and heat – I then add my fruits, nuts or raisins and top it off with a sweetener and then add some cold home-made almond milk (you don’t have to use almond milk) and wow…feels like hmmm….happiness.  A great way to start every day!  My mom loved it too while visiting and I think I may have finally turned her into a breakfast eater.

steel cut oats (from Whole-grain Mornings by Megan Gordon):

1 cup steel cut oats
1-3 teaspoons unsalted butter (I use 2)
3 1/4 cups water
1 cup low fat milk (the recipes calls for whole milk which I bet is delicious, 2% might be a good alternative)
1/2 teaspoon kosher salt
1-3 teaspoons sugar (optional) (I use a sweetener at the time I eat it)
2 teaspoons pure vanilla extract
cinnamon (optional)
brown sugar, honey, syrup, heavy cream, almond milk, milk, raisins, fruits (optional all for serving)
I use almond milk, monk fruit sugar, and sliced bananas and nectarines or berries (in winter diced apples and cinnamon)

In a heavy bottomed skillet, melt the butter over medium high heat.  Add the oats and stir and gently toss in the pan until fragrant and darken in color.  See above photo.  This will take 5-6 minutes.

While toasting, bring the water, milk, sugar and salt to a low simmer over medium heat.  Add the oats (be a little careful here since the ingredients all seem to puff up).  Bring to a slow boil, partially cover – and decrease heat to low and cook until it has thickened (25-30m) and the oats have softened.  Stir occasionally while cooking – but especially towards the end so they don’t stick to the bottom of the pan.

The porridge will look loose at the this point – but it will continue to soak up additional liquid so don’t worry.

Add vanilla.  If using raisins – stir in and cover.  Let sit (covered for 5 m).

At this point you can scoop into bowls and serve with all of the above optional ingredients or some of the above.

IMG_7222
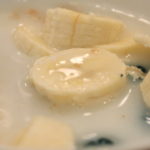
Since I am the only person eating this in my house, I pour the oatmeal into a container.  Each day I take some (it is kind of a solid mass at this point once refrigerated overnight) and place in a bowl with a little bit of water (to loosen it up).  I heat at a medium power for 3 m in the microwave – and end with a 30 sec full blast heat.  (I like it really really hot).  I add my cut up fruits – lately nectarines and banana, then my monk fruit sugar (a sweetener) and top it off with my cold almond milk and yum.  Seriously yum!!  Yum!  Enjoy –


flour-less chocolate cake (la bete noire)

The black beast lives up to its name.  Great for Passover – or really anytime (I made it for Rob’s birthday).  This cake is delicious, rich and satisfying.  It may seem daunting for a second (the water bath and layers of foil) but it is really easy.  Don’t be afraid and try.  I followed the recipe but added a dash of kosher salt.  But otherwise left it as is.  And I used all bittersweet chocolate because that is what Rob likes.  However, if for me, I would have used more semi-sweet.  Oh, and lastly I only had a 9 inch springform pan, so I made a few ramekins on the side (also cooked in a water bath) and gave to the kids since they weren’t invited to the party 🙂

For the water bath – place the springform pan into the roasting pan with out the water.  Then place the pans in the oven and pull the rack out.  Then add hot water to the roasting pan.  This way you don’t have to balance the water and the pan, and the cake pan.

Enjoy – here is the link to epicurious.

things i love – chocolate drizzled pop corn

So I make this myself and I love love love it.  But I know that many don’t feel like tempering chocolate so this makes it easy…buying it!

Stever’s (they make those ridiculous marshmallows) makes an awesome drizzle popcorn.  First, the popcorn is fresh which is important.  Second, the milk chocolate is just so tasty and smooth and third, they lay it on so thick!  Thick thick so that big chunks of popcorn stick together with the chocolate acting like glue.  We love it.

As mentioned when I talked about the chocolate marshmallows, Stever’s has a website – but you can’t order on-line.  But call and they are so nice and friendly up in Rochester, NY that you will likely make a new friend :).

Click here for the link.


popcorn brittle

Yum.  Crunchy, sweet, salty and then chocolaty!  I made these treats and they were a hit with mostly me, Mark and Jack (Andy’s friends) and my sis in law Linda.  She kept telling Patrick that they were good “Patrick this is good!”  but sadly he refuses to enjoy popcorn in any form.  I happen to love popcorn.  It is up there with ice cream and brownies and lasagna.  So when I came across this recipe in Cooking Light – I was eager to try it.  Make no mistake, there is nothing really “lite” about these nuggets save for the fact popcorn replaces nuts.  Oh and speaking of nuts, my niece Emily who is severely allergic took a look at these and said, “wow, nuts” (clearly dissapointed that I made something so obviously nutty and placed it right in front her!)  But I was happy to report that these treats were miraculously nut free!  The brittle is good as is – or, like me you can dip or drizzle them with chocolate.  If you choose to keep them clean, crunch the brittle and mix it into vanilla ice cream.  Yum.

These can be a little tricky to make in that you must be careful working with the hot sugar – and you need a candy thermometer.  But beyond that – not too difficult.  Then of course the chocolate – the tempering of the chocolate.  See past posts for that and remember if you are into it, investing in a small tempering machine can be very helpful.

Oh, and these little gems last a long time so great for the holidays.

Enjoy –

popcorn brittle

5 1/2 cups popcorn (I cooked in a tad of oil and salted – you can also use plain, or air popped but I like the salt with the sweet)
1 1/2 cups sugar
6 tablespoons light corn syrup
1/4 cup water
3 tablespoons molasses
1 tablespoon butter
1/2 teaspoon baking soda
1/2 teaspoon vanilla extract
1/4 teaspoon salt (unless you salted your popcorn like me)

Line a baking sheet with foil and coat foil with cooking spray.

Place popcorn in a lare zip lock bag.  Seal and crush with a mallet or rolling pin.  Set aside.

Place sugar, syrup and water and a medium small saucepan and cook for 1 minute or until sugar dissolves.  Stir to help it melt.

Now take next steps carefully as this mixture will become very hot.

Then cook, over medium high heat without stirring until a candy thermometer registers at 270 degrees (should take 7-9 minutes or so) then add molasses and butter – and cook until therm registers at 290 degrees.  Remove from heat.

Stir in baking soda, vanilla and salt.  Then add the reserved popcorn and mix to combine quickly – then carefully pour onto prepared baking sheet.  Spread with a palet knife or back of a spoon to flatten as best you can.

Let cool completely then break or cut into chunks.  Dip in tempered chocolate for an extra treat!

Enjoy-

mixed berry pavlova

Lisi's Kitchen

This was so good that I completely forgot to take a photo!  But not to worry, photos on the Smitten Kitchen site for you to enjoy.  I made this a while ago – and kept thinking I would make again to photograph and share – but the summer is almost over and I don’t want you to miss out.  Use the last of the berry season to make this delicious treat.  I mean it – the meringue so tasty, soft and fluffy – the whipped cream and the fresh cold berries.  So so so good!  I followed the recipe (well, I doubled it and made two!)

Try to squeeze it in and enjoy

smitten kitchen pavlova

apple cinnamon muffins (very healthy – made with almond meal)

Andy came into the kitchen and said omgoodness what is that smell?  It smells sooo good!  I told him I was making muffins but didn’t mention the healthy part of the description.  Hot out of the oven Andy asked if he could have one – I said sure and his eyes lit up with joy and disbelief because he usually does not get to eat a muffin close to dinner.  He mmmmed and mmmmed and declared these AMAZING!  I said you know these muffins are healthy and he smiled and said, “good, I can have them for breakfast!”  I will say that he said (on his second one) that the consistency was a little soft and that they were best when hot and fresh out of the oven.  And yes, all that is true – but my thought is that if you have a kid like him – who loves muffins and loaf breads, it is awesome to have a treat that is full of protein and apples and cinnamon!  Unfortunately, Sylvie didn’t love them as much.  The consistency bothered her a bit more and Greg too – thought they were ok but not memorable.  So – well – after reading all that you can decide whether you think your family (or a member of your family) might enjoy.  Oh and btw, I did!

I kept the muffins unwrapped and out so that they wouldn’t get even softer.  You could slice and toast the next day to recreate the warm flavor.

apple cinnamon muffins (from elana amsterdam’s book The Gluten-Free Almond Flour cookbook):

2 cups blanched almond flour (almond meal)
1/2 teaspoon sea salt
1/2 teaspoon baking soda
1/4 cup arrowroot powder
1 teaspoon ground cinnamon
1/4 cup grapeseed oil
1/2 cup agave nectar
1 large egg
1 tablespoon vanilla extract
2 medium apples, peeled, cored, and diced into 1/4 inch cubes

Preheat the oven to 350 degrees.  Line muffin cups with paper liners.  Peel, core and dice apples.

In a large bowl, whisk together the almond flour, salt, baking soda, arrowroot powder and cinnamon.

In a medium bowl, stir together the oil, agave, egg, and vanilla extract.

Next, stir the wet ingredients into the dry and mix fairly well  then fold in the apples.

Bake for 30-35 m – until the muffins are golden brown on top and a toothpick comes out clean.

These are best warm outta the oven or soon after.  Remember though – they are soft,  so you might need a spoon when hot!

Enjoy-

cinnamon almond snack cake (made from ground almonds – no flour) healthy!

Sylvie LOVED this cake.  Rob and I did too.  The cinnamon topping is soo very full of flavor and the cake is dense, moist and satisfying.  Really!  Again from my almond flour cookbook that I’m having so much sweet success with.  About a month ago I was convinced that Greg had a gluten sensitivity or Celiac so I quickly ran out and got a few gluten free cookbooks – this being one of them.  I like this cookbook because the ingredients are familiar and healthy.  Greg’s been tested and now I’m 95 percent sure that he doesn’t have it – but he does need to gain weight – and best in a somewhat healthy way.  So I figured that baked goods made with almond flour would be somewhat caloric – but healthy and full of protein.  And really, a good snack for all of us.  Unfortunately, Greg (and Andy) didn’t love it – but i think it was just the slivered almonds on the top.

Try it – I don’t think you will be disappointed.  Oh, I added the chocolate chips to the recipe (had to!) although the recipe called for nuts and currents.  I’ll include both options in the recipe.  Enjoy!

You will need agave nectar and grapeseed oil which you should be able to now find in the supermarket.  Or buy agave nectar online for better price.

cinnamon almond snack cake (slightly adapted from The Gluten-Free Almond flour cookbook by Elana Amsterdam which was inspired by lucyskitchenshop.com):

cake
2 1/2 cups blanched almond flour
1/4 teaspoon sea salt
1/2 teaspoon baking soda
1/2 cup walnuts (or not — here I added chocolate chips!)
1/2 cup dried currents or raisins (I didn’t – just used the chocolate chips)
1/4 cup grapeseed oil
1/4 cup agave nectar
2 large eggs

topping
2 tablespoons ground cinnamon
2 tablespoons grapeseed oil
1/4 cup agave nectar
1/2 cup sliced almonds

Preheat oven to 350 degrees.  Grease an 8 inch baking pan with grape seed oil and dust with almond flour.

Combine the almond flour, sea salt, baking soda, chocolate chips (or walnuts and currents!) in a large bowl.  Whisk and stir to combine.

In a medium bowl, stir together the grape seed oil, agave nectar and eggs.

Stir the wet ingredients into the dry and mix until thoroughly combined – and then spread into the prepared pan.

Make the topping by combining the cinnamon, grape seed oil, agave nectar and almonds together…and then sprinkle the topping all over the batter.

Bake for 25-35 minutes — a tooth pick should come out just clean.  Keep checking.  Cool and serve.

bittersweet chocolate soufflé (you can make in advance!) and flourless for passover

Big hit.  Big Big hit.  Sooo delicious.  Pure chocolate, pure happiness.  Rob ate one, and said – you know, I could easily eat the whole tray and I mean it.  Sylvie, Andy and Greg all said so good mom…so so good.  I gobbled mine up fast – as if someone was trying to steal it from me.  Greg and Andy’s friends were over – Connor said, “did I just eat that, or did I die and go to heaven?”  He sure knows how to compliment me (maybe he just wants to keep the treats coming.)  Matt was also verrrry happy and loved the freshly whipped cream that went with it.  I decided to make these on the fly on Saturday afternoon.  I had all the ingredients in the house and I bet you do too!  (Maybe?)  Rob and I thought we’d go out and catch up – but suddenly we had 5 extra boys and at that point it just didn’t seem like a good idea.  Rob seemed so sad, I think he was looking forward to a yummy meal (since he splurges a bit on Saturday nights) and here we were ordering in.  In addition to all that, this was my last meal because I had to fast (liquids) on Sunday for my upcoming colonoscopy on Monday so I too really wanted a good treat that would last me 24 hours.  I scanned my books and found this delicious and fairly simple recipe from Alice Medrich’s book, Bittersweet.  Sylvie jumped right in, enjoying prepping the ramekins (buttering and sugaring) while I got the ingredients together.  Not too much work here – just whipping up egg whites which I guess is the only part that some may find intimidating – but it isn’t.  The best thing about these is that you can make them up to two days in advance (store in the fridge) – and bake them on the day you plan to serve which is such a treat for a dinner party.  Make these and enjoy!

Please use the BEST chocolate you can possibly find and afford as this dessert will showcase that chocolate.  Alice Medrich uses 70% bittersweet chocolate.  I used half 70% bittersweet chocolate and half 62% semisweet – as I was not certain that the kids would like it if it was too bitter.  Up to you – and you know your guests.  If you only have semisweet chocolate and would like it richer in chocolate flavor then you can reduce the sugar to 1/4 cup if desired as well.

This recipe calls for eight 6 oz. ramekins.  I used that size but also added 2 larger ramekins and with added baking time they worked just as well.

I doubled the following recipe.

bittersweet chocolate souffles (from Alice Medrich’s Bittersweet with the addition of a speck of salt):

about 2 – 3 tablespoons sugar for ramekins
little melted butter for ramekins
8 ounces bittersweet 70% chocolate, finely chopped (or as mentioned above a sweeter chocolate if preferred)
1 tablespoon unsalted butter
1/3 cup milk (this worked with the skim I had in the house but if you have whole, go for it)
3 large eggs, separated, at room temp
plus one large egg white, room temp (I forgot this!  So my rise wasn’t great…but yours will be!)
1/8 teaspoon cream of tartar
1/4 skant teaspoon kosher salt
1/3 cup sugar

topping:
1 cup heavy cream
1/2 teaspoon pure vanilla extract
1 tablespoon sugar

If you are baking the soufflés immediately, then preheat the oven to 375 degrees and place the rack in the lower third of the oven.

Melt a little butter and with a pasty brush or paper towel, cover the entire ramekin, including the top lip.  Place some sugar on top of the butter and rotate the ramekin around so that the sugar sticks to all of the butter.  As you rotate, pour the extra sugar into the next ramekin and begin again.

Place the chocolate, butter and milk in a medium sized metal bowl and place over a pot of barely simmering water (water shouldn’t touch the bowl). (Or use a double boiler.)   Gently melt and remove the chocolate from the water bath once smooth.  Add the egg yolks and mix well.  (Batter might seem oddly stiff at this point, don’t worry.)

With the whisk attachment and on medium speed (or hand held beaters) beat the egg whites (remember to add the 4th white) with the cream of tarter and salt until soft peaks form (so eggs have a form, but they don’t really hold their shape.)  Then gradually pour in the 1/3 cup sugar and then mix at high speed until the whites get nice and stiff but don’t look dry.

Fold about a fourth of the egg whites into the chocolate/egg mixture to lighten it a bit.  Then fold in the remaining whites carefully – and try to incorporate with out over mixing.

Fill each ramekin 3 quarters full.  ** The soufflés can be prepared up to this point, and placed covered, and refrigerated for up to 2 days – then bake directly from the fridge.

Place the soufflés on a baking sheet and place in the oven.  Now this is the most important part…as you don’t want them too soft and don’t want them to dry out.

Bake until they rise and crack on top.  A wooden skewer or toothpick should come out with moist and gooey but not liquidy.  This will likely take 14-16 minutes but you really need to watch them as all ovens vary.  Oh, and if you refrigerated them, they might take a minute or two longer.

To make the whipped cream, place all ingredients into the mixer and whip on medium high speed until it holds a soft shape.  Please don’t buy whipped cream.  Really, this makes a huge difference!

Serve immediately from oven with a little powdered sugar and a dollop of whipped cream.  Yum!

coconut mounds (the best ever) (dairy and gluten free btw)

Loved these!  We all did – even those of us who don’t love coconut (including me, although I think I may have moved over into the like category.)  Judy and Marco really enjoyed – and she is a true coconut aficionado.  Alice Medrich calls these New Classic Coconut Macaroons because she recreated the recipe with unsweetened dried  coconut flakes (not sweetened, shredded and artificially preserved.)  Maybe that is why I like them so.  The cookie consistency is chewy and soft inside, and crispy on the outside and so very flavorful and quite pretty to look at.  (Long run-on, I’m aware.)  I threw some bittersweet chocolate shavings into some and wow — even better!  In others, I added dried cherries, and that too was another nice alternative.  Make these soon and make a lot!  They last 4-5 days in an airtight container.  Enjoy –

coconut mounds (from Chewy, Gooey, Crispy Crunchy by Alice Medrich):

makes about 22 cookies

4 large egg whites
3 1/2 cups (5.25 oz.) unsweetened dried coconut flakes (also called coconut chips)
3/4 cup (5.25 oz.) sugar
2 teaspoons pure vanilla extract
slightly rounded 1/4 teaspoon kosher salt

Combine all the ingredients in a stainless steel bowl.  Set the bowl over a sauce pan filled with an inch of barely simmering water (the bowl should be on top of the sauce pan, it should not fit inside the sauce pan.)

Mix the ingredients with a rubber spatula over the heated water until the mixture becomes more opaque and less translucent.  This should take about 5-7 minutes.  The mixture will get hot – which you want, but you don’t want to cook the egg whites.

Set batter aside for 30 minutes to fully absorb the coconut flavor.

Preheat the oven to 350 degrees.  Place 2 tablespoons of batter for each cookie onto a parchment lined baking sheet.  Bake for about 5 – 7 minutes (rotating pans).  You want the coconut tips to just start to color.  Reduce the oven temp to 325 and continue to cook for 10-15 minutes (again, rotating your pans) until the cookies are a beautiful cream color with golden brown edges.

If the coconut tips are browning too fast, you can reduce the oven temp to 300.

Let cool on pans, and oh, best to enjoy day one as they are gooey and soft on the inside and crispy on the outside.  Yum.