luscious lemon almond cake (gluten and dairy free!)

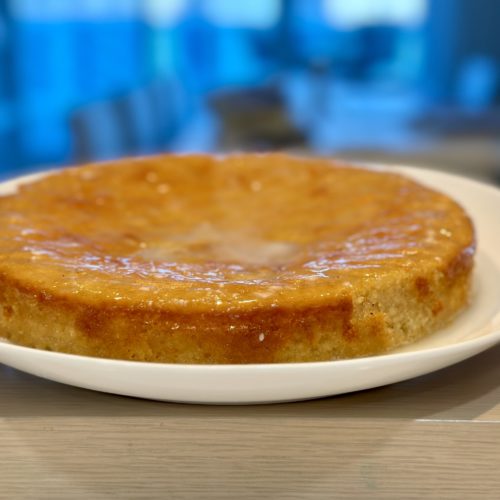
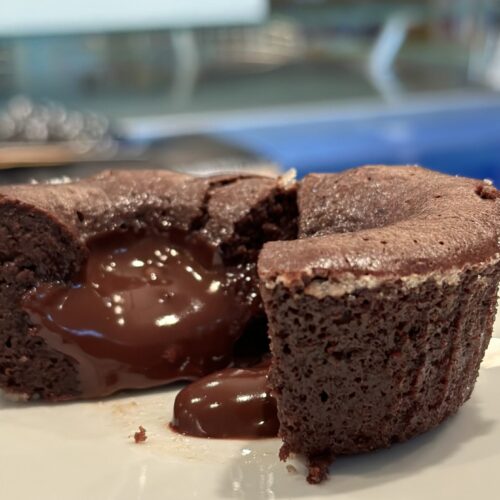
I’m always  on the lookout for some extraordinary gf/df sweets for Greg.  And I think this fits the bill.  It is incredibly moist and dense and has a marzipan feel to it which Greg loves.  It is also verrrry lemony!  Rob and I enjoyed as well btw – don’t have to be gf/df to appreciate.

I found this recipe in The Healthier Bite blog.  Jennifer created this blog for those with ulcerative colitis who are on the Specific Carbohydrate Diet.  Greg does not need to follow the diet so I modified only a tad –  only with the icing as my icing contains confectioners sugar and the original recipe does not.  

The original recipe is here if you want to follow the original SCD version and/or if you are trying to eliminate refined sugar.  (The SCD diet does allow honey which is why it is in this cake).  

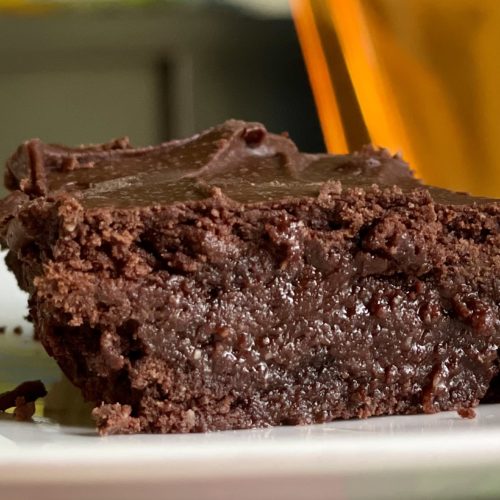
When I made this cake the first time I mistakenly set the oven to 350 instead of 325.  But I actually prefer it that way.  The baking time is variable so you will have to check and check again.


Ingredients cake:

  • 2 tablespoons coconut oil, melted (but not hot) 
  • 3/4 cup honey
  • 2 large eggs (room temp)
  • 2 tablespoons lemon zest (wash your lemon first)
  • 1/2 cup freshly squeezed lemon juice 
  • 1/4 teaspoon vanilla extract
  • 3 cups finely ground blanched almond flour
  • 1/2 teaspoon kosher salt
  • 1 teaspoon baking soda 
      FROSTING
      powdered sugar (confectioners) and lemon juice.  Original lemon coconut frosting is on the blog   
     mentioned above

Directions


Preheat the oven to 350 degrees.  Grease the sides and bottom of a 8 or 9 inch cake pan. (Smaller pan will need a bit more cooking time).  Line the bottom of the pan with parchment. 

Place all wet ingredients (coconut oil, honey, eggs, lemon juice, and vanilla) into a blender and blend for about 15-30 seconds.  The mixture should be frothy.

Add the dry ingredients (almond flour, salt, baking soda) and the zest and blend until all is combined.  Scrape down the sides of the blender as needed and blend again to incorporate.

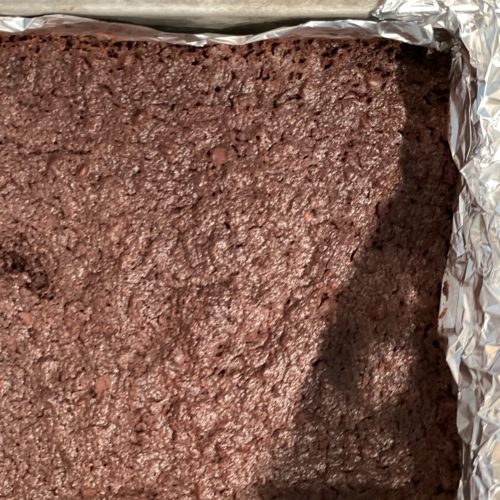
Pour into the prepped pan and bake on the middle rack – check after about 25m.  I don’t remember exactly how long it took but use a toothpick and keep baking and checking until the pick comes out just clean and the cake is a nice golden color.

Let the cake cool before you glaze or frost.

Again look at the original recipe here for the SCD frosting.  And read through Jennifer’s directions too as they are more detailed than mine.  Also read the “about me” to learn more about Ulcerative Colitis and the SCD diet.

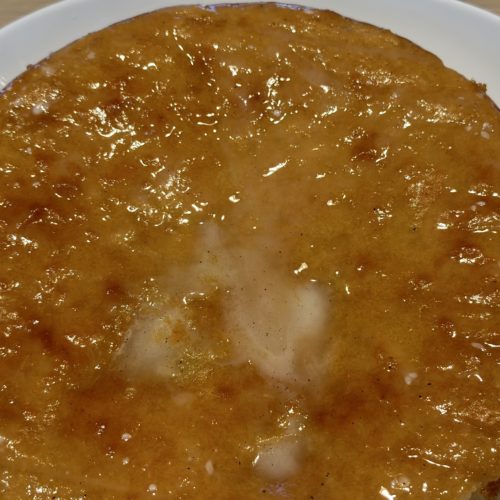
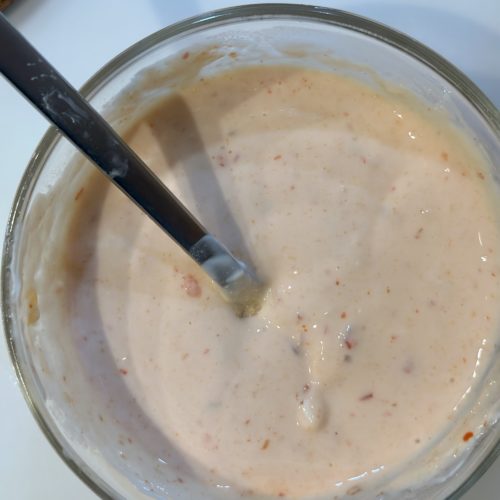
For Greg’s sugary and sinful icing – use about 1.5 to 2 tablespoons of lemon juice and whisk In as much confectioners sugar as you like – to the consistency that you like.  It can be quite thick if you add a lot of powdered sugar and therefore will be sweeter.  Or, you can keep the glaze thin and lemony (which I prefer) and add just enough powdered sugar to cut the tartness.  Just add the sugar slowly tablespoon by tablespoon and whisk in and continue to taste until it suits your palate.

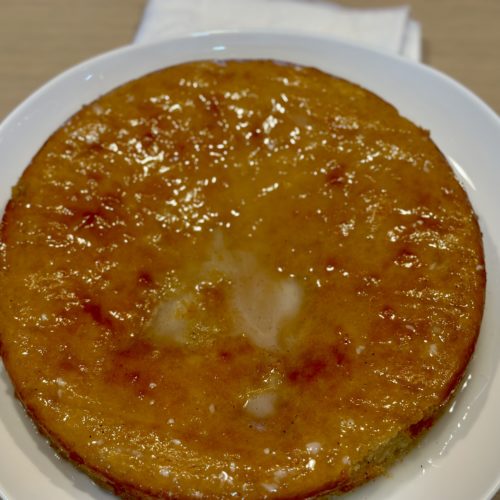
With a toothpick poke a bunch of holes in the cake.  Then brush on the glaze.  Yum.

Enjoy-

seriously good GF/DF chocolate molten cake

I cannot believe that 3 years has gone by since the photo on the right.  That is just crazy.  And it’s taken me this long to write about these delicious cakes.   

During covid 2020 Greg was home for his birthday – Andy too.  Andy’s request that year was a chocolate molten cake.  He loved it.  Greg’s Birthday, just four days later requested the same.  I sighed.  How to make a truly delicious gluten and dairy free molten cake?  It seemed impossible.  I am/was really inexperienced in this type of baking but I scoured the internet and thought hard about this.  (I make it sound like rocket science which is silly).  

The basic recipe for the cake is from Organically Addison –  I added what I learned from my first teacher Rick Katz – that molten is necessary for a seriously good molten cake.  No underbaked center here – but instead, a ganache ball made with coconut cream (not coconut milk)  and melted chocolate.  This little nugget placed in the center of the batter filled ramekin did the trick.  It was gooey, intense and the chocolate flavor popped.  Greg was thrilled. 🙂  

I made them again this last month – twice actually and Jill loved.  Sylvie loved.  She isn’t even GF or DF but enjoyed immensely.  Nicole, andy’s girlfriend who is GF and DF is next at bat.  These are easy to make despite this long write up! 

Here are some important notes/thoughts (please read through before you bake):

The recipe calls for coconut sugar.  But because Greg rarely eats desserts I opted for brown sugar.  I wanted a true treat for him.  But if he had access to these all the time I would make with coconut sugar as it is healthier than refined sugar.

The recipe also suggests that you grease the ramekins  and call it a day.  As mentioned above, because this is a rare treat for Greg when home I coated the greased ramekins with sugar.  Yup I did.  Regular white sugar so that the cakes had a crunchy sugar coating.  I hope that these efforts bring him home more often :).

Laslty, make the ganache balls the day before or a few days before – or the morning before you plan to bake.  This will give the ganache time to firm up – able to form a solid ball to be dropped into the batter. 

Oh, truly lastly I tripled the recipe as it calls for only 3! ramekins.  I made 9 and and froze the leftovers.  Now I’m ready when he comes home to pop in microwave for an easy treat.  The ganache recipe below is for 9 ramekins – so 3 times the recipe!

Ingredients and Directions

Ganache balls:
3/4 cup chopped bittersweet chocolate
1/2 cup coconut cream (this is available in most supermarkets right next to the coconut milk)
tiny pinch of kosher salt

Heat the coconut cream to almost a boil.  Then pour over the chopped chocolate.  Wait a minute then whisk to combine.  Add salt.  Place in refrigerator to let cool and firm up.

When ready to make the cakes, form balls with the ganache – you can pick the size of these balls – but I’d say around 2 teaspoons or so.  Place the balls back in the fridge.

As mentioned the cake recipe is from Organically Addision.  Refer to my notes above before you start to bake – specifically eyeing my notes regarding sugar, sugar coating and tripling her recipe.

Here is the link to her terrific blog and the directions.

Follow her instructions but as mentioned feel free to coat the ramekin with sugar as I did.  And after you pour the batter into each ramekin – drop a delicious ganache ball into the center to create the molten lava that you will enjoy later.

Bake as directed. 

Feel free to kind of press down on cake with your finger to check if done.  The center ganache ball will remain gooey and will never looked cooked – but the cake should look and feel firmer and lose its unbaked sheen.  You may have to cook for a minute or two longer…keep checking and timing.

Let sit for a few minutes then run a knife around the edges and pop out if eating immediately.  Be careful the ramekin and ganache will be hot.  

If saving for a later date, let cool, then run a knife around the edges and pop out.  Freeze once completely cooled.   Microwave before serving – in small increments.  Don’t want to kill the cakes but warm up the ganache.  

Enjoy!

bang bang shrimp with GF option (delicious) naturally dairy free

Crispy air fried shrimp, cool yogurt sauce and tart salad – like a symphony in my mouth.   Mango, cilantro, blanched carrots shaved zucchini – have fun!  This is one of my favorites.  Made it for Greg when he was home as it can be GF and DF and again for Rob and I the other night.  Sylvie loved it too – I put hers on some simple healthy fried rice and she gobbled it up!  So yes, serve with plain rice, seasoned rice, salad like me – any which way. 

The air fryer is so easy and I love that I can have crispy food that isn’t sodden with oil.  The shrimp are light and crispy.  The hard part about this recipe is that you have to make it in batches since it’s hard to fit a lot of shrimp into your air fryer.  So I make them all and  when time to eat I pop them back into the air fryer for a minute to heat back up.  I always make an extra serving so I can eat for lunch the next day.  

I found this at I Heart Umami – ChihYu Smith – the chef behind the blog is amazing.  She shares healthy Asian recipes that include Palieo, gluten free and low carb so check it out. 

I followed her recipe – made it once gluten free for Greg (and followed recipe exactly) and once using regular breadcrumbs for us.  Use avocado oil spray as she suggests – or – olive oil spray (I had that and worked great).  You will need tapioca starch btw.  I made her bang bang sauce for Greg and he liked it.  It is gluten free and dairy free.  I also made it with Greek yogurt and it was good too!

The second time I made the shrimp  I used a different recipe for the bang bang sauce which I liked even more and I will share that with you below (again with yogurt).

The salad I made has shaved zucchini, cucumber, cilantro, greens, and tomato.  I dressed with a simple dressing of white rice vinegar, sesame oil, lime and salt.  Feel free to add blanched peas and carrots, yum.

The recipe takes a little time – like a mini assembly line – so turn on some music and relax and enjoy making it.  Once I know what I’m doing I turn on my audio book and enjoy the process.  

*** Do cut the shrimp lengthwise  as ChihYu suggests – and well, really just follow her detailed instructions here.

Alternative sauce (skinny bang bang sauce from Trialandeater.com):

1/4 cup plain greek yogurt (use full fat if you can2 tablespoons sweet chili sauce 

1-3 teaspoons sriracha sauce or hot sauce (I’m a wimp with spice so you do you)

2 teaspoons rice vinegar

Dash of kosher salt 

Mix well and drizzle on the shrimp.

Enjoy this! 


chocolate frosted brownies (GF + DF and sooo good!)

These are silly.  Silly good.  This is the best gluten-free and dairy-free dessert I have had to date.  I must admit that I don’t eat a lot of GF and DF sweets – but I can tell you that when I make these for Greg I’m eating them too!  Andy, Rob, Sylvie – all love them – although we are forced to abstain since Greg’s choices are so limited.  I made them for my friend Judy and she said a hit with her family too.  She then asked for the recipe which is always a good sign.

I found these gems in my Bakerita cookbook written by Rachel Connors.  She also has an amazing blog – and these are also featured in the blog.  I’ve made her chocolate chip cookies and snickerdoodles and both – well, just delicious.  Greg will likely have some vacation time around the holidays so I’ll start looking for some new ideas soon.  And likely from this book!

I always double the recipe and bake in a 9×13 pan.  The brownies are a little thicker this way and I prefer that.  So the timing needs to be fiddled with.  They burn easily and it is hard to tell when done so it make take some guess work.  I usually underbake a tad but we all like it that way.   If you happen to overbake, consider doubling the icing as it is sooooo good and unlikely that anyone would notice your hard brownie.  They also freeze well so I’m always ready for Greg and his sweet tooth.

Note: This recipe uses coconut sugar.   Although healthier (a non-refined sugar) I use brown sugar instead.  For the 3/4 cup of coconut sugar in the recipe I use a packed half cup of brown sugar.  You can do either and they will be good either way. 

Enjoy these!!  Here is a link to the blog post.

snickerdoodles (dairy free, gluten free, no refined sugar)

I’ve made these gems a few times this winter.  I really liked them – the texture and taste.  I crumbed into my vanilla ice cream and it was true bliss.  Andy ate them too – and even vied for them (as they were made really with Greg in mind) which is pretty amazing too.  His friend Steve who is gluten free and Gabi my vegan hair colorist both gave a big thumbs up.  But most importantly, Greg loved them.  He went back to Boston with a little box full and he looked so happy about it.  It was nice to see that smile (for sweets) on my 24 year old as It is hard to bake for Greg given his restrictions (GF, DF).   I found this recipe in Bakerita:100 + No-Fuss Gluten-Free, Dairy-Free, and Refined Sugar-Free Recipes for the Modern Baker by Rachel Conners.  I followed the recipe – although the second time I made them I used refined sugar in the cinnamon sugar blend that you roll the cookies in.  The coconut sugar was fine but the real sugar better – but do what makes you happy.

These are so easy to throw together – but you will probably need to go to the store and get a few things – although if you have food restrictions you may have some of the ingredients already in your pantry.  

Take out your kitchen scale if you have one as Rachel gives us the weighted measurements!

I baked some of these right away and I left some dough in the fridge to bake off as needed.  Fresh baked warm snickerdoodles…well, yum.

Enjoy-

Ingredients

  • 1 3/4 cup (168 g) blanched almond flour
  • 1/4 cup (32 g) coconut flour
  • 1/2 teaspoon baking soda
  • 1/2 teaspoon cream of tartar
  • 1/2 teaspoon salt
  • 1/2 teaspoon cinnamon
  • 1/3 refined coconut oil (67 g), melted
  • 1/3 cup (113 g) maple syrup
  • 1 tablespoon pure vanilla extract 

    TOPPING
  • 1/4 cup coconut sugar (or regular refined sugar)
  • 1 tablespoon cinnamon 

Directions

Preheat oven to 350 degrees and line sheet pan(s) with parchment. 

Whisk together the two flours, the baking soda, cream of tartar, salt and cinnamon.

Melt the coconut oil and mix in the maple syrup and vanilla extract

Mix the wet and the dry until thoroughly combined. 

Prepare the topping by mixing the two ingredients.

With a cookie scoop or spoon, form your cookies.  Roll in your hands a bit then roll around in the topping.  The cookies are delicate so be a bit careful.  I like a lot of sugar and cinnamon so I kind of pressed them into the topping to really coat the cookie.

The size of the cookie depends on you.   Rachel measures about a tablespoon of dough.  You can do that, or smaller if you like.  It will change the baking time a bit (the smaller the cookie the less time to bake).

Place cookies on sheet pan about 2 inches apart (they don’t really spread).  And then flatten a tad with your palm.  

The larger cookie bakes for about 10 minutes.  Mine took a bit longer.  I will say that it is hard to tell when these are done.  You want them to be a nice golden color.  

I decided to use one cookie as a tester and also checked the bottom for clues.  The hard part is that these cookies crumble fairly easily so that tester cookie, although still edible, will likely fall apart.  Anyway, the bottom should look a nice golden brown too.  Try not to overtake though.  This is the trickiest part of making these – trial and error will help.  I hope you like them! 


Gluten Free Chocolate Chip Banana Pancakes

Gluten Free pancakes
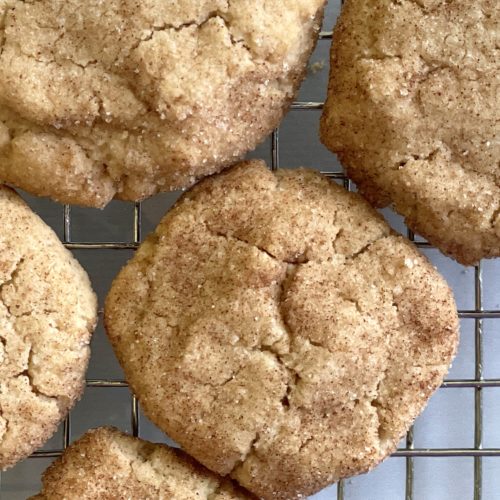
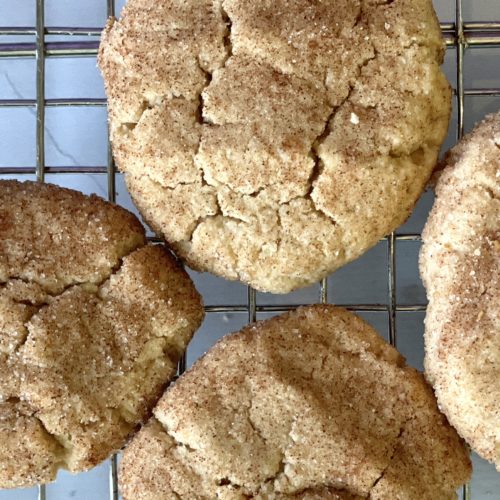
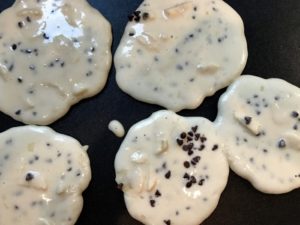
Made gluten free pancakes and didn’t tell Andy.  He had one and said “This is awful, are they gluten free?”  So I researched and made them again. This time success for Andy, Sylvie, Rob and me.  Made them the next couple of days…then decided to try a different recipe for fun.  Andy complained – “Why are you trying again??  We like the other one.  Stop.  No more!”  So I’m sticking with these and everyone is happy.  Even Andy who is not on a gluten-free diet.

I found the recipe from Taste of Home.

I add diced bananas and add extra mini chips.  I also reduce the sugar by half because well, the chips and banana make up for it.

Enjoy!

banana bread (gluten-free and DELICIOUS)

This banana bread is really very good.  Seriously good.  For real.  Andy was home from school today, studying in his room and started texting me…What are you making! Smells so good!  I informed him that I made the banana bread again, but in muffin form.  Down he came and quickly gobbled up two and oh, BTW, he isn’t even gluten-free (and is a harsh critic).  You will not miss the gluten in this recipe.  Full of banana flavor, a delicious rich tasting crumb – and some extra chocolate chips, well, good good good!  Found myself muttering the good, good good as I tasted and sampled over and over again.

This recipe is from the book Purely Elizabeth and I just LOVE it.  I really do.  Elizabeth promised that you wouldn’t miss your old banana bread, and she is correct.  You do need to get a few special items from your grocery store or from Amazon.  If you are gluten free, I assume you have most of this in the house.  And even if you are not – I urge you to try.

Also – the first time I made this I baked in a loaf pan and it was really delicious – but I felt I needed more control on how cooked the middle was and so tried in muffin tins.  I liked both.  Next time though, I think I would pour most of the batter into the loaf pan, but hold a little back and bake the remaining in a mini loaf tin or make a few muffin shapes on the side.  Cooking time will be affected with all of the different shapes.

Oh, you want to wait for your bananas to be overripe – with dark spots on the skin.

banana bread (from Purely Elizabeth by Elizabeth Stein):

cinnamon sugar (2 T of coconut sugar for every 1 tsp of cinnamon)
1 cup coconut sugar
1/2 cup almond flour
1/2 cup millet flour
1/2 cup brown rice flour
1/2 teaspoon cinnamon
1 teaspoon baking soda
3 very ripe bananas
1/3 cup coconut oil (just melt this if in solid form)
2 large eggs
1 teaspoon vanilla extract
1/3 cup walnuts (I didn’t add because my family doesn’t love)
1/2 cup chocolate chips (I added a cup!  I did, but do what you want)

Preheat the oven to 350 degrees.  Use and oil spray or coconut oil to grease the loaf pan.  Sprinkle the cinnamon sugar to coat the bottom and sides and set aside.

In a large bowl, stir together the coconut sugar, almond flour, millet flour, brown rice flour, cinnamon, and baking soda.  In a separate bowl (or in electric mixer) beat together the bananas, oil, eggs and vanilla until smooth.

Pour the wet into the dry (or if using your mixer you can put the dry into the wet) and stir until combined.  Add the chocolate and walnuts (if using).  Pour into pans – loaf, muffin, mini…and bake until done.  If you put all the batter into a loaf pan, Elizabeth says 45-50 minutes.  If you make the loaf pan less full as I mentioned above, baking time will be lower.  And muffin tins, much lower.  You want the top to spring back gently when touched.

Yum.  Enjoy –


coconut macaroons

It’s been a long time.  Too long.  Pain in my feet is the root of my inactivity and although it persists I am just going to bake, donate and blog because I miss it!

Made delicious little golden nuggets of coconut filled joy yesterday.  These little gems were so good – so flavorful, moist, and EASY.  Andy is almost done eating sweets – he is often reluctant to try and craves real food more than desserts.  But he came home from his first day of school yesterday and started popping these in his mouth and said “these are really good mom” and “can I have some more?”  When I told him I donated the rest he was so glum.  I quickly made another batch for him right then and there (although I only had unsweetened coconut which wasn’t as good in these cookies btw) but he was happy.  And so was I.  These came from my newish cookbook The Splendid Table’s How To Eat Supper.  I’ve cooked meals from it several times but this is my first dessert from the book, and I’m psyched that they were so good.

Enjoy-

coconut macaroons (from Lynne Rossetto Kasper and Sally Swifts “How To Eat Supper”):

2 large eggs, well beaten (room temp if you remember)
1/2 cup sugar
generous pinch of salt
1 teaspoon vanilla extract (use almond if you prefer)
3 cups sweetened shredded coconut

chocolate chip option – add about 1/2 cup to the mixture.

Preheat the oven to 350.  Line sheet pans with parchment paper.

In a large bowl, mix together the eggs, sugar, salt and vanilla extract.  Add the coconut and mix to incorporate.

Drop by generous teaspoons onto the baking sheet. I used my smallest cookie scoop and pressed the mixture in it.  If you don’t have one, try to smoosh coconut into a small spoon and drop the dough out onto the pan.

Bake for 20-30 minutes – until they are golden around the edges and a little golden on top.  If you bake each pan one at a time, they will need closer to 20 m in the oven.  If you put 2 pans in together, you should switch racks halfway through and they will likely take a bit longer to cook.


caramel apple jam

Thanks mom for sending me this recipe!

MMMMmmmm….so delicious and warm and soothing and inviting.  Funny for a “jam” to be all that but it is!  Caramel, vanilla, and apples delightfully and simply combined.  Warm this up and pour over some vanilla ice cream and you have a winner.  Equally good on the savory side if you serve as a sweet side relish for pork or chicken.  Alison Roman, the creator of this apple jam, also suggests ice cream (like me) – but topped with crushed Nilla wafers.  And I say, sounds great, but make home made vanilla wafers (coming next)  and add a little whipped cream.

Use a variety of apples, makes for a more interesting outcome because different apples break down differently and this will provide texture and fun!

apple jam (from Bon Appetite Oct 24th):

Original recipe and write up are here.

1 cup sugar
3 pounds apples, use a variety if you can, peeled, cored and cubed about 3/4 inch thick.
1/2 vanilla bean (scraped)
1 tablespoon lemon juice
cinnamon stick or powder
kosher salt

Place 3 tablespoons water in a large saucepan.  Add the sugar and mix.  Heat on medium high and boil – and continue to cook until the sugar caramelizes.  It will turn a dark amber color – but be careful as it all happens very fast, and it is HOT.  Seriously hot.

Add the apples and the vanilla seeds and bean to the pot and cook on medium heat.  The caramel may seize up at the start (because the apples cool it down) but soon it will dissolve again.  Add a 1/2 cinnamon stick (if you don’t have a stick, wait and add some ground cinnamon to taste at the end.)

Continue to cook for about 20-25 m, stirring occasionally until some of the apples are translucent and some still have their shape, and most of the liquid is dissolved.  You can keep cooking btw, if you like your apples super soft, or remove them earlier if you like them super chunky.

Remove from heat.  Add lemon juice and a pinch of kosher salt.  Store in a glass jar or container for up to a month in fridge.


steel cut oats (the very best) don’t skip

Never ever ate any kind of hot cereal as a child, wanted to like it in my 30’s, enjoyed it in my 40’s but wow…at 47 I have found the exact hot cereal (n my case steel cut oats) that I craved (and didn’t even know I was craving it!)   I didn’t know that oats could be so nuanced with delicious flavors and so toothsome!  Seriously.  These oats are unlike the oats I’ve made for myself (every week) for the past year or so.  I recently bought the book Whole-grain Mornings and Megan Gordon (the author) really opened my eyes.  I looked forward to my morning bowl, but now, I can’t wait.  Please don’t beoats turned off by the tad of butter and the extra step of toasting your oats because it is WELL WORTH IT.  Really.  The result is super scrumptious.  My breakfast feels decadent.  This IMG_7184
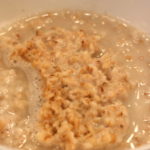
recipe is enough for 6 days.  Each morning I cut a serving, add a little water and heat – I then add my fruits, nuts or raisins and top it off with a sweetener and then add some cold home-made almond milk (you don’t have to use almond milk) and wow…feels like hmmm….happiness.  A great way to start every day!  My mom loved it too while visiting and I think I may have finally turned her into a breakfast eater.

steel cut oats (from Whole-grain Mornings by Megan Gordon):

1 cup steel cut oats
1-3 teaspoons unsalted butter (I use 2)
3 1/4 cups water
1 cup low fat milk (the recipes calls for whole milk which I bet is delicious, 2% might be a good alternative)
1/2 teaspoon kosher salt
1-3 teaspoons sugar (optional) (I use a sweetener at the time I eat it)
2 teaspoons pure vanilla extract
cinnamon (optional)
brown sugar, honey, syrup, heavy cream, almond milk, milk, raisins, fruits (optional all for serving)
I use almond milk, monk fruit sugar, and sliced bananas and nectarines or berries (in winter diced apples and cinnamon)

In a heavy bottomed skillet, melt the butter over medium high heat.  Add the oats and stir and gently toss in the pan until fragrant and darken in color.  See above photo.  This will take 5-6 minutes.

While toasting, bring the water, milk, sugar and salt to a low simmer over medium heat.  Add the oats (be a little careful here since the ingredients all seem to puff up).  Bring to a slow boil, partially cover – and decrease heat to low and cook until it has thickened (25-30m) and the oats have softened.  Stir occasionally while cooking – but especially towards the end so they don’t stick to the bottom of the pan.

The porridge will look loose at the this point – but it will continue to soak up additional liquid so don’t worry.

Add vanilla.  If using raisins – stir in and cover.  Let sit (covered for 5 m).

At this point you can scoop into bowls and serve with all of the above optional ingredients or some of the above.

IMG_7222
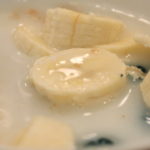
Since I am the only person eating this in my house, I pour the oatmeal into a container.  Each day I take some (it is kind of a solid mass at this point once refrigerated overnight) and place in a bowl with a little bit of water (to loosen it up).  I heat at a medium power for 3 m in the microwave – and end with a 30 sec full blast heat.  (I like it really really hot).  I add my cut up fruits – lately nectarines and banana, then my monk fruit sugar (a sweetener) and top it off with my cold almond milk and yum.  Seriously yum!!  Yum!  Enjoy –