chocolate chocolate chip cookies

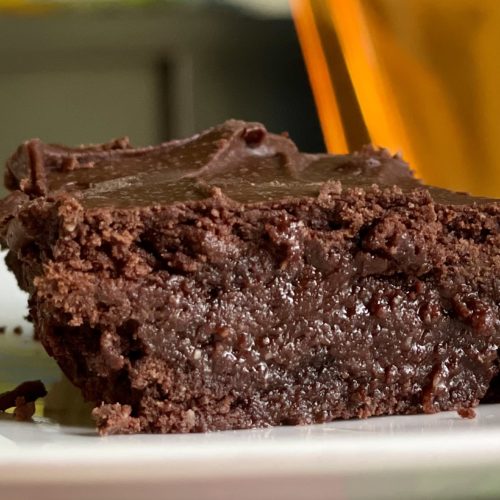
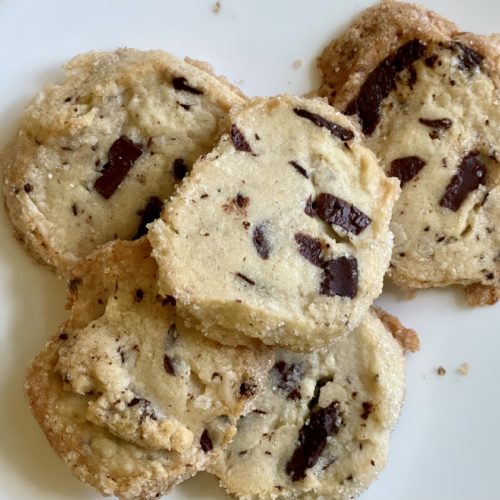
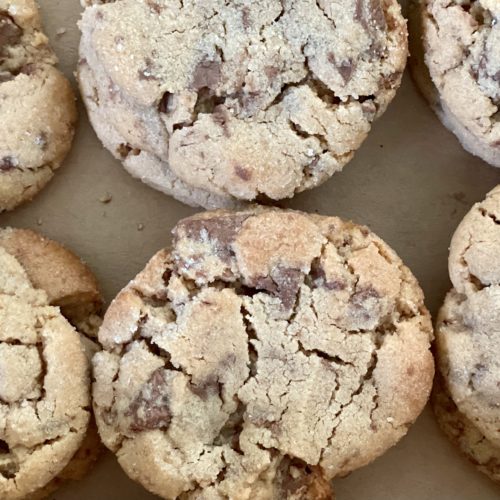
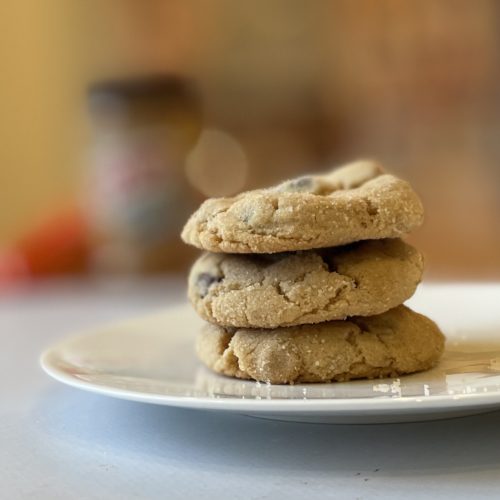
Sylvie and I LOVE these cookies.  We LOVE them.  Sweet and full of chocolate and a plethora of chips and chocolate wafers these are on our hit list.  Chewy yet sturdy.  If you make them as instructed they are giant and that makes them even more enticing for some reason.

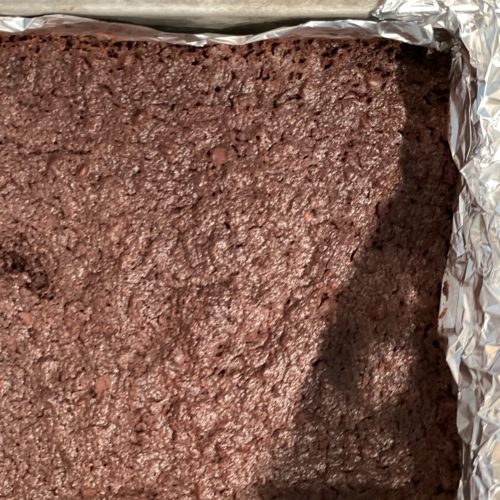
My father was visiting the last time I made them and well – tbh, he didn’t LOVE them like we did.  He likes a darker richer chocolate cookie (I think) and Rob couldn’t really weigh in too much since I burned the batch he tried.  (These are tricky to bake because they are so dark!)  I sent the rest to the shelter so I’m not exactly sure how other people felt but they did get a 5 star rating in The NY Times so there is that!  These beauties mixed in to my vanilla ice cream, well, um, heaven.  

Big note – make these in advance – they are best if you are able to chill the dough for 24 hours before baking.  I also usually double this recipe.  Up to you…save extra in the freezer to bake off at a later date.  Also – I love to mix up all my chips.  I use both bitter and semi (with different percentages) in my cookies.  I chop some bar chocolate and make some shards and I use thin discs too as well as regular chocolate chips.  I find this adds a nuance to the cookies making each bite  more exciting than the next.  

Check out Guittard chips – they have a “super chip” chocolate chip that is a different texture than the semi sweet or dark Akoma chips.  I also add some classic Nestle chocolate chips because they are a taste memory for me even though there are more pure chocolate chips out there now.  

Found these in The NY Times baking section.  I will include the weighted measurement since that is way more accurate that cups etc.  So if you have a scale please use it.  You will guarantee a better outcome.

Ingredients

  • 1 cup/145 grams all purpose flour
  • 3/4 cup/75 grams Dutch process cocoa powder
  • 3/4 teaspoon kosher salt (diamond crystal!) (if you must use table salt cut by half but really get some kosher salt.  And not Mortons.)
  • 1/2 teaspoon baking powder 
  • 1/2 teaspoon baking soda
  • 10 tablespoons/141 grams unsalted butter, room temp
  • 3/4 cup/150 grams dark brown sugar
  • 2/3 cup/133 grams granulated sugar
  • 1 large egg
  • 2 teaspoons pure vanilla extract
  • 2 cups mix of semi, bitter, dark, chocolate discs, chips or chopped chocolate

Directions

In a medium bowl, whisk together the flour, cocoa powder and baking soda.

In a stand mixer with paddle attachment (or hand held beaters) beat the butter, brown sugar, and white sugar until very light and fluffy.  This will take about 5 minutes.

Add the egg and vanilla and beat until combined.

With the mixer on low add the dry ingredients to the butter/sugar/egg mixture and beat on low until JUST combined.

Add the chocolate chips and fold in to incorporate.  

Place the batter in plastic wrap – you can do big discs or you can make rolls to slice and bake shown in the photo above.  Let chill in fridge for 24-36 hours.

Heat oven to 350 degrees.  Line baking pan with parchment.

Portion balls – about 3.5 ounces (these make giant cookies!)  and place 5 balls onto your baking pan.  They will spread so do not try to add more (unless you are making smaller cookies (which I have done). 

Bake the cookies until set – about 18 m but still a bit soft in the center.  These are a little tricky so keep a close eye on them – a minute or two before and after.  

Continue to bake rest of batter or simple freeze dough and bake when you have a craving or guests!

Enjoy –

air-fryer eggplant

These multi sized discs of delight are a hit with almost everyone.  Seriously.  Who knew how many people love eggplant?  My mom is a huge fan repeatedly asking me how I make these and vowing to make.  Stephen and Halley, Sylvie too is in love.  Made for friends last weekend and they too adored.  

These are just as delicious with GF breadcrumbs for Greg.  

I’ve made these in a variety of ways – whole wheat breadcrumbs, plain ones, Italian seasoning, panko, with and with out parmesan cheese – the varieties are endless. You can eat plain which we tend to do or dip in tomato sauce or layer and make an eggplant napoleon layered with fresh mozzarella (and tomato sauce.) 

The recipe is very loose and you can fiddle with it and cook longer or shorter depending on how crispy you like your eggplant. 

Simple works for me best with these.  I prep the eggplant by salting them first (drawing out the excess water), dipping them in egg white and then again in breadcrumbs.  (Add grated cheese if you like!)

Finally throw them in the preheated air fryer – spray with olive oil and sprinkle with Maldon salt (a must) – and voila – a delicious healthy side dish. 

You may have to cook in batches – reheat in air fryer for service or for the next day.  Yum


Ingredients

  • 1 or two eggplant  
  • kosher salt
  • breadcrumbs (whole wheat, seasoned or unseasoned, plain breadcrumbs, panko) eyeball it here
  • egg white (you will need 2-3 depending on how much eggplant you decide to make) beat the egg white to break it up a bit.  Also you can use a normal whole egg. 
  • Italian seasoning (optional)
  • parmesan cheese (optional)
  • olive oil spray
  • Maldon sea salt

Directions

Wash and dry your eggplant

Cut into 1 cm (or so) thick slices

Place slices on a paper towel and sprinkle with kosher salt.  Let sit for 15 m

The eggplant will now look wet – as the salt draws out the liquid.

Pat dry with paper towel.

Preheat air fryer to 390 degrees.  Spray the bottom of the air fryer with a little olive oil spray.

Dip the eggplant in the egg white then into the breadcrumbs and place into the air fryer.  Do not overlap.  Spray each slice with olive oil and sprinkle a tad of Maldon salt on top.

Air fry for about 16 m total flipping half way through and spraying the other side with oil after you turn.  

Be careful they are hot on the inside and too easy to burn your tongue since you will want to just gobble them up!

Enjoy-


luscious lemon almond cake (gluten and dairy free!)

I’m always  on the lookout for some extraordinary gf/df sweets for Greg.  And I think this fits the bill.  It is incredibly moist and dense and has a marzipan feel to it which Greg loves.  It is also verrrry lemony!  Rob and I enjoyed as well btw – don’t have to be gf/df to appreciate.

I found this recipe in The Healthier Bite blog.  Jennifer created this blog for those with ulcerative colitis who are on the Specific Carbohydrate Diet.  Greg does not need to follow the diet so I modified only a tad –  only with the icing as my icing contains confectioners sugar and the original recipe does not.  

The original recipe is here if you want to follow the original SCD version and/or if you are trying to eliminate refined sugar.  (The SCD diet does allow honey which is why it is in this cake).  

When I made this cake the first time I mistakenly set the oven to 350 instead of 325.  But I actually prefer it that way.  The baking time is variable so you will have to check and check again.


Ingredients cake:

  • 2 tablespoons coconut oil, melted (but not hot) 
  • 3/4 cup honey
  • 2 large eggs (room temp)
  • 2 tablespoons lemon zest (wash your lemon first)
  • 1/2 cup freshly squeezed lemon juice 
  • 1/4 teaspoon vanilla extract
  • 3 cups finely ground blanched almond flour
  • 1/2 teaspoon kosher salt
  • 1 teaspoon baking soda 
      FROSTING
      powdered sugar (confectioners) and lemon juice.  Original lemon coconut frosting is on the blog   
     mentioned above

Directions


Preheat the oven to 350 degrees.  Grease the sides and bottom of a 8 or 9 inch cake pan. (Smaller pan will need a bit more cooking time).  Line the bottom of the pan with parchment. 

Place all wet ingredients (coconut oil, honey, eggs, lemon juice, and vanilla) into a blender and blend for about 15-30 seconds.  The mixture should be frothy.

Add the dry ingredients (almond flour, salt, baking soda) and the zest and blend until all is combined.  Scrape down the sides of the blender as needed and blend again to incorporate.

Pour into the prepped pan and bake on the middle rack – check after about 25m.  I don’t remember exactly how long it took but use a toothpick and keep baking and checking until the pick comes out just clean and the cake is a nice golden color.

Let the cake cool before you glaze or frost.

Again look at the original recipe here for the SCD frosting.  And read through Jennifer’s directions too as they are more detailed than mine.  Also read the “about me” to learn more about Ulcerative Colitis and the SCD diet.

For Greg’s sugary and sinful icing – use about 1.5 to 2 tablespoons of lemon juice and whisk In as much confectioners sugar as you like – to the consistency that you like.  It can be quite thick if you add a lot of powdered sugar and therefore will be sweeter.  Or, you can keep the glaze thin and lemony (which I prefer) and add just enough powdered sugar to cut the tartness.  Just add the sugar slowly tablespoon by tablespoon and whisk in and continue to taste until it suits your palate.

With a toothpick poke a bunch of holes in the cake.  Then brush on the glaze.  Yum.

Enjoy-

pan-seared cod in white wine tomato basil sauce

This is my favorite easy delicious healthy dinner recipe.  I LOVE it.  I wish I had better photos – gotta work on that but trust me this has such great flavor and it is incredibly simple.  It is lemony and is making my mouth water while I’m writing this up.  

I made it for Rob’s family in the fall and they asked for the recipe which is always a good sign.  It is also dairy and gluten free so I could even make it for Greg, if only he liked fish :(. 

My only issue is that my cod tends to fall apart.  I struggle with this but well, whatever – it is tasty as hell.  I suppose you could use a sturdier fish and you would have more success but I happen to love cod.  And maybe your technique will allow the fish to stay intact. 

 I urge you to try this.  You can make the sauce beforehand and quickly pan fry the cod – pour the sauce over sprinkle your basil and you are just set.  So set.  I usually double the sauce recipe – and you don’t have to add all the tomatoes even half the amount in the recipe will do the trick. For lunch the following day I sautéed spinach and bok choy and reheated gently.  Delicious.

My mom introduced me to cod when I was young – it was a Ritz Cracker extravaganza and wow did I love it.  It was buttery oh so good.  I liked it with a little ketchup which sounds pretty gross but mmm….   It was the first dish I made for Rob soon after we met – and I burned it badly.  Anyway – this is not relevant so I will stop now. 

The recipe for this is from Baker by Nature and you can click right here for the recipe.  

 Here are my thoughts and slight changes take a moment to read through:

As mentioned above I like to double the sauce as I find it so delicious.  Serve with rice, a baked potato or a sourdough to scoop up that sauce.  

I use only one clove of garlic since too much makes me feel unwell – and I actually don’t even grate it – I put a whole clove in the sauce and let the flavors mingle there – then pull out out for service.  

I find I do not need to cook the tomatoes for as long as Ashley does.  

The cod – if thick takes longer than 10 minutes to cook.

And lastly I add the basil at the end right to finish the dish.

Enjoy-

honey soy glazed salmon

I sent this recipe to Andy and at the end of that very day, he sent me the photo on the right!  He went to the store, bought everything and cooked it straight away.  He told me how good it was so I made it the next day.  We both loved it.  Rob loved it – I made it with shrimp for Sylvie and she loved that too.  I don’t have a ton more to say about this dish save for the obvious – it looks good, is easy to prep and tastes delicious.  Andy added a lot of veggies and scallions and really plated it up well for himself.   I can’t eat scallions so just kept it simple with some squash and string beans.  

The Tik Tok video of this salmon is what caught my eye.   I followed up by looking at the blog Jasmine and Tea for the ingredients and measurements.  

I’m taking the lazy lady way out and I’m going to provide the link to the recipe here.  Jasmine provides tons of tips and really good instruction.  Read through it first.  Then take note of of my clarifications below.

To be clear (as I’m not sure it is) remove the veggies from the pan before you add the sauce to the pan.  After the sauce has reduced (as instructed),  place the salmon back in to the sauce to finish cooking and then add the cooked veggies at the very end (so they don’t get mushy but heat up).

Lastly, I put in half of the recommended amount of chili paste – but if you love the heat, go for it!

Enjoy-

chocolate frosted brownies (GF + DF and sooo good!)

These are silly.  Silly good.  This is the best gluten-free and dairy-free dessert I have had to date.  I must admit that I don’t eat a lot of GF and DF sweets – but I can tell you that when I make these for Greg I’m eating them too!  Andy, Rob, Sylvie – all love them – although we are forced to abstain since Greg’s choices are so limited.  I made them for my friend Judy and she said a hit with her family too.  She then asked for the recipe which is always a good sign.

I found these gems in my Bakerita cookbook written by Rachel Connors.  She also has an amazing blog – and these are also featured in the blog.  I’ve made her chocolate chip cookies and snickerdoodles and both – well, just delicious.  Greg will likely have some vacation time around the holidays so I’ll start looking for some new ideas soon.  And likely from this book!

I always double the recipe and bake in a 9×13 pan.  The brownies are a little thicker this way and I prefer that.  So the timing needs to be fiddled with.  They burn easily and it is hard to tell when done so it make take some guess work.  I usually underbake a tad but we all like it that way.   If you happen to overbake, consider doubling the icing as it is sooooo good and unlikely that anyone would notice your hard brownie.  They also freeze well so I’m always ready for Greg and his sweet tooth.

Note: This recipe uses coconut sugar.   Although healthier (a non-refined sugar) I use brown sugar instead.  For the 3/4 cup of coconut sugar in the recipe I use a packed half cup of brown sugar.  You can do either and they will be good either way. 

Enjoy these!!  Here is a link to the blog post.

strawberry raspberry muffins

Do you remember Mrs. Fields cookies and muffins?  Well – these muffins reminded me of the Mrs. Fields raspberry white chocolate muffins (my absolute favorite).  It was really cake.  But I felt better eating them when they were called a muffin.  These are not as rich, do not have white chocolate, and are strawberry as you can see. 

I put them on the top of my “to bake” list and I’m glad I did!  I didn’t have enough strawberries on hand so I added raspberries and wow.  I love these.  Everything about them – moist, fruity and the icing – well – yum!  I follow dianemorrisey on instagram and EVERYTHING she cooks/bakes/presents calls out to me.  I mean everything.  And the joy she shares through food really is like no other.  

I will just post  her recipe here since it is concise and clear.  You can mix the raspberries and strawberries as I did – or use only strawberries.  Make them for your next treat.  They are worth it.

Enjoy-

chocolate chunk shortbread cookies

These cookies are scrumptious!  Seriously good.  Rich buttery shortbread with bittersweet (or semisweet) chocolate chunks rolled in coarse sugar – well, what is there not to like.  Andy said “fire” which is always a good sign.  Rob is not a shortbread person so yeah, he didn’t care for these.  But if you do like shortbread then these are a no brainer.  

I saw the recipe in the NY Times and knew I had to put in my “to bake” folder.  After baking them, and loving them, I purchased Alison Roman’s cookbook – Nothing Fancy: Unfussy Food For Having People Over.   I whole heartedly recommend it.  I made the cookies, meatballs and chicken from the book and wow.  These shortbread cookies were made especially for the book because Alison says that chocolate chip cookies are often lacking in a certain area – too soft, too hard, too chocolatey, too buttery and so on.  I do still love regular chocolate chip cookies (and all the variations) but these are an awesome addition to my (and now your) repertoires.  Enjoy –

The directions are clear in the article so I’m going to just give you the link.  If you have questions just ask :). Here is the link.

peanut butter cookies

I absolutely love these.  LOVE.  Joy.  Everything about them – the texture, the sugar coating, the versatility, the plain old scrumptiousness.  I’m not a fan of normal peanut cookies at all.  So this is a nice change for me.  

Rob had a nibble but the texture actually turned him off.  I don’t get it.  But I don’t have to.  I sent some to the shelter but feedback isn’t on the top of the list there (rightly so) – so I’m just hopeful that someone enjoyed as much as me.

The first time I made these I used dark chocolate chips and Reesees chips.  (Pictured on the sides above.). And they were good.  Good!  But the peanut butter chips always taste a little too sweet for me.  So the next time I chopped up some good quality (Callebaut) milk chocolate and added it to the mix (center photo).  Well, well, I mean so good.  Of course you can always add chopped or chips of dark and semi sweet which I think most people would choose but I’m telling you – a good quality milk chocolate (and not the chips – the bar) is worth a try.  For kids and those who like things sweet (me) I’d also consider M&M’s candies.  Yup I would.  I will and I’ll try to share with neighbors and friends to see if they like them too.

I found this recipe on SmittenKitchen.com.  Love everything about the site – and have for many years.  I also have the Smitten Kitchen cookbook.   If you have some time click on the link where she tells us why and how she created this recipe.  Well, adapted it. 

Actually,  you might as well just read her directions.  It will make my life easier and she has some beautiful photos.  Way better than mine.  Oh – lastly I used creamy peanut butter – and I used the Wild Friends brand.  I didn’t want a PB with added oils and sugars.  I found it at Freshdirect (my grocery delivery store) and they came out great.  You can also get it here.

Enjoy-

whole wheat (partially) banana bread

This banana bread was good.  It is good!  Great even.  On par with my normal banana bread which you can find here.  I might like this a bit more because it is a bit less sweet and I do love the addition of white whole wheat flour.  It gives the bread a heartier taste and I like the darker color which is irrelevant I know.  

I found this in my new  King Arthur Baking Company’s All-purpose Baker’s Companion book (that is a mouthful).  The book was updated in March of this year and I’m excited to try out a lot of recipes.  This was my first as I had extra bananas and felt like a change.  

As mentioned the recipe includes white whole wheat flour and also a little cinnamon sugar coating on top which is particularly yummy.  I added chocolate chips to some of my loaves (I doubled the recipe) and that was obviously very good (if you like chocolate).  

Not much more to say – well, the recipe calls for a 9×5 loaf pan and I always find that my loaf cakes come out better if I don’t fill the entire pan with batter.  I might use a bunch of small loaf pans or a large and small – but basically I find my cake cooks  more evenly when not stuffed into the pan.  Then I don’t have to overbake the cake in order to make the middle less raw.  You can also use a muffin tin and make a muffin or two with the extra batter.  Or just bake as the recipe is stated and I’m sure it will be fine.  

Enjoy – 

Ingredients

  • 2 cups (454 g) mashed banana (about 4-5 medium bananas).  Weigh everything if you have a kitchen scale.  And if you don’t – buy one!
  • 1/2 cup veggie oil (99 g)
  • 1 cup (213 g) brown sugar 
  • 2 large eggs
  • 1 teaspoon vanilla extract
  • 1 cup (120g) all purpose flour
  • 1 cup (113 g) white whole wheat flour
  • 1 teaspoon baking soda
  • 1/2 teaspoon baking powder
  • 3/4 teaspoon kosher salt (diamond crystal is best in my opinion)
  • 1 teaspoon cinnamon
  • 1/2 c (57g) chopped walnuts, toasted if desired (optional)
  • choc chips if desired
TOPPING
  • 1 tablespoon (13g) sugar
  • 1/2 teaspoon cinnamon 

Directions

Preheat the oven to 350 degrees.  If using glass or stoneware, reduce the oven temp to 325.  Lightly grease the loaf pan and line the bottom with parchment.

In a large bowl, stir together the mashed banana, oil, brown sugar, eggs, and vanilla

Mix together the flours, baking soda, baking powder, salt, cinnamon, and chopped walnuts and chocolate chips (if using) 

Combine the two and gently mix and fold until it is smooth.

Pour into prepared pan(s).

Combine the cinnamon and sugar for the topping and sprinkle all over the batter.

Bake until a toothpick inserted into the center comes out just clean – with a few moist crumbs but no wet batter.

If the bread appears to be browning too quickly, tent the cake with aluminum foil.

Also, if using stoneware or glass pan, increase the baking time 15 m or so.

As you know – I don’t really believe in baking times.  The recipe in the book calls for 60 to 75 minutes.  As mentioned in the intro – I don’t like to stuff my loaf pans and bake for this long.  I find it better to put a little less batter into the loaf pan – and then bake the rest in a mini loaf pan or a muffin or two.

In that case I would check the bread after 30 minutes and just see what’s going on.  If it all is jiggly and wet – you know you have at least 10 m and likely more.  Keep resetting the timer until it is done.

Let cool for 15 m and then run a knife around the edges, and turn it out of the pan onto a rack to cool completely.

Enjoy –