Chocolate Dipped Fresh Fruit

Chocolate Dipped Fruit

I’ve dipped a multitude of goodies in chocolate.  My favorite is fresh fruit.  Not just strawberries, but blueberries and raspberries and especially pomegranates.  I might be alone here since whenever I make them I seem to be the only one standing over that platter insisting that “you need to try these!!”   That feeling of the pomegranates popping while the chocolate snaps and then melts, well, it is a symphony in my mouth.

Eat these the day you make them and place in the refrigerator until you serve.  They are mediocre the next day as the fruit begins to break down and gets a little funky.IMG_0286

Read here to remind you about tempering chocolate.  And here about other valentine treats.

apple pan tart (simple)

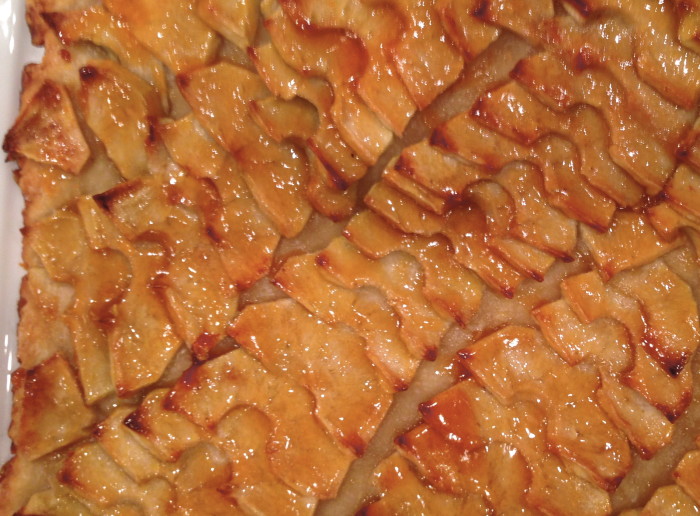
Soooo easy, so simple, so apple-y, so flakey (the crust) so moist… just scrumptious.  Served this tart the other evening and friends Jason and Trent were ecstatic.  Well, that may be too strong of a word, but for grown men, they were all smiles.  I’m so happy I finally made an apple tart worth posting.  My mom makes a beautifully simple tart but I can’t seem to master it.  I’ve tried various recipes and ideas and although good, not great.  Until this one.   Found this with who else, but Ina Garten…   enjoy this and make this – you will not disappoint.

apple tart (from Ina Garten Food Network):

2 cups flour
1/2 teaspoon kosher salt
1 tablespoon sugar
12 tablespoons (1 1/2 sticks) cold unsalted butter, diced
1/2 cup ice water

4 granny smith apples
1/2 cup sugar
4 tablespoons cold unsalted butter, diced small
1/2 cup apricot jelly, or warm, strained apricot jam
2 tablespoons calvados, rum or water

For the crust – place flour, salt and sugar in a food processor and pulse to combine.

Add the cold diced butter and pulse 10-12 times until the butter chunks are about the size of peas.

Get your ice water ready – make sure it is really cold (I make a tall glass of ice water, then measure out the water after it has a chance to really get cold).

With the motor runnIMG_5151ing, add the water and pulse until the dough just starts to come together.  Stop.

Remove from machine and dump onto a floured surface and quickly form into a ball.  Make sure all the flour is incorporated.  Wrap the dough in plastic wrap, then flatten the ball to form a disc shape.  Let sit in fridge for at least one hour.

Preheat the oven to 400 degrees and line a sheet pan with parchment.

Roll the dough so that it is slightly larger than a 10×14 rectangle — and transfer to your baking sheet.  To transfer, roll the dough around your pin quickly and unroll on the parchment.

Peel, cut, core and slice your apples.  Cut them in half, through the stem.  Core.  Then slice crosswise in 1/4 inch slices.

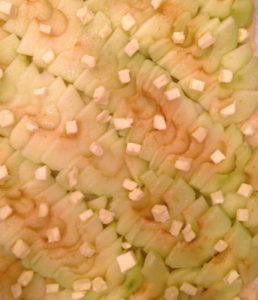
Place overlapping slices of apples diagonally across the tart.  And continue on both sides until the dough is covered.  Sprinkle with the full (seems like a lot) 1/2 cup sugar.  Dot the apples with the small bits of butter as shown.

Bake for about 45 m to an hour (mine took an hour) – and rotate the pan at least once during baking.  Heat your jam and spirit (or water) and strain through a small sieve.  Gently brush the glaze over the tart.  Take a large spatula and loosen the tart from the pan.  Some of the sugar may have caramelized and it will stick if not unstuck while warm.

This was delicious warm, room temp and the next few days too.  You can also serve cold if that is what you like

banoffee pie (just a really good banana pie!!)

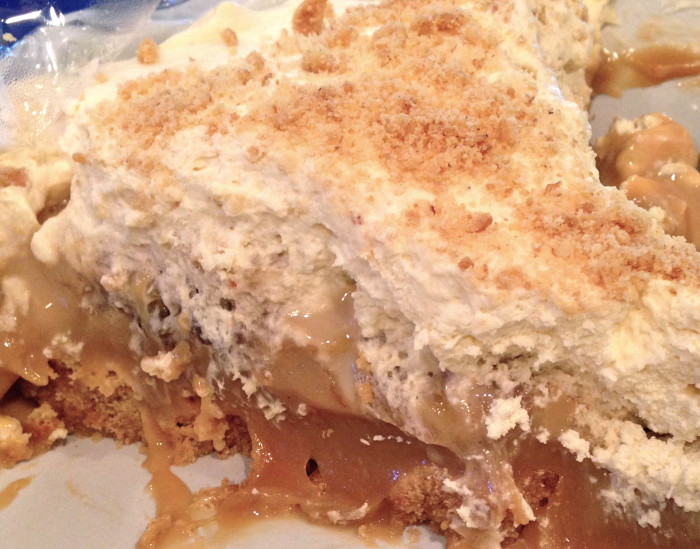
AMAZING Jason exclaimed, eyes wide the other night after he had a bite of this pie.  He was so excited!  And today I got a text from him asking for the recipe because “that was so insanely good and I want to try to make it for Thanksgiving.”  So…I figured many of you may be interested in this recipe for the holidays, because yes, so so so good, a little different and although there are a few steps to this, you can do them slowly and in advance of your meal (any meal).

The caramel filling is really decadent and rich.  The espresso powder in the whipped cream adds a something new to the flavor.  The digestive cookie crust is another departure from the normal graham cracker crust which really gives the pie more depth of flavor and less sweetness somehow.  And well, bananas are bananas!

You will need to get digestive cookies from the market.  You can also order them online here.  Hard to get less than three pack via mail, but they are good cookies – great to use to make the pie again, share with friends (Jason, I’m going to give you some) or crumble and put in vanilla ice cream so good!

You also need to get some sweetened condensed milk and some espresso powder.  You can get the milk at the store and espresso powder here or here or at a specialty store.  It lasts for a long time – and it is called for in many chocolate cake recipes as well.

Make the filling and crust up to a day before you plan to serve it.  Finish it closer to service with the topping and bananas.

banoffee pie (very slightly adapted from Sticky, Chewy, Messy, Gooey by Jill O’Connor):

filling

2 cans (14 oz each) sweetened condensed milk
1 teaspoon pure vanilla extract
1/4 cup firmly packed dark brown sugar
4 tablespoons unsalted butter, melted
1/4 teaspoon kosher salt
hot/boiling water as needed

crumb crust

2 1/2 cups (plus extra to sprinkle on top) wholemeal digestive biscuit crumbs (use a food processor to make the crumbs)
1/4 cup sugar
1/2 cup (one stick) unsalted butter, melted
1/2 teaspoon kosher salt

topping

3-4 medium bananas
2 cups heavy cream
2 tablespoons sugar
1/4 teaspoon instant espresso powder dissolved in
1 teaspoon vanilla extract

Preheat oven to 400 degrees.

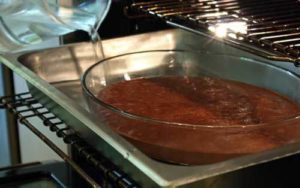
For the filling, stir together the sweetened condensed milk, vanilla extract, dark brown sugar, melted butter, and salt.  Place mixture in a 6 cup oven proof dish (approx.) and cover with tin foil.  Place this  filling pan, inside a larger baking pan (approx 9×13).   Place the double pans in the oven, then take hot or boiling water and fill the outer pan with water – about half way up thebrownie-pudding-pour sides.  Your custard will remain dry, covered and inside of the pan with the water.  (Example on the left is a chocolate dessert, but similar idea, remember the foil though.)  Bake for about 1 1/2 -2 hours.  Stir after 30 minutes, then in 15 minute intervals until the filling turns a toasty caramel color and thickens.  Remove from oven and hot water and let cool.  Make the crust while the filling cools – or while it is baking if you have 2 ovens.
For the crust, preheat the oven to 350 degrees.

Mix the crumbs, sugar, melted butter and salt together with a fork or your hands.  Press the mixture somewhat firmly into a 9 inch pie shell – or a similar sized container (a tart pan, decorative quiche pan) and place in the oven.  Bake for about 6-7 minutes until a little deeper brown.   Let cool.

Scoop and spoon the cooled filling into the pie shell.  At this point, you can cover and let sit for us to 24 hours.  But let sit for at least a few hours to set.

Make the topping by whipping up the cream with the sugar, epresso powder and vanilla.  Go to freshly whipped cream for instructions on how to do this.

Now, sprinkle a little awesome salt if you have it on top of the caramel filling.  I love my Malden sea salt.  Cut the bananas in about 1/2 inch thick slices.  Place on top of the filling.  I really jammed the bananas in since I really wanted to taste them.  Cover the bananas with the whipped cream.  Make sure you cover them all so they don’t brown.

Sprinkle bits of the crumbled digestive cookies on top and place in the fridge for a bit.  Serve when you are ready!

Enjoy-


caramel apple jam

Thanks mom for sending me this recipe!

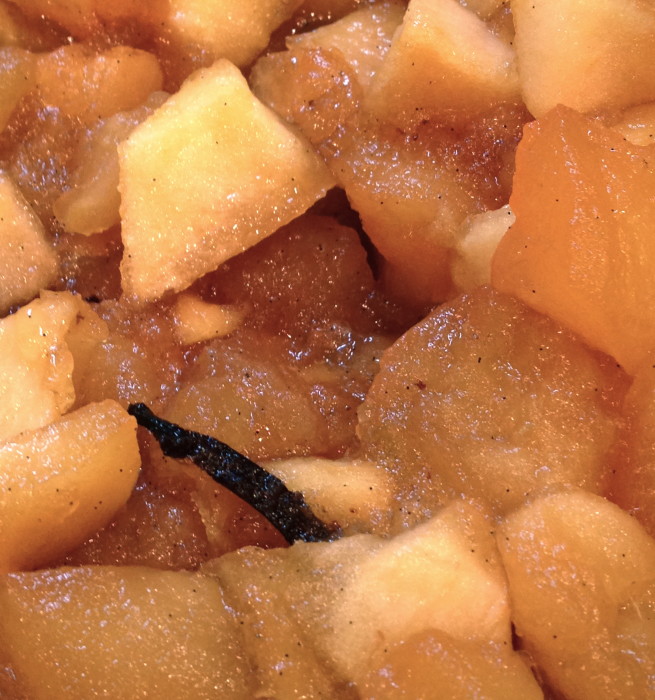
MMMMmmmm….so delicious and warm and soothing and inviting.  Funny for a “jam” to be all that but it is!  Caramel, vanilla, and apples delightfully and simply combined.  Warm this up and pour over some vanilla ice cream and you have a winner.  Equally good on the savory side if you serve as a sweet side relish for pork or chicken.  Alison Roman, the creator of this apple jam, also suggests ice cream (like me) – but topped with crushed Nilla wafers.  And I say, sounds great, but make home made vanilla wafers (coming next)  and add a little whipped cream.

Use a variety of apples, makes for a more interesting outcome because different apples break down differently and this will provide texture and fun!

apple jam (from Bon Appetite Oct 24th):

Original recipe and write up are here.

1 cup sugar
3 pounds apples, use a variety if you can, peeled, cored and cubed about 3/4 inch thick.
1/2 vanilla bean (scraped)
1 tablespoon lemon juice
cinnamon stick or powder
kosher salt

Place 3 tablespoons water in a large saucepan.  Add the sugar and mix.  Heat on medium high and boil – and continue to cook until the sugar caramelizes.  It will turn a dark amber color – but be careful as it all happens very fast, and it is HOT.  Seriously hot.

Add the apples and the vanilla seeds and bean to the pot and cook on medium heat.  The caramel may seize up at the start (because the apples cool it down) but soon it will dissolve again.  Add a 1/2 cinnamon stick (if you don’t have a stick, wait and add some ground cinnamon to taste at the end.)

Continue to cook for about 20-25 m, stirring occasionally until some of the apples are translucent and some still have their shape, and most of the liquid is dissolved.  You can keep cooking btw, if you like your apples super soft, or remove them earlier if you like them super chunky.

Remove from heat.  Add lemon juice and a pinch of kosher salt.  Store in a glass jar or container for up to a month in fridge.


steel cut oats (the very best) don’t skip

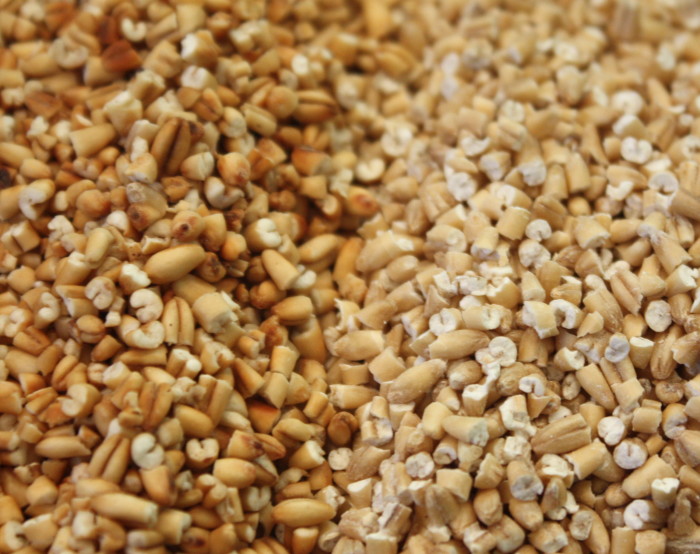
Never ever ate any kind of hot cereal as a child, wanted to like it in my 30’s, enjoyed it in my 40’s but wow…at 47 I have found the exact hot cereal (n my case steel cut oats) that I craved (and didn’t even know I was craving it!)   I didn’t know that oats could be so nuanced with delicious flavors and so toothsome!  Seriously.  These oats are unlike the oats I’ve made for myself (every week) for the past year or so.  I recently bought the book Whole-grain Mornings and Megan Gordon (the author) really opened my eyes.  I looked forward to my morning bowl, but now, I can’t wait.  Please don’t beoats turned off by the tad of butter and the extra step of toasting your oats because it is WELL WORTH IT.  Really.  The result is super scrumptious.  My breakfast feels decadent.  This IMG_7184recipe is enough for 6 days.  Each morning I cut a serving, add a little water and heat – I then add my fruits, nuts or raisins and top it off with a sweetener and then add some cold home-made almond milk (you don’t have to use almond milk) and wow…feels like hmmm….happiness.  A great way to start every day!  My mom loved it too while visiting and I think I may have finally turned her into a breakfast eater.
steel cut oats (from Whole-grain Mornings by Megan Gordon):

1 cup steel cut oats
1-3 teaspoons unsalted butter (I use 2)
3 1/4 cups water
1 cup low fat milk (the recipes calls for whole milk which I bet is delicious, 2% might be a good alternative)
1/2 teaspoon kosher salt
1-3 teaspoons sugar (optional) (I use a sweetener at the time I eat it)
2 teaspoons pure vanilla extract
cinnamon (optional)
brown sugar, honey, syrup, heavy cream, almond milk, milk, raisins, fruits (optional all for serving)
I use almond milk, monk fruit sugar, and sliced bananas and nectarines or berries (in winter diced apples and cinnamon)

In a heavy bottomed skillet, melt the butter over medium high heat.  Add the oats and stir and gently toss in the pan until fragrant and darken in color.  See above photo.  This will take 5-6 minutes.

While toasting, bring the water, milk, sugar and salt to a low simmer over medium heat.  Add the oats (be a little careful here since the ingredients all seem to puff up).  Bring to a slow boil, partially cover – and decrease heat to low and cook until it has thickened (25-30m) and the oats have softened.  Stir occasionally while cooking – but especially towards the end so they don’t stick to the bottom of the pan.

The porridge will look loose at the this point – but it will continue to soak up additional liquid so don’t worry.

Add vanilla.  If using raisins – stir in and cover.  Let sit (covered for 5 m).

At this point you can scoop into bowls and serve with all of the above optional ingredients or some of the above.

IMG_7222Since I am the only person eating this in my house, I pour the oatmeal into a container.  Each day I take some (it is kind of a solid mass at this point once refrigerated overnight) and place in a bowl with a little bit of water (to loosen it up).  I heat at a medium power for 3 m in the microwave – and end with a 30 sec full blast heat.  (I like it really really hot).  I add my cut up fruits – lately nectarines and banana, then my monk fruit sugar (a sweetener) and top it off with my cold almond milk and yum.  Seriously yum!!  Yum!  Enjoy –


chocolate covered pretzels

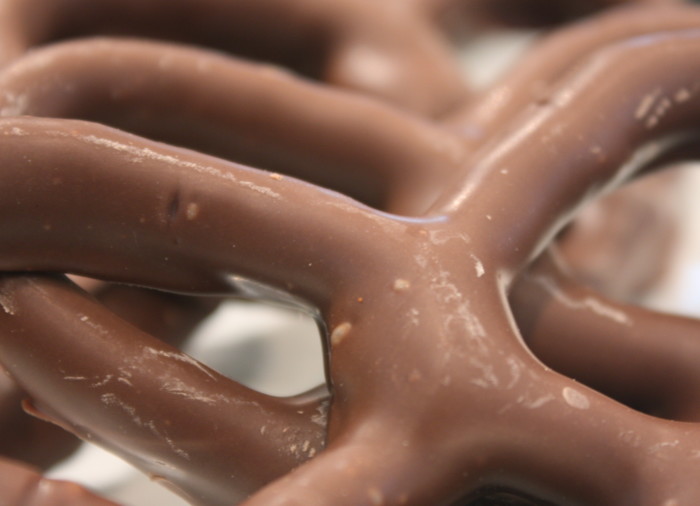
Another love – the chocolate covered pretzels from Enjou Chocolate.  These are my favorites because the chocolate is sooooo good and the pretzels are firm and fresh.  And although dipped generously, it is not overdone.  As usual, pricey – but def worth it!

You can find them here.


popcorn brittle

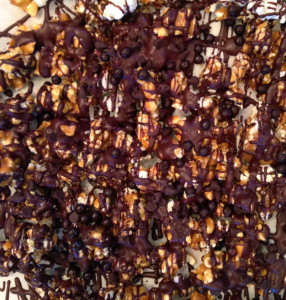
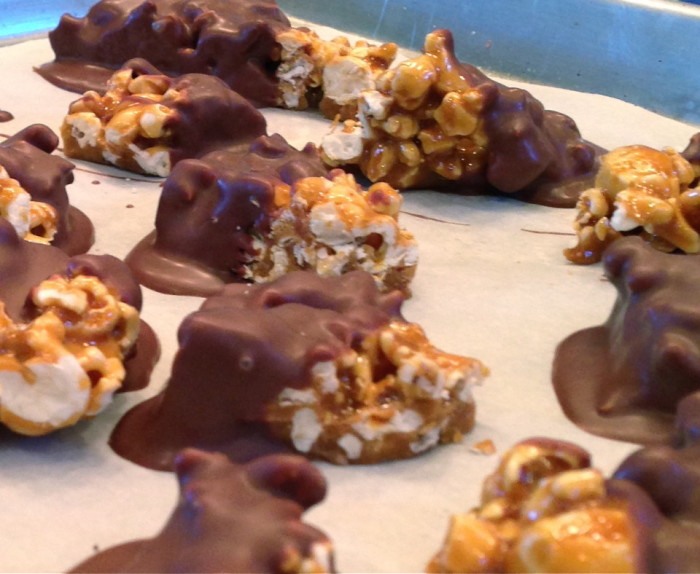
Yum.  Crunchy, sweet, salty and then chocolaty!  I made these treats and they were a hit with mostly me, Mark and Jack (Andy’s friends) and my sis in law Linda.  She kept telling Patrick that they were good “Patrick this is good!”  but sadly he refuses to enjoy popcorn in any form.  I happen to love popcorn.  It is up there with ice cream and brownies and lasagna.  So when I came across this recipe in Cooking Light – I was eager to try it.  Make no mistake, there is nothing really “lite” about these nuggets save for the fact popcorn replaces nuts.  Oh and speaking of nuts, my niece Emily who is severely allergic took a look at these and said, “wow, nuts” (clearly dissapointed that I made something so obviously nutty and placed it right in front her!)  But I was happy to report that these treats were miraculously nut free!  The brittle is good as is – or, like me you can dip or drizzle them with chocolate.  If you choose to keep them clean, crunch the brittle and mix it into vanilla ice cream.  Yum.

These can be a little tricky to make in that you must be careful working with the hot sugar – and you need a candy thermometer.  But beyond that – not too difficult.  Then of course the chocolate – the tempering of the chocolate.  See past posts for that and remember if you are into it, investing in a small tempering machine can be very helpful.

Oh, and these little gems last a long time so great for the holidays.

Enjoy –

popcorn brittle

5 1/2 cups popcorn (I cooked in a tad of oil and salted – you can also use plain, or air popped but I like the salt with the sweet)
1 1/2 cups sugar
6 tablespoons light corn syrup
1/4 cup water
3 tablespoons molasses
1 tablespoon butter
1/2 teaspoon baking soda
1/2 teaspoon vanilla extract
1/4 teaspoon salt (unless you salted your popcorn like me)

Line a baking sheet with foil and coat foil with cooking spray.

Place popcorn in a lare zip lock bag.  Seal and crush with a mallet or rolling pin.  Set aside.

Place sugar, syrup and water and a medium small saucepan and cook for 1 minute or until sugar dissolves.  Stir to help it melt.

Now take next steps carefully as this mixture will become very hot.

Then cook, over medium high heat without stirring until a candy thermometer registers at 270 degrees (should take 7-9 minutes or so) then add molasses and butter – and cook until therm registers at 290 degrees.  Remove from heat.

Stir in baking soda, vanilla and salt.  Then add the reserved popcorn and mix to combine quickly – then carefully pour onto prepared baking sheet.  Spread with a palet knife or back of a spoon to flatten as best you can.

Let cool completely then break or cut into chunks.  Dip in tempered chocolate for an extra treat!

Enjoy-

ice box zebra delight

This is a very old fashioned dessert – but it has never ever lost its appeal.  Mark said “This is slice number four…I’m going to have to ride (my bike) 100 miles tomorrow morning!”  And Mike was lamenting the absence of my ginger cookies but sang a different tune when he sampled this treat.  He said “So light, so airy, hands down the best thing you have ever made!”  This is a perfect treat for summer  –  you can make it in advance and although rich in chocolate flavor it is not too heavy.  Serve it with ice cream and you have such and easy sweet to serve.  My mom made this when we were young and I remember thinking that it must be so difficult to make.  But as usual (with me) it is not!  Well, if you decide to make thin chocolate wafer cookies on your own, then yes, this is more work.  But I happen to love the Famous Chocolate thin chocolate wafters by Nabisco that you get in that yellow box.  I do.  The recipe for this is actually on the box!!  I tweaked it a bit – making it in a cake pan so that I could invert it and coat with ganache – but you don’t have to – really up to you.  If you follow the directions on the box you simply make a zebra roll.  And that is quite good.  I’ll list the ingredients and then how I made this one – and you can play around.  Even if you throw all the cookies and whipped cream in a big bowl, and served with a spoon and some chocolate sauce and ice cream…well – that is just the same!   Enjoy this one!’

Basic recipe is first, then what I did in addition is below that.

ice box zebra delight (from the Famous Chocolate thin chocolate wafer box):

2 cups heavy cream
1 teaspoon vanilla
1 package (9 oz) Famous Chocolate Wafers
ice cream
ganache – optional

With whisk attachment beat the cream until stiff peaks form.   Towards the end, add the vanilla

Spread 1-1/2 teaspoon (I did a bit more) whipped cream onto each wafer, stack then stand on the edge on a plate.  Keep going until you finish with the cookies.  Spread the remaining cream on top and sides.

Then refrigerate for at least 4 hours.  Cut into diagonal slices to serve.

You can also freeze until firm and wrap tightly and store for up to 2 months!  Remove from freezer and place in fridge for at least an hour until you are ready to serve.

I lined a cake pan with plastic wrap – so that the sides overhang.  I placed some whipped cream down first, then i filled the bowl with the long tube that is described above — I put that in the center.  After that I just layered the cookies and the cream all around.

Once frozen, invert the pan and pull the frozen dessert out with the help of the plastic wrap.  If it is too cold, just run the bottom of the pan under hot water.  Then take your ganache (the recipe is in the blog) and pour over the concoction and cover the top and sides.  I served with both chocolate and vanilla ice cream.

Alternatively you can just drizzle ganache on top – or skip it.  You can also place all in a bowl, and scoop out with a spoon.  Again, feel free to add some chocolate sauce in there.

You cannot go wrong!

Enjoy –

Toll House kookie brittle

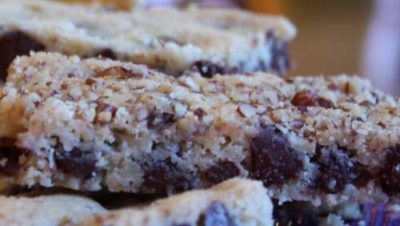
Yummy!!!  Crunchy, buttery, chocolaty, salty and nutty – well, that says it all!  A shortbread version of a Toll House Cookie.  Without eggs and a bit less sweet this is a great alternative to the classic cookie.  So VERY easy to make, and pretty to look at – another great choice for a cookie platter or a hostess gift.  My Aunt Suzi shared this recipe because she loves it.  When I was little she used to bring us canisters of Toll House cookies and boy did I love that (and her!)  Also the way she cut my steak into tiny little pieces without a speck of fat (my mom didn’t get this) – but I digress.  Moving back to the cookie, make them and enjoy!  Might be nice for the Superbowl.

Oh, and so so so good in vanilla ice cream.  Seriously delicious.

toll house kookie brittle (from my Aunt Suzi):

I doubled this – goes fast!

1 cup butter (2 sticks), softened (not melted)
1 1/2 teaspoons vanilla,
1 teaspoon kosher salt
1 cup sugar
2 cups flour
12 oz package of Toll House chocolate chips
3/4 cup finely chopped salted pecans

Preheat oven to 375 degrees.

Combine the butter, vanilla, sugar and salt in the bowl of an electric mixer (or hand held) and blend well with the paddle attachment.  Fully incorporate the sugar into the butter.  I think my aunt may not use a mixer at all…

On the lowest speed or by hand (and I mean with your actual hand) add the flour and chocolate chips.

Press batter onto a parchment lined sheet pan and press so that the dough is about a half inch thick.  Alternately, Press evenly into a 15x10x1 inch baking pan.

Sprinkle the pecans over the dough and press them in so they stick.  If your pecans are unsalted, sprinkle a little sea salt on top of the pecans.

Bake for 20-25 minutes or until nicely golden

Cool and cut into pieces.  Enjoy!

seven-layer bars

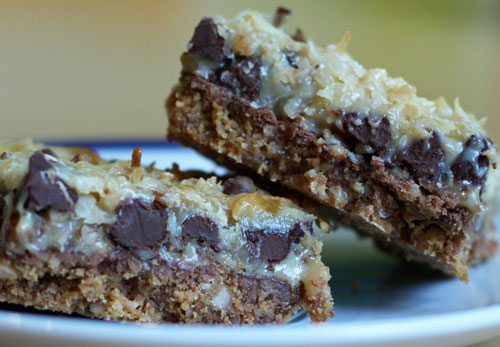
Serious scrumptiousness.  Rich, sweet and addictive.  Seven layers of delight. I can’t stop picking at them.  I keep talking to myself, oh, I’ll just have a nibble even though it is 10 AM, then oh, what’s another little sliver at noon (before lunch is big for me), then another sliver around 4 and before I realize it I’m full and slightly nauseated from the days tastings.  I don’t even love coconut but managed to gobble these up.  Judy summed it up nicely stating very simply, “this is the perfect food.”  Karen echoed that with lots of mmmms and then added my usual line,”this would be perfect with vanilla ice cream!” (girl after my own heart).  (Happy birthday BTW.)  And Chrissi nodded, smiled, and said quietly, “really good Lisi.”  Cooks County Magazine’s Diane Unger really perfected this recipe.  No more butterscotch chips (I’m not a fan) and added little goodies here and there that make an even more delicious bar than the Hello Dolly bars (or Magic bars) of yore.  She worked hard fiddling with Heath Bars and Rice Krispies and really the only change I made was to add a touch of salt to the crust and a tad of sea salt to the top.  I can’t resist the sweet salty thing and neither will you (well, I think!)

You can prep a few of the ingredients in advance so that baking day is even simpler.

seven-layer bars (from Diane Ungers recipe in The Cooks County Magazine):

1 cup toffee bits (Heath or Skor Bars)
2 cups minus 2 tablespoons graham cracker crumbs
1 stick unsalted butter, melted
8 ounces milk chocolate – chopped into smallish chunks.  (I used Ghirardelli milk chocolate chips.  Or use a block chocolate.)
1 cup Rice Krispies cereal
1 cup pecans, toasted and chopped
1 cup semisweet chocolate chips
1 cup sweetened flaked coconut, toasted
2 (14 oz) cans sweetened condensed milk (not evaporated milk)
1 tablespoon real vanilla extract

Preheat the oven to 350 degrees.  Line a 9×13 pan with foil and make sure there is excess foil that hangs over the edges.  Grease the foil with butter or spray – and don’t forget the sides.

As mentioned above, you can prep the 3 ingredients below a day or 2 or 3 in advance.  This will make life easier on baking day.

1. Toast the nuts in the oven at 350 degrees for about 7-10 minutes or until fragrant.  Cool and chop coarsely.

2. Toast the coconut for a bit longer.  I’m forgetting what I did – but some of it should turn a nice golden brown and it should dry out a bit.  Stir it up every now and then as you toast it.

3. Process the toffee bits (I broke up Heath Bars) in a food processor to a fine powder.  You need one cup total.

Ok, now time to assemble.

Mix together the graham cracker crumbs and the fine toffee crumbs and add 2 pinches of kosher salt.  Add the melted butter and mix well to incorporate.  Press the mixture into your prepped pan and try to press it out evenly – the corners too.

Bake for about 8 – 10 minutes – it should just start to brown.

Once out of the oven, immediately sprinkle the chocolate chunks over the crust.  Let sit about 2 minutes – allowing the chocolate to soften, and then spread and smooth it into and even layer.  Use the back of a spoon or an off set spatula if you have one (makes it easier).

Next, place the Rice Krispies on top of the melted chocolate layer.  Try to do this evenly and then gently press them into the chocolate.

Add layers of chopped pecans, chocolate chips and toasted coconut (in that order) and press each layer to adhere.

Whisk together the condensed milk and the vanilla.  Pour evenly over the coconut.

Sprinkle a little bit of sea salt (I love Maldon) to the top (this is optional but adds a great nuance).

Place in oven and bake until golden brown – for about 25-30 minutes.  I had to place mine on the top rack towards the end in order for it to brown nicely.  Didn’t want it to bake extra.  See how your oven does and do what you need to do.

Let the bars cool for 2 hours.  Then simply pull the foil up with the uncut bars and place on counter.  Pull the foil free from the sides.  Cut and serve gooey that day (and pop into that ice cream) or loosely wrap with foil and let the bars harden (I like it like this) and cut the next day.

Enjoy-