chicken nuggets (healthy and so good!)


When I saw Gina’s post (from SkinnyTaste) in my inbox featuring chicken nuggets, my heart did a little flutter. I knew she’d make them healthy and tasty, and yep—she did! I’ve made these nuggets several times for friends and my kids, and they’ve been a huge hit. Chrissi said she saw the post too and was thinking about making them—and now she definitely will. Andy and Nicole loved them as well, with Nicole loving her gluten-free version.  They made them last week and reported easy and delicious.

If you read my last post about the McDonald’s Fish Filet and how I had no choice but to order it when I was little—remember the chicken nuggets didn’t exist until 1983.  By that time, I was a junior in high school.  I did dabble in those nuggets especially in college.  (Honestly I didn’t just dabble I was really full of chicken nuggets – I thought for a lifetime.)  But nope!

I like to serve these nuggets with roasted potatoes and a salad. It’s kind of like the air-fried haddock—there’s something about these familiar flavors that satisfies that old craving and brings back so many memories.

A few simple ingredients – ground chicken, frozen cauliflower (riced) and spices are all you need to make a satisfying lunch – or dinner.  Serve wtih ketchup, bbq, honey mustard or healthy tartar sauce (Rob loves that) and enjoy –

Oh and they freeze well!

Find the recipe from the blog SkinnyTaste – here.  To make GF use GF breadcrumbs – and be sure to add some Italian herbs.  And finish (all) with some Maldon sea salt.  

greek yogurt

tartar sauce

Everyone falls in love with this yogurt for its taste, health benefits, and versatility.  Seriously in love.  I enjoy it every morning, mixing it with a variety of goodies.  Lately, I add chia, roasted walnuts and my Hampton’s Grocer granola (thank you Jen!)  I add pomegranate seeds and other fruits depending on what is in season.  When I wake, I’m eager to go and get my breakfast ON!  I also use it as a base for savory dips for lunch and dinner, such as healthy tartar sauce, tzatziki, and bang-bang sauce.  

This yogurt is particularly great for those with dairy issues since it is fermented at a low temperature for 24 hours (instead of the usual 8 hours). The bacteria in the yogurt starter culture consume the lactose in the milk, creating billions of beneficial bacteria. This process makes the yogurt virtually lactose-free and easier to digest. The benefits last for about 2 weeks in the refrigerator, but while you can consume it after that, it may lose its beneficial bacteria.

Making yogurt isn’t hard. It can feel overwhelming at first due to the 3 or 4 steps spread over 36 hours, but each step takes very little time. I waited about 6 months before I finally took the plunge. Thank you, Judy, for the nudge! 

If you think you can’t figure it out, please know I have successfully shared this recipe with about 15 friends and relatives, including my 85-year-old mom and my 88-year-old mother-in-law. These beloved grandmas are far from incapable; you can learn at any age—with the Instant Pot and a little patience.

Google SCD yogurt videos (specific carbohydrate diet) if you want some video instructions.  There is a ton of info out there.  I promise you won’t regret adding this to your everyday diet. 

One important note*** – use a clean new instant pot ring for your yogurt making and continue to use it only for yogurt or sweets.  The ring holds onto scent and food – so if you made beef carnitas in your pot, your yogurt may have a beefy tang which you do not want! 

Equipment Needed 

  • Instant Pot: a 3-quart or 6-quart model works. I use a 6-quart because I tend to make larger batches, while my mom and MIL use a 3-quart. You can also use a yogurt maker, but you’ll need to research and follow specific fermentation instructions—just search for “SCD yogurt” for plenty of information.
  • thermometer: a milk thermometer is great, but any thermometer will do—even a digital one.
  • yogurt Starter: I recommend the GI gut-pro health starter, but you can find other yogurt starters online. Search for “SCD yogurt starters.” This starter ships with ice, so refrigerate it immediately upon arrival.
  • ice or ice packs: these aren’t necessary, but they will speed up the process.
  • tiny whisk
  • Greek yogurt strainer
  • glass bowls: for storing the yogurt in the refrigerator.

RECIPE 

Use either 2% or whole milk, or a combination of both. I prefer organic, grass-fed milk, but choose what suits your taste and budget.

Pour half a gallon (8 cups) of milk into the inner pot of your Instant Pot. If using a 6-quart Instant Pot, feel free to double the recipe.

Secure the lid on the Instant Pot, ensuring the vent is set to “vent” (the “sealed” position is for pressure cooking only).

Plug in the Instant Pot and repeatedly press the yogurt button until it displays “boil.” Depending on your model, you may need to press the adjust button instead. Wait for the milk to reach a boil (about 180°F), which takes approximately 30-35 minutes in the 3 quart pot twice that in a 6 quart. The machine will beep and display “yogurt” when done. If you miss the beep, check the display; if it says “yogurt,” the milk has boiled.

Cool the milk to 100-110°F before adding the yogurt starter.  Let it cool on the counter or speed it up with an ice bath. For the ice bath, fill your sink or a large bowl with cold water and ice, and periodically stir the milk until it cools to the desired temperature. Feel free to use an ice pack or two or three instead (or in addition) to the ice.

Once cooled, measure 1/8 teaspoon of the GI pro yogurt starter into a small bowl. If doubling the recipe, use 1/4 teaspoon. (If using a different starter follow those directions.)  Add a tablespoon or two of the cooled milk to the starter, whisking until combined.  (A tiny whisk works well here.). Pour that mixture back into the cooled milk.  Again – whisk to combine. 

Return the milk and starter mixture to the Instant Pot, cover with the lid, and keep the vent open. Press the yogurt button and set it for 24 hours. Again, hit repeatedly or hit the adjust button until 24 is on the display.

At this point the yogurt will incubate for 24 hours.  The display will show how much time has gone by.  After 24 hours it will beep.  If you walk by and you see the display is gone or it says yogurt you know it is finished incubating.

After 24 hours, transfer the yogurt pot to the refrigerator for at least 2 hours to firm up. You can refrigerate it for longer if needed or preferred.

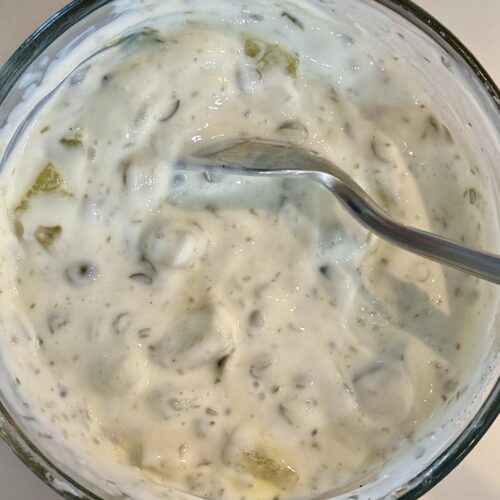
To make Greek yogurt, pour the yogurt into a Greek yogurt strainer and cover with the lid. The longer you strain, the thicker it gets; I recommend straining overnight, while others might prefer 6-8 hours.

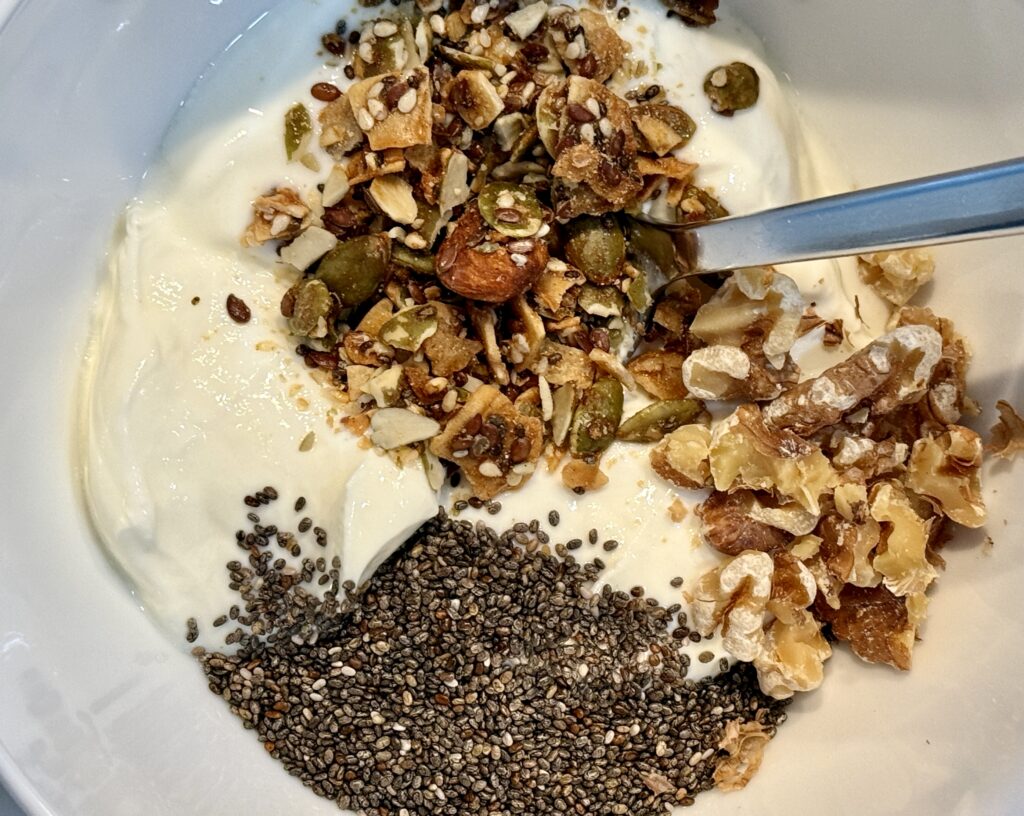
Scoop the strained yogurt into bowls, store in the fridge, and enjoy! 

Google SCD yogurt videos (specific carbohydrate diet) if you want some video instructions.  There is a ton of info out there.  I promise you won’t regret additing this to your everyday diet. 

Oven baked potato chips

I love home made chips.  I love love love them.  And yes a labor of love.  I’ve said love too many times. 

I make these with baby potatoes, larger Yukon as well as garnet yams and covington sweet potatoes.  I also really enjoy the sweeter Japanese white potatoes (see photo way below) that happen to taste great even cold out of the fridge the next day.  Yum.

So – how do you make these?   You slice,  mandolin or Cuisinart.  Back in the day I sliced.  But then I wanted faster and more even slices.  So I bought a handy mandolin.  That was great.  Just great until I had a piece of my palm on the tray.  Yikes. That was brutal.  A trip to urgent care – glue and no potatoes that night.  I’ll spare you that photo.

Rob bought me a lovely pair of safety gloves because he too loves these guys.  So – that worked until one day I was rushing and forgot the safety glove.  And took off the side of my finger.  That was really bad and incredibly painful.  Made worse by the orthopedist (!?) at urgent care who tried to cauterize my missing chunk without anesthesia!  Oh my gosh.  Even more brutal.  Luckily Andy was home ( I was cooking for his friends) and he finished the potatoes while Rob took me in.  Infection and pain ensued and that photo is even more awful so I will spare you again. 

Rob bought me a Cuisinart next!  And oh what joy! 

The message is – be careful!  Please. 

Preheat the oven to 325 or so – convection or convection bake – you might have to fiddle.  Spray your sheet pans with olive oil spray.

Cut your potatoes – the thinner the less time to cook.  The thicker the more time.  Rob likes them thick, I like them verrrry thin.

Place on sheetpan and do not overlap.  Spray with olive oil.  Sprinkle with Maldon salt.  I like to add pepper to my Yukons.  

Pop in the oven.  If very thin might be as little as 10 m.  If thicker longer.  These guys bake at different speeds and you will also have hot spots in your oven.  So have some tongs and oven mitts nearby and as they cook, pull off the ones that are nice and brown.  Place those on a plate.  And put the sheet pan back in the oven.  This is one job that makes sense to stay by the oven – keep setting the timer  – and keep looking and checking.  Listen to a podcast, music or book.  Rotate the pans and sometimes (especially if thickly cut) flip the slice over with your tongs if looks like it needs it.  Obviously a very loose recipe. 

I sometimes make 5-6 sheet pans at a time – for company or for us.   And that is time well spent in the kitchen 🙂 

You can make these in advance and reheat as needed.  All varieties of sweet potatoes are especially good the next day.  The regular potatoes not so great even reheated so keep in mind.

Enjoy

simply baked chicken with onion, carrot, potato and leeks if you like

I love this dish!  I’ve made it several times and each time it comes out a little different but always delicious.  Ruhama Shitrit does a beautiful job on instagram. Each dish she is more beautiful than the next but in that home cooked way.  Nothing fancy but always tasty.  She often cooks and bakes gluten free and dairy free which is great when Greg is home.  

I add a lot of extra onion, carrots cut into smaller sticks, and well washed leeks.  Sometimes I pop in a few cherry tomatoes.  And love it.  The gravy in the pan – well, I could eat it like a soup.  Rob likes this.  He likes it.  I love it.  My mom loved it and wanted the recipe.  So you decide.  It is really very simple.  You will need to purchase date syrup which can be found now in the grocery store or easily online.  Also make sure you have parchment paper. 

Friends who have made this find that the chicken dries out – so I suggest  you remove the chicken from the pan when just about cooked.  (Check with a thermometer). Set the chicken aside until the veggies look mouthwatering and the carrot can be pierced with a fork.  Then, place the chicken back on top to finish with a short broil for color.  You can also use bone in meat — thighs  or breasts (these will take longer to cook) and again pull the chicken when you see fit.  

Click here for Ruhama’s recipe.  Remember to add thin cut carrots, extra onion and leeks if you like.  Remember to sprinkle Maldon or Jacobson sea salt at the very end.  The leftovers are equally yummy. 

Enjoy this – and fiddle with the recipe as you see fit.

smokey lime glazed salmon

I’ve been making this yummy salmon for years.  It is a goodie!  Simple.  Oven baked and full of flavor.  I normally serve with some cut mango and some wilted spinach but the other night I only had peas.  This is sweet, smokey and tart – yes, all in one.  It’s great for a dinner party – as it is just as good at room temp.  I usually make steak as well and then most friends are happy.  Even those who usually don’t love salmon!  

I found this in the Wolfe oven pamphlet.  I love when I find awesome recipes in the most obvious places.  Enjoy this.  Great for lunch the next day on top of greens and fresh tomatoes and cucumbers.  Yum! 

Ingredients:

1.5 tablespoons light brown sugar
1.5 tablespoons smoked paprika (or half smoked half sweet, or whatever you have on hand)
1 or 1/2  teaspoons chipotle chili powder (or 2 teaspoons if you like it very spicy) (I use 1/2 teaspoon because I’m a a wimp)
1.5 teaspoons kosher salt (diamond crystal!)
 3/4 teaspoon cumin
1/2 teaspoon pepper (or more if you like)
4 salmon filets
4.5 tablespoons lime juice (fresh)
3.5  tablespoons honey
1.5 tablespoon lime zest 
sprinkle of Maldon salt or other sea salt

Grease a 9×13 baking dish with a little oil and turn oven on to broil.  Mix together the brown sugar, paprika, chipotle chili, salt, cumin and pepper In another bowl, combine the lime juice, zest and honey.  Spray or rub a little olive oil onto the salmon.  Press the dry rub into the flesh.  Using most of it to evenly coat each piece of salmon.  

As best you can invert the salmon into the baking dish (turn upside down – skin will now be on top) trying not to spill the rub too much.  The rub will be underneath the salmon.

Broil the salmon for 6-7 minutes until the skin starts to crisp up a bit.   Maybe a bit longer but check to make sure nothing is burning in there.  

Remove dish from oven and carefully flip the salmon scooping up the rub and all with a large spatula – return to the oven for another 3 minutes.  Then pour the wet glaze over the fish.  Continue to broil until desired wellness.  Remember that it will continue to cook a bit as it sits.  Also remember that bake time will vary depending on how thick your salmon is!

If it gets too brown or is browning too fast – change the oven dial to bake and continue to cook that way.   375 would be fine.  When serving scoop up the juices and glaze on top of the salmon.  Sprinkle with a tiny bit of Maldon salt (optional).  

Enjoy –

sticky spicy basil shrimp (GF & DF)

This Sticky, Spicy, Basil Shrimp is one of my favorites.  Super easy, with a ton of flavor.  I love it. 

Made if for Edith who asked for the recipe and also for Sylvie, Greg, Sarah and many more and it was a hit on every occasion.  It is an easy go to for me because I usually have shrimp in the freezer and I do usually have ginger root and basil.  Easy to shop for even if you don’t have all the ingredients on hand.  

I found this in The Cook You Want To Be by Andy Baraghani.  Andy writes about the need for salt (and good salt), mighty flavor, levels of tang, and acid.  The book is just beautiful.  He incorporates so many flavors and he writes with humor and ease.  

The marinade is quick to blend and the shrimp takes about 7 minutes to cook.  I like to serve with cucumbers as mentioned in the recipe but also some fresh pineapple.  Yum! 

I don’t use all of the garlic in the recipe (but you should if you can digest it well) and I sometimes sub the Fresno chile  with red pepper and a little cayenne – so fiddle as you see fit with the ingredients you have and can find.   Lastly – use this marinade for pork chops, roasted cauliflower and really anything.  

Ingredients:

4 Fresno chili, coarsely chopped (see above for sub)

8 garlic cloves (I use 4) 

2 inch piece of ginger peeled and thinly sliced

1/2 cup sugar (I know seems like a lot, but this is just a marinade!)

3 tablespoons fish sauce

2 teaspoons kosher salt (diamond crystal – if using Mortons or table salt cut in half)

1/4 neutral oil (grapeseed, avocado, I’ve used olive too), plus 2 tablespoons

2 pounds head on, shell on shrimp (for flavor) – although I confess sometimes I only have the peeled tail on!

3 cups basil leaves

lime wedges, sliced cucumbers and pineapple for serving

In a blender, combine the chiles, garlic, ginger, sugar, fish sauce, salt, and 1/4 cup oil.  Blend until very smooth. Pour this into a medium bowl and add the shrimp.  Let marinate for 15 m or so.

Heat a large cast iron or non stick skillet over medium high heat.  Once hot add the oil.  When the oil feels hot add the shrimp using tongs – discarding the excess marinade.  Be careful not to overcrowd the pan.  You may want to use two pans or cook in batches.  Cook until shrimp are lightly charred around the edges for about 3 minutes.

Flip shrimp and cook on second side until cooked through another 2-3 minutes.  Turn off the heat and add the basil – toss well until the basil is wilted.

Squeeze with lime and arrange more lime around the shrimp on a platter or simply serve from you pan.  Serve cucumber and pineapple along too and enjoy this scrumptious meal. 


air-fryer eggplant

These multi sized discs of delight are a hit with almost everyone.  Seriously.  Who knew how many people love eggplant?  My mom is a huge fan repeatedly asking me how I make these and vowing to make.  Stephen and Halley, Sylvie too is in love.  Made for friends last weekend and they too adored.  

These are just as delicious with GF breadcrumbs for Greg.  

I’ve made these in a variety of ways – whole wheat breadcrumbs, plain ones, Italian seasoning, panko, with and with out parmesan cheese – the varieties are endless. You can eat plain which we tend to do or dip in tomato sauce or layer and make an eggplant napoleon layered with fresh mozzarella (and tomato sauce.) 

The recipe is very loose and you can fiddle with it and cook longer or shorter depending on how crispy you like your eggplant. 

Simple works for me best with these.  I prep the eggplant by salting them first (drawing out the excess water), dipping them in egg white and then again in breadcrumbs.  (Add grated cheese if you like!)

Finally throw them in the preheated air fryer – spray with olive oil and sprinkle with Maldon salt (a must) – and voila – a delicious healthy side dish. 

You may have to cook in batches – reheat in air fryer for service or for the next day.  Yum


Ingredients

  • 1 or two eggplant  
  • kosher salt
  • breadcrumbs (whole wheat, seasoned or unseasoned, plain breadcrumbs, panko) eyeball it here
  • egg white (you will need 2-3 depending on how much eggplant you decide to make) beat the egg white to break it up a bit.  Also you can use a normal whole egg. 
  • Italian seasoning (optional)
  • parmesan cheese (optional)
  • olive oil spray
  • Maldon sea salt

Directions

Wash and dry your eggplant

Cut into 1 cm (or so) thick slices

Place slices on a paper towel and sprinkle with kosher salt.  Let sit for 15 m

The eggplant will now look wet – as the salt draws out the liquid.

Pat dry with paper towel.

Preheat air fryer to 390 degrees.  Spray the bottom of the air fryer with a little olive oil spray.

Dip the eggplant in the egg white then into the breadcrumbs and place into the air fryer.  Do not overlap.  Spray each slice with olive oil and sprinkle a tad of Maldon salt on top.

Air fry for about 16 m total flipping half way through and spraying the other side with oil after you turn.  

Be careful they are hot on the inside and too easy to burn your tongue since you will want to just gobble them up!

Enjoy-


honey sriracha roasted salmon

This simple 20 minute recipe gets its flavor from delicious oven broiled salmon, fresh crisp marinated cucumbers and from a delightful sprinkling of furikake (a dried mixed seasoning made from sesame seeds, seaweed flakes, salt and sugar). 

I love this recipe and all the flavors – sweet honey, spicy sriracha, tart rice vinegar, and warm sesame oil – the hot salmon with the cold veggies – that is a successful theme for me.  

Gina Homolka – the author of all the Skinny Taste cookbooks and blog recommends making this as a bowl – customizing as you see fit.  I kept it very simple but you can add rice or other grains, edamame, tomato, avocado, shaved carrots chopped peppers etc.  

I love all of her recipes and have several of her cookbooks. I just wish it wasn’t called Skinny Taste – only because well the recipes are just good – not only good if you are on a diet.  Gina provides the nutritional value of every recipe which is amazing.  I tend to add more oil than she does – or more cheese and often I double the sauce when I’m cooking from her recipes but easy to stick to the recipe esp if trying to lose a little weight. 

You can find the recipe recipe here.  Just take note of my thoughts below:

I use 1/2 the sriracha the recipe calls for.  I’m a weakling when it comes to spicy food.  You can always add some sriracha at service – let your family or friends take control of their spice level.

Your salmon will cook faster if it is thinner.  Don’t rely on prescribed cooking times.  Peek at the fish – cut a cube in half and remember that it will continue to cook as it sits on the counter after cooking.  Rob likes his cooked through so I gave him all the thin slices and I like mine medium.  We were both happy. 

Double the sauce – if you are like me saucy and tasty are the key to making a yummy salmon bowl.  And baste twice!  Not an order of course – you get to do what YOU like!

Enjoy – 

Oh, this is delicious for lunch the next day. 

pan-seared cod in white wine tomato basil sauce

This is my favorite easy delicious healthy dinner recipe.  I LOVE it.  I wish I had better photos – gotta work on that but trust me this has such great flavor and it is incredibly simple.  It is lemony and is making my mouth water while I’m writing this up.  

I made it for Rob’s family in the fall and they asked for the recipe which is always a good sign.  It is also dairy and gluten free so I could even make it for Greg, if only he liked fish :(. 

My only issue is that my cod tends to fall apart.  I struggle with this but well, whatever – it is tasty as hell.  I suppose you could use a sturdier fish and you would have more success but I happen to love cod.  And maybe your technique will allow the fish to stay intact. 

 I urge you to try this.  You can make the sauce beforehand and quickly pan fry the cod – pour the sauce over sprinkle your basil and you are just set.  So set.  I usually double the sauce recipe – and you don’t have to add all the tomatoes even half the amount in the recipe will do the trick. For lunch the following day I sautéed spinach and bok choy and reheated gently.  Delicious.

My mom introduced me to cod when I was young – it was a Ritz Cracker extravaganza and wow did I love it.  It was buttery oh so good.  I liked it with a little ketchup which sounds pretty gross but mmm….   It was the first dish I made for Rob soon after we met – and I burned it badly.  Anyway – this is not relevant so I will stop now. 

The recipe for this is from Baker by Nature and you can click right here for the recipe.  

 Here are my thoughts and slight changes take a moment to read through:

As mentioned above I like to double the sauce as I find it so delicious.  Serve with rice, a baked potato or a sourdough to scoop up that sauce.  

I use only one clove of garlic since too much makes me feel unwell – and I actually don’t even grate it – I put a whole clove in the sauce and let the flavors mingle there – then pull out out for service.  

I find I do not need to cook the tomatoes for as long as Ashley does.  

The cod – if thick takes longer than 10 minutes to cook.

And lastly I add the basil at the end right to finish the dish.

Enjoy-

air fryer artichoke

Sylvie recently sent me a Tik Tok about friends eating the weirdest things – and yes, one of the foods was an artichoke.  I love them. She knows this and seems to find it interesting how much pleasure I get from biting into these tough leaves.  As I gleefully enjoy the heart, she again seems fascinated by this.  She doesn’t get it.  I think she would if it was baked and stuffed with breadcrumbs and cheese like my mom made me when I was young.  That is really something.  But surprisingly I find I like them plain with a bit of olive oil and Malden salt.  I avoided making them for myself all these years because it just seems like a lot of work for little reward.  But the air fryer changed all that.  I’m not saying these are the best artichokes in the world but if you like them, this is a super simple way to enjoy them. 

Enjoy! 

Here is how you do it:

Cut off the stem and peel off the leaves that were closest to the stem

Next, with a serrated knife cut through the top of the artichoke

With scissors, cut all the tiny prickly points off of the remaining stems

Slice artichoke in half.  Then with a small sharp paring knife cut around the choke.  This is the light colored area that is soft to the touch and looks kind of hairy.  This is the only tricky part – just dig in there with your knife – cut the shape of the choke and then kind of dig that out and toss.  There are a ton of videos on how to do this if you Google.

Preheat your air fryer – to 350.  Spray the artichoke with olive oil on both sides – and  salt with some Maldon salt.  Air fry cut side down for 10 min then flip and air fry another 10 or so.  You want the heart to be able to be pierced easily with a knife – so cook more if needed.