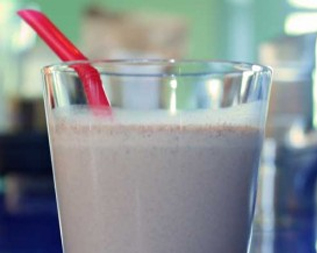
chocolate ice cream milkshake

So Greg had his appendix taken out!  He didn’t eat 2 days prior to the surgery and the day after.  Already lean, I was willing to make anything for him.  Chocolate ice cream milkshake was what he wanted so off I went to find a good recipe.  This was delicious.  I actually haven’t made a milk shake before – so I have nothing to compare it to – save for the milkshakes at the diner – and they are good, but not too chocolatey.  Greg loved, Chris and Andy did too.  Chocolatey and “real” tasting were the comments.  I should mention that Greg specifically asked for premium ice cream — Greater’s Ice Cream actually.  So I put chocolate chocolate chip in and it created little specs of blended chocolate which also added to the quality of the shake.  It is not necessary – but do know that your shake will only be as good as the ice cream you put in!

chocolate ice cream milk shake (slightly adapted from food.com)

4 cups milk, cold (I used low fat milk, although full fat would have been better I bet!)
4 cups chocolate ice cream (premium if you can, choc choc chip also good as mentioned above)
1.5 teaspoon cocoa powder
2 teaspoons sugar
1/8 teaspoon kosher salt
2 teaspoons hot chocolate powder
1 cup chocolate syrup, divided (optional – and home made sauce would have been better, but I didn’t have time)

Blend milk, ice cream, chocolate powder, sugar, salt, cocoa powder in a blender.  Process until smooth.

Pour a little chocolate syrup into the bottom and sides of each glass.

Divide mixture among glasses.cover bottom and drizzling syrup in a spiral pattern inside of each glass.

Pour ice cream mixture into each glass

Swirl some chocolate syrup over each serving and serve cold.

Enjoy –

mixed berry pavlova

Lisi's Kitchen

This was so good that I completely forgot to take a photo!  But not to worry, photos on the Smitten Kitchen site for you to enjoy.  I made this a while ago – and kept thinking I would make again to photograph and share – but the summer is almost over and I don’t want you to miss out.  Use the last of the berry season to make this delicious treat.  I mean it – the meringue so tasty, soft and fluffy – the whipped cream and the fresh cold berries.  So so so good!  I followed the recipe (well, I doubled it and made two!)

Try to squeeze it in and enjoy

smitten kitchen pavlova

bittersweet chocolate flourless cake

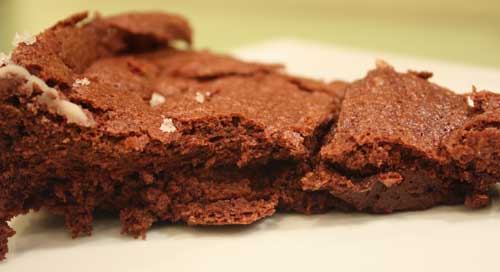
This flourless chocolate cake is so good – moist, light, rich (I know that doesn’t make sense, but it is oddly true) and chocolatey.  Intensely chocolatey.  The lightness comes from the egg whites that are folded in at the end, and the chocolate, from the bittersweet chocolate.  Just a few ingredients but the result is wow.  I served this with vanilla ice cream, whipped cream, and home made hot fudge sauce that really put this over the top.  But you don’t need all those elements.  It is good all alone.  Today I nibble on leftovers are 2 days old and cold but still blog-worthy.

The author states “This cake really show-cases the chocolate you use, so be sure to use a high-quality brand and a type of chocolate that you really love.”

bittersweet chocolate cake (from The Craft of Baking by Karen DeMasco & Mindy Fox):

3 tablespoons sugar (Demerara if you have it (I didn’t)
9 ounces bittersweet chocolate, chopped.  (use 65 to 72%)
9 tablespoons unsalted butter, cut into small pieces.  (plus more for the pan)
4 large eggs, separated and best at room temp
1/2 cup sugar
1/4 teaspoon kosher salt

Preheat the oven to 350 degrees.  Butter an 10 inch spring form pan and then dust with the Demerara sugar.

Combine the chocolate and butter and melt in a heatproof bowl over a saucepan with about 2 inches of simmering water.  Stir frequently and remove once melted (do not cook the chocolate, just melt).

With the whisk attachment, beat the egg yolks on medium speed for about a minute.  Add 1/4 cup of the sugar and whisk on high speed until the mixture is pale yellow and thick – about 7-10 minutes.

Gently fold the yolk mixture into the melted chocolate mixture.

With a clean bowl and whisk attachment, beat the egg whites on medium speed until a little foamy.  With the machine running, slowly add the remaining 1/4 cup sugar and salt.  Beat on medium high speed until soft, glossy peaks form – after about 5 minutes.  Then in 3 additions, gently fold the egg whites into the chocolate/yolk mixture.

Pour the batter into the prepped pan and place on a baking sheet and place into the oven.  Bake until a toothpick in the center comes out almost clean and note that the cake will likely be cracked with firmer edges.  Do not over bake.  Oh, and rotate the pan about half way through baking.

Let the cake cool for about 30 min.  Then run a knife around the edges and release from the pan.

Let cool and enjoy!!

cinnamon almond snack cake (made from ground almonds – no flour) healthy!

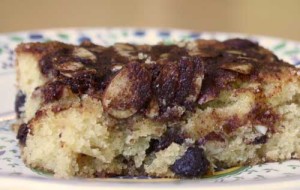
Sylvie LOVED this cake.  Rob and I did too.  The cinnamon topping is soo very full of flavor and the cake is dense, moist and satisfying.  Really!  Again from my almond flour cookbook that I’m having so much sweet success with.  About a month ago I was convinced that Greg had a gluten sensitivity or Celiac so I quickly ran out and got a few gluten free cookbooks – this being one of them.  I like this cookbook because the ingredients are familiar and healthy.  Greg’s been tested and now I’m 95 percent sure that he doesn’t have it – but he does need to gain weight – and best in a somewhat healthy way.  So I figured that baked goods made with almond flour would be somewhat caloric – but healthy and full of protein.  And really, a good snack for all of us.  Unfortunately, Greg (and Andy) didn’t love it – but i think it was just the slivered almonds on the top.

Try it – I don’t think you will be disappointed.  Oh, I added the chocolate chips to the recipe (had to!) although the recipe called for nuts and currents.  I’ll include both options in the recipe.  Enjoy!

You will need agave nectar and grapeseed oil which you should be able to now find in the supermarket.  Or buy agave nectar online for better price.

cinnamon almond snack cake (slightly adapted from The Gluten-Free Almond flour cookbook by Elana Amsterdam which was inspired by lucyskitchenshop.com):

cake
2 1/2 cups blanched almond flour
1/4 teaspoon sea salt
1/2 teaspoon baking soda
1/2 cup walnuts (or not — here I added chocolate chips!)
1/2 cup dried currents or raisins (I didn’t – just used the chocolate chips)
1/4 cup grapeseed oil
1/4 cup agave nectar
2 large eggs

topping
2 tablespoons ground cinnamon
2 tablespoons grapeseed oil
1/4 cup agave nectar
1/2 cup sliced almonds

Preheat oven to 350 degrees.  Grease an 8 inch baking pan with grape seed oil and dust with almond flour.

Combine the almond flour, sea salt, baking soda, chocolate chips (or walnuts and currents!) in a large bowl.  Whisk and stir to combine.

In a medium bowl, stir together the grape seed oil, agave nectar and eggs.

Stir the wet ingredients into the dry and mix until thoroughly combined – and then spread into the prepared pan.

Make the topping by combining the cinnamon, grape seed oil, agave nectar and almonds together…and then sprinkle the topping all over the batter.

Bake for 25-35 minutes — a tooth pick should come out just clean.  Keep checking.  Cool and serve.

bittersweet chocolate soufflé (you can make in advance!) and flourless for passover

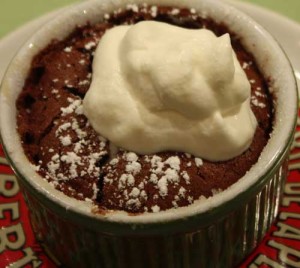
Big hit.  Big Big hit.  Sooo delicious.  Pure chocolate, pure happiness.  Rob ate one, and said – you know, I could easily eat the whole tray and I mean it.  Sylvie, Andy and Greg all said so good mom…so so good.  I gobbled mine up fast – as if someone was trying to steal it from me.  Greg and Andy’s friends were over – Connor said, “did I just eat that, or did I die and go to heaven?”  He sure knows how to compliment me (maybe he just wants to keep the treats coming.)  Matt was also verrrry happy and loved the freshly whipped cream that went with it.  I decided to make these on the fly on Saturday afternoon.  I had all the ingredients in the house and I bet you do too!  (Maybe?)  Rob and I thought we’d go out and catch up – but suddenly we had 5 extra boys and at that point it just didn’t seem like a good idea.  Rob seemed so sad, I think he was looking forward to a yummy meal (since he splurges a bit on Saturday nights) and here we were ordering in.  In addition to all that, this was my last meal because I had to fast (liquids) on Sunday for my upcoming colonoscopy on Monday so I too really wanted a good treat that would last me 24 hours.  I scanned my books and found this delicious and fairly simple recipe from Alice Medrich’s book, Bittersweet.  Sylvie jumped right in, enjoying prepping the ramekins (buttering and sugaring) while I got the ingredients together.  Not too much work here – just whipping up egg whites which I guess is the only part that some may find intimidating – but it isn’t.  The best thing about these is that you can make them up to two days in advance (store in the fridge) – and bake them on the day you plan to serve which is such a treat for a dinner party.  Make these and enjoy!

Please use the BEST chocolate you can possibly find and afford as this dessert will showcase that chocolate.  Alice Medrich uses 70% bittersweet chocolate.  I used half 70% bittersweet chocolate and half 62% semisweet – as I was not certain that the kids would like it if it was too bitter.  Up to you – and you know your guests.  If you only have semisweet chocolate and would like it richer in chocolate flavor then you can reduce the sugar to 1/4 cup if desired as well.

This recipe calls for eight 6 oz. ramekins.  I used that size but also added 2 larger ramekins and with added baking time they worked just as well.

I doubled the following recipe.

bittersweet chocolate souffles (from Alice Medrich’s Bittersweet with the addition of a speck of salt):

about 2 – 3 tablespoons sugar for ramekins
little melted butter for ramekins
8 ounces bittersweet 70% chocolate, finely chopped (or as mentioned above a sweeter chocolate if preferred)
1 tablespoon unsalted butter
1/3 cup milk (this worked with the skim I had in the house but if you have whole, go for it)
3 large eggs, separated, at room temp
plus one large egg white, room temp (I forgot this!  So my rise wasn’t great…but yours will be!)
1/8 teaspoon cream of tartar
1/4 skant teaspoon kosher salt
1/3 cup sugar

topping:
1 cup heavy cream
1/2 teaspoon pure vanilla extract
1 tablespoon sugar

If you are baking the soufflés immediately, then preheat the oven to 375 degrees and place the rack in the lower third of the oven.

Melt a little butter and with a pasty brush or paper towel, cover the entire ramekin, including the top lip.  Place some sugar on top of the butter and rotate the ramekin around so that the sugar sticks to all of the butter.  As you rotate, pour the extra sugar into the next ramekin and begin again.

Place the chocolate, butter and milk in a medium sized metal bowl and place over a pot of barely simmering water (water shouldn’t touch the bowl). (Or use a double boiler.)   Gently melt and remove the chocolate from the water bath once smooth.  Add the egg yolks and mix well.  (Batter might seem oddly stiff at this point, don’t worry.)

With the whisk attachment and on medium speed (or hand held beaters) beat the egg whites (remember to add the 4th white) with the cream of tarter and salt until soft peaks form (so eggs have a form, but they don’t really hold their shape.)  Then gradually pour in the 1/3 cup sugar and then mix at high speed until the whites get nice and stiff but don’t look dry.

Fold about a fourth of the egg whites into the chocolate/egg mixture to lighten it a bit.  Then fold in the remaining whites carefully – and try to incorporate with out over mixing.

Fill each ramekin 3 quarters full.  ** The soufflés can be prepared up to this point, and placed covered, and refrigerated for up to 2 days – then bake directly from the fridge.

Place the soufflés on a baking sheet and place in the oven.  Now this is the most important part…as you don’t want them too soft and don’t want them to dry out.

Bake until they rise and crack on top.  A wooden skewer or toothpick should come out with moist and gooey but not liquidy.  This will likely take 14-16 minutes but you really need to watch them as all ovens vary.  Oh, and if you refrigerated them, they might take a minute or two longer.

To make the whipped cream, place all ingredients into the mixer and whip on medium high speed until it holds a soft shape.  Please don’t buy whipped cream.  Really, this makes a huge difference!

Serve immediately from oven with a little powdered sugar and a dollop of whipped cream.  Yum!

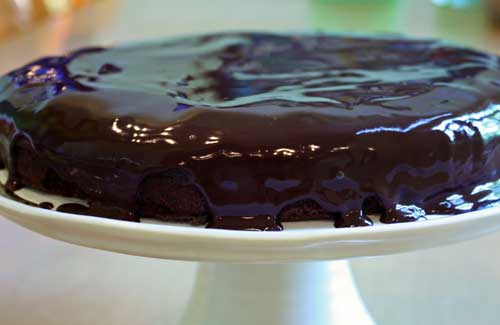
chocolate decadence cake

Chocolate chocolate decadence.  Delicious, delightful and rich.  Rob loved it and was thankful for a chocolate dessert in the midst of summer crisps and cobblers.  The kids too I think, unless I’m making that up.  (Made this a long time ago and lost my notes!)  I was a bit lazy this summer…my vertigo was mostly gone, nothing was hurting too much body wise save for the tend0nitis in my bum (I have to say bum now because the kids hate it when I say ass. Or butt. They are funny.)  I did bake though, but not a lot.  I photographed, but didn’t edit.  And then I just could not seem to write.  I’m sorry!  I don’t have much more to write since I’m terribly forgetful – however I do remember that I was upset because the cake took a lot less time than it stated in the recipe.  And although I checked on it 10 minutes early, it already seemed over-baked.  I fretted because I had friends coming over but Rob said DO NOT toss it and with a little ice cream all would be OK (as usual!)  The cake in the end, I do remember, was delicious.  Really good, and yes, slightly over-baked so it will be even better for you since you will learn from me.  OK, I can ramble on and on, but I’ll stop and just tell you that I found this recipe on the blog Joy The Baker.  As I’ve said before, I happen to be a fan and this cake looked too good to ignore.  Joy found this recipe from Tuesdays with Dorie back in 2008 and I happen to have Dorie’s cookbook that also holds the recipe.  It will be a perfect fall dessert that will be sure to bring many smiles on your chocolate lovers faces.

Enjoy –

Continuing on this lazy theme, I’m going to send you the link to Joy’s blog.  I followed her directions, but I used a simple ganache for the glaze.  And that recipe is below.

Oh, and please check the cake 15 minutes early.  Maybe mine was a fluke – but check and double check so as not to over bake.

almost fudge gateau from Joy the Baker (click on link below for recipe):

JOY THE BAKER

simple ganache:

3/4 cup heavy cream
6 oz bitter or semi sweet chocolate (chopped up)

Place chocolate in a heat proof bowl.  Heat cream until it just almost boils.  Pour over the chopped chocolate.  Let sit for a minute then gently whisk to combine.

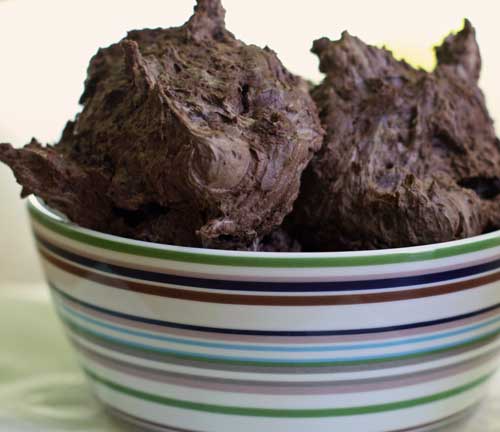
fudgy puffy chocolate cookies (changed the name so you don’t confuse these with my traditional meringues)

Chocolate-y, gooey on the inside and crispy on the outside, these meringue cookies are scrumptious.  Extra good.  Unlike many meringues, these are a bit soft in the center, very flavorful, and are not as cloyingly sweet as meringues can often be.  We all loved these.  Me, Rob, Greg, Andy, and Sylvie – I think I also gave to Lauren and Zach and pretty sure they enjoyed too – but it was a while ago and I can’t really remember.  Oh well, trust me and my family.  Good stuff.  These are definitely best the day you make them.  However, after 2 days, Greg’s friend Henry was here and he sampled what looked like dry cookies (to me) and pronounced them delicious.  Enjoy-

fudgy meringue chocolate cookies (from March 11 Bon Appetit ):

1 cup bittersweet (divided) chocolate chips (do not exceed 61 percent cacao)
1 1/2 cups confectioners’ sugar, (divided)
1/3 cup unsweetened good quality cocoa powder (I used natural Callebaut)
2 teaspoon cornstarch
2 large egg whites, room temp
1/2 teaspoons vanilla extract
1/8 teaspoon cream of tarter
2 pinches kosher salt

Preheat oven to 350 degrees.  Line baking sheets with parchment.

Melt 1/2 cup of the chocolate in a small bowl over simmering water or in a microwave safe bowl for 15 second intervals until the chocolate is melted.  Try very hard not to burn the chocolate.  You are melting, not cooking it.

Cool the chocolate to lukewarm – about 10 minutes. While it cools, whisk together 1/2 cup of the sugar, cocoa, and cornstarch in a small bowl and set aside.

With the whisk attachment of your mixer or with hand held beaters, beat the egg whites until a little frothy.  Add the salt and cream of tarter and continue to beat until soft peaks form.

Slowly add the remaining one cup of sugar – add it in 4 additions and beat to blend after each addition.

Continue to beat until meringue is thick and glossy like marshmallow fluff.  Beat in cocoa mixture.  Then fold in the melted chocolate and then the remaining chocolate chips.  Try not to overwork the meringue at this point.

Drop the batter by rounded tablespoons onto the sheet pans.  Bake cookies for about 11-14 minutes.  Reverse sheet pans and turn around as well half way through.

Try not to over-bake or they will dry out.

Let cool and then eat!

coconut tart with chocolate smear (non dairy, flourless and also butter-less))

Rob loved this.  Loved it.  A lot.  He ate slice after slice as it sat on our counter throughout the weekend.  He thought it tasted very rich and creamy despite the lack of butter or cream.  Ali and family too thought delicious – like a Mounds bar.  I’m not a coconut fan, so honestly very hard for me to judge but even to me, it tasted pretty good.  The yummy recipe comes from Mark Bittman’s new cookbook, Food That Matters and wow – what a terrific book!  Thank you mom.  This was very easy to make – a good one to throw together with your kids (or on your own) and serve to guests as well.

The recipe makes one small 9 inch tart.  Feel free to double the recipe and make two if you are baking for a crowd.  Enjoy-

Mark Bittman suggests topping the whole tart with fresh raspberries or cut up strawberries if you want to change it up.

coconut tart with chocolate smear (very slightly adapted from Mark Bittman’s Food That Matters):

2 cups shredded, unsweetened coconut (I used sweetened – all I had in the house)
1/2 cup sugar (if using sweetened coconut add only 1/4 cup sugar)
2 eggs – separated
1 teaspoon vanilla extract
1/2 teaspoon kosher salt
6 ounces bittersweet chocolate, roughly chopped
1 tablespoon sugar
1 cup coconut milk (light is OK too)

Preheat the oven to 350 degrees. In a medium sized bowl, mix, together the coconut, sugar, egg whites, vanilla and salt.  Press the mixture into the bottom and up the sides of a 9 inch tart pan.

Bake until the coconut shell is firm and nicely toasted (nice golden color) about 13-20 minutes – keeping in mind that you will not bake it again.

Meanwhile, in a medium saucepan, combine the chocolate, egg yolks, coconut milk and sugar and place over low heat.  Whisk and cook almost constantly until the chocolate is completely melted and steaming.  Be careful – do not let the mixture boil and separate.

When the tart shell comes out of the oven, spread the chocolate mixture into it.  Let the tart sit and cool – and become firm before cutting and serving.  The tart will keep covered and refrigerated for a day or two (although we kept ours on the counter and it held up pretty well).  Enjoy-