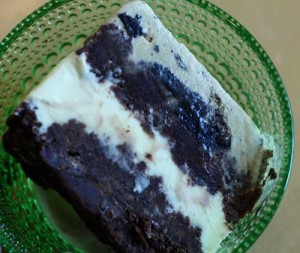
ice box zebra delight

This is a very old fashioned dessert – but it has never ever lost its appeal.  Mark said “This is slice number four…I’m going to have to ride (my bike) 100 miles tomorrow morning!”  And Mike was lamenting the absence of my ginger cookies but sang a different tune when he sampled this treat.  He said “So light, so airy, hands down the best thing you have ever made!”  This is a perfect treat for summer  –  you can make it in advance and although rich in chocolate flavor it is not too heavy.  Serve it with ice cream and you have such and easy sweet to serve.  My mom made this when we were young and I remember thinking that it must be so difficult to make.  But as usual (with me) it is not!  Well, if you decide to make thin chocolate wafer cookies on your own, then yes, this is more work.  But I happen to love the Famous Chocolate thin chocolate wafters by Nabisco that you get in that yellow box.  I do.  The recipe for this is actually on the box!!  I tweaked it a bit – making it in a cake pan so that I could invert it and coat with ganache – but you don’t have to – really up to you.  If you follow the directions on the box you simply make a zebra roll.  And that is quite good.  I’ll list the ingredients and then how I made this one – and you can play around.  Even if you throw all the cookies and whipped cream in a big bowl, and served with a spoon and some chocolate sauce and ice cream…well – that is just the same!   Enjoy this one!’

Basic recipe is first, then what I did in addition is below that.

ice box zebra delight (from the Famous Chocolate thin chocolate wafer box):

2 cups heavy cream
1 teaspoon vanilla
1 package (9 oz) Famous Chocolate Wafers
ice cream
ganache – optional

With whisk attachment beat the cream until stiff peaks form.   Towards the end, add the vanilla

Spread 1-1/2 teaspoon (I did a bit more) whipped cream onto each wafer, stack then stand on the edge on a plate.  Keep going until you finish with the cookies.  Spread the remaining cream on top and sides.

Then refrigerate for at least 4 hours.  Cut into diagonal slices to serve.

You can also freeze until firm and wrap tightly and store for up to 2 months!  Remove from freezer and place in fridge for at least an hour until you are ready to serve.

I lined a cake pan with plastic wrap – so that the sides overhang.  I placed some whipped cream down first, then i filled the bowl with the long tube that is described above — I put that in the center.  After that I just layered the cookies and the cream all around.

Once frozen, invert the pan and pull the frozen dessert out with the help of the plastic wrap.  If it is too cold, just run the bottom of the pan under hot water.  Then take your ganache (the recipe is in the blog) and pour over the concoction and cover the top and sides.  I served with both chocolate and vanilla ice cream.

Alternatively you can just drizzle ganache on top – or skip it.  You can also place all in a bowl, and scoop out with a spoon.  Again, feel free to add some chocolate sauce in there.

You cannot go wrong!

Enjoy –

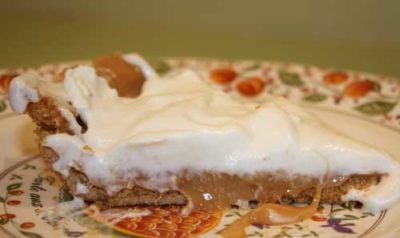
banana caramel cream pie

Lousy photo I know!  Forgot to take picture and this is on a plate, mostly eaten, with berry ice cream.

This is part of an email I received in the morning after serving this pie the night before:

Gregg just came in from a run, opened the fridge and asked if there was any more of your pie!  He said that it was “the most decadent outstanding thing he has ever eaten”… coming from a non dessert eater, not a bad compliment!  So I found the recipe on your blog, but where did you add the bananas?
Nice, right?  So yes, this is very similar to the salted caramel pie – but the caramel is a little richer (omgoodness) and there is the addition of bananas.  So delicious.  Rich though.  VERY rich.  Beth called me the morning after I brought the pie to her house and asked if I could bring some back (she made me take it home the night before!)  She said Jason (her son) wanted to try it because Sarah (her daughter) told him how good it was (she sampled the night before).  I also think Beth wanted it too and regretted forcing it upon me as I left her house!   I was more than happy to get it out of my house because although I do have decent restraint, I couldn’t stop taking spoonfuls in the early am! And honestly at that point it was making me feel sick.  Anyway – that is how Gregg was lucky to find it in his refrigerator the next AM.   This recipe came from Jill O’Connor’s cookbook Sticky, Chewy, Messy, Gooey.  And it is a good one!  Enjoy –

You can start this pie the day before you plan to serve it if you like.  Just save the bananas and whipped cream for the next day.  You can also make the caramel filling 2-3 days before and store in a container until ready to use.  This would be nice also in parfait glasses — no crust and just layer with whipped cream and bananas.

banana caramel cream pie (slightly adapted from cookbook above):

filling-

2 cans (14 oz) sweetened condensed milk
1 teaspoon pure vanilla extract
1/8 cup firmly packed dark brown sugar
3 tablespoons butter (melted, unsalted)
1/2 teaspoon kosher salt

crust –
2 1/2 cups wholemeal digestive biscuit crumbs — or graham cracker crumbs
1/4 cup sugar
1/2 cup (1 stick) unsalted butter, melted
1/3 teaspoon kosher salt

topping –

3 medium barely ripe bananas
2 cups heavy cream
1.5  to 2.5  tablespoon sugar (to taste) – I prefer my whipped cream to be less sweet here since the caramel is very sweet.

Place rack in middle of oven and preheat to 400 degrees.

For the filling, stir together the condensed milk, vanilla, dark brown sugar, melted butter and salt.  Place mixture in a 6 cup oven proof dish – a Pyrex pan is good.  To see if 6 cups will fit in your pan, just pour 6 cups of water into it and see.  If you need to go bigger that is fine, but cooking time will be less.  Cover the pan with foil.

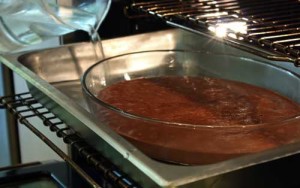
Place the pan with the covered mixture in it into another pan (9×13) and place in the oven.  Similar to chocolate photo below (although your’s will be covered and likely in a rectangular pan.)  Next pour very hot water into the larger pan so that it comes up about 1/2 way up the sides of the dish.  Bake this mixture until it as reduced and thickened and turned a nice toasty caramel color.  This should take 1 1/2 -2 hours – and try to stir with a spatula every 15 minutes or so.

When done, carefully remove from oven and the water bath and let cool.  Reduce temp to 350 degrees.  If you are waiting to use the filling cover and refrigerate once cooler.

For the crust — in a medium bowl, combine the crumbs, butter and sugar and salt.  Stir until crumbs are wet and all is combined.  Press into a 9 inch pie plate or a 9 inch tart pan (3 inches deep).  Bake at 350 until fragrant and a little crisp about 8-10 minutes.  Place on rack and let cool.

When the caramel is cool but still soft, spoon into the cooled crumb crust – spread in an even layer an refrigerate until the filling is set.  You can cover and keep pie at this point for 24 hours.  Or, just chill for 2 hours.

Cut the bananas into 1/2 inch thick slices and place them all over the caramel filling.

Place the heavy cream and sugar in the bowl of your electric mixer – or with hand held beaters and whisk on medium speed until medium peaks form.  Spoon the whipped cream on top of the bananas – and make sure to cover the bananas to prevent browning.

Chill in fridge until ready to serve.

Yum!

matzoh candy again!

I’m re-posting this from a year ago.  Sorry to repeat, but just so good…Happy Passover!

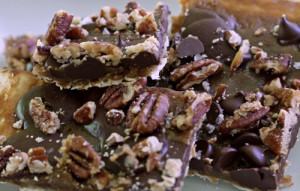
Many of my friends (and kids friends) keep Passover, so I wanted to try this recipe that I’ve heard about throughout the years.  I like the idea of a handy treat for those who celebrate.  My friend Stephanie happily shared the recipe from her “Passover Stuff” book and I must tell you that this is really good and I thank you (Stephanie).  Really good.  Sweet, yes, but I added some bittersweet chocolate and some delicious sea salt and I have to say this is better than I expected and utterly addictive.  I had friends over this weekend – none who happen to celebrate Passover and they were munching away and loving it.  I mentioned that it didn’t look so pretty but they were undeterred.  They all loved and commented on the salty caramel and nutty chocolate (the matzoh just holds it together).  I used toasted pecans…but really most nuts will do – walnuts, almonds, pistachios – maybe even some raisins too.  You can go really crazy here and have fun.  Serve for your family and friends who happen to celebrate (or not!)  Happy Passover.  Enjoy-

If you have time – find some Maldon sea salt.  It is great – flaky and tasty.  You can order online but pretty certain whole foods sells it.  (Great for salads too – with olive oil.)

chocolate/caramel matzoh candy with sea salt (slightly adapted from Stephanie’s “Passover Stuff”)

4 Matzoh boards (I used salted, but believe unsalted OK too)
1 cup (2 sticks) unsalted butter
1 cup packed dark brown sugar
2 cup chocolate chips or chunks (I used half semi and half bitter – but use what you like – Stephanie said she’s tried milk chocolate too)
1 cup (or more to taste) toasted pecans, walnuts, or almonds (raisins too optional)
1/2 teaspoon good quality flaky sea salt – or kosher salt

Preheat oven to 450 degrees.  Line a sheet pan with parchment.  (Reader Jessie said she made this without the parchment and the toffee spread to the underside…she said it was fantastic.)

Arrange matzoh in a single layer – break if necessary and try to cover the whole sheet pan.

Combine the butter and brown sugar in a small sauce pan over medium heat and bring to a boil – stirring constantly.  Cook until syrupy — about 3 minutes or so.

Pour the toffee mixture over the matzoh and spread it out evenly (this is hot be careful.)

Place in oven and bake until bubbly – about 4 minutes (now it is extra hot).  Remove from oven and sprinkle the chocolate over the hot bubbly mixture.  Place in the oven again for about 30-60 seconds more.  (The second time I made this I did not place the chocolate back in the oven.  I let it be…prettier appearance and the chips all over were delicious.)

Now you have a choice…leave as is – or you can spread the chocolate around.  Either way – its a matter of appearance.  I happen to like to see the chocolate chips and chunks.  Sprinkle the toasted nuts over and then the flaky salt.  (Reader Michelle used salted peanuts and said it was AMAZING.)

Refrigerate until the chocolate is firm about 30 minutes to and hour.  cut or break into pieces.  I happen to like this cold – so I store in the fridge.  The chocolate discolors over time, but it is tasty!

Save the crumbs for an ice cream topping.

Enjoy-

bittersweet chocolate soufflé (you can make in advance!) and flourless for passover

Big hit.  Big Big hit.  Sooo delicious.  Pure chocolate, pure happiness.  Rob ate one, and said – you know, I could easily eat the whole tray and I mean it.  Sylvie, Andy and Greg all said so good mom…so so good.  I gobbled mine up fast – as if someone was trying to steal it from me.  Greg and Andy’s friends were over – Connor said, “did I just eat that, or did I die and go to heaven?”  He sure knows how to compliment me (maybe he just wants to keep the treats coming.)  Matt was also verrrry happy and loved the freshly whipped cream that went with it.  I decided to make these on the fly on Saturday afternoon.  I had all the ingredients in the house and I bet you do too!  (Maybe?)  Rob and I thought we’d go out and catch up – but suddenly we had 5 extra boys and at that point it just didn’t seem like a good idea.  Rob seemed so sad, I think he was looking forward to a yummy meal (since he splurges a bit on Saturday nights) and here we were ordering in.  In addition to all that, this was my last meal because I had to fast (liquids) on Sunday for my upcoming colonoscopy on Monday so I too really wanted a good treat that would last me 24 hours.  I scanned my books and found this delicious and fairly simple recipe from Alice Medrich’s book, Bittersweet.  Sylvie jumped right in, enjoying prepping the ramekins (buttering and sugaring) while I got the ingredients together.  Not too much work here – just whipping up egg whites which I guess is the only part that some may find intimidating – but it isn’t.  The best thing about these is that you can make them up to two days in advance (store in the fridge) – and bake them on the day you plan to serve which is such a treat for a dinner party.  Make these and enjoy!

Please use the BEST chocolate you can possibly find and afford as this dessert will showcase that chocolate.  Alice Medrich uses 70% bittersweet chocolate.  I used half 70% bittersweet chocolate and half 62% semisweet – as I was not certain that the kids would like it if it was too bitter.  Up to you – and you know your guests.  If you only have semisweet chocolate and would like it richer in chocolate flavor then you can reduce the sugar to 1/4 cup if desired as well.

This recipe calls for eight 6 oz. ramekins.  I used that size but also added 2 larger ramekins and with added baking time they worked just as well.

I doubled the following recipe.

bittersweet chocolate souffles (from Alice Medrich’s Bittersweet with the addition of a speck of salt):

about 2 – 3 tablespoons sugar for ramekins
little melted butter for ramekins
8 ounces bittersweet 70% chocolate, finely chopped (or as mentioned above a sweeter chocolate if preferred)
1 tablespoon unsalted butter
1/3 cup milk (this worked with the skim I had in the house but if you have whole, go for it)
3 large eggs, separated, at room temp
plus one large egg white, room temp (I forgot this!  So my rise wasn’t great…but yours will be!)
1/8 teaspoon cream of tartar
1/4 skant teaspoon kosher salt
1/3 cup sugar

topping:
1 cup heavy cream
1/2 teaspoon pure vanilla extract
1 tablespoon sugar

If you are baking the soufflés immediately, then preheat the oven to 375 degrees and place the rack in the lower third of the oven.

Melt a little butter and with a pasty brush or paper towel, cover the entire ramekin, including the top lip.  Place some sugar on top of the butter and rotate the ramekin around so that the sugar sticks to all of the butter.  As you rotate, pour the extra sugar into the next ramekin and begin again.

Place the chocolate, butter and milk in a medium sized metal bowl and place over a pot of barely simmering water (water shouldn’t touch the bowl). (Or use a double boiler.)   Gently melt and remove the chocolate from the water bath once smooth.  Add the egg yolks and mix well.  (Batter might seem oddly stiff at this point, don’t worry.)

With the whisk attachment and on medium speed (or hand held beaters) beat the egg whites (remember to add the 4th white) with the cream of tarter and salt until soft peaks form (so eggs have a form, but they don’t really hold their shape.)  Then gradually pour in the 1/3 cup sugar and then mix at high speed until the whites get nice and stiff but don’t look dry.

Fold about a fourth of the egg whites into the chocolate/egg mixture to lighten it a bit.  Then fold in the remaining whites carefully – and try to incorporate with out over mixing.

Fill each ramekin 3 quarters full.  ** The soufflés can be prepared up to this point, and placed covered, and refrigerated for up to 2 days – then bake directly from the fridge.

Place the soufflés on a baking sheet and place in the oven.  Now this is the most important part…as you don’t want them too soft and don’t want them to dry out.

Bake until they rise and crack on top.  A wooden skewer or toothpick should come out with moist and gooey but not liquidy.  This will likely take 14-16 minutes but you really need to watch them as all ovens vary.  Oh, and if you refrigerated them, they might take a minute or two longer.

To make the whipped cream, place all ingredients into the mixer and whip on medium high speed until it holds a soft shape.  Please don’t buy whipped cream.  Really, this makes a huge difference!

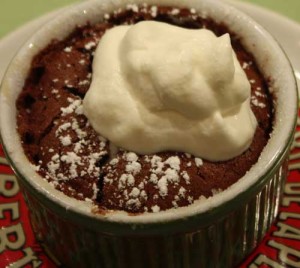
Serve immediately from oven with a little powdered sugar and a dollop of whipped cream.  Yum!

salted caramel pie (don’t miss this one)

Although my memory is hazy  from a night or day (?) a few weeks ago, I do remember Jason (my non chocolate loving friend) standing up and exclaiming “Lisi, hands down the BEST thing you ever made!”  (Kind of like I won the game!)  Everyone else agreed by mmmm…ing and eating as he made this pronouncement.  This pie is ridiculously and particularly easy to pull together and the taste is so decadent and luscious.  It truly is.  I decided to make it again last weekend and Rob and Steph couldn’t get enough of it.  They mmm…ed too and were delighted to keep the pie for friends who were coming over later.  My friend Beth poo poo’d the dessert when I told her about it saying “but where is the chocolate?!”  but she too tried it and loved it – although we both did agree that some sort of chocolate addition would also be quite awesome.  Maybe a chocolate wafer crust and/or bananas too.  Next time.  Anyway, this pie is sweet and salty – gooey and rich.  I love love love it.

Oh and btw, you can make the filling 3 in advance to make life easier on the day you plan to serve it.

salted caramel pie (very slightly adapted from Simplethings Sandwich & Pie Shop in LA written up in the November issue of Food & Wine):

1 1/4 cup graham cracker crumbs
4 tablespoons unsalted butter, melted
1/4 cup light brown sugar
1/4 teaspoon kosher salt
two 14 oz. cans sweetened condensed milk
fleur de sel or Malden sea salt (delicious)
1 1/2 cups heavy cream
1 1/2  tablespoons confectioners’ sugar

Preaheat oven to 350 degrees.  Mix together the graham crumbs, brown sugar, melted butter and salt.  Once all incorporated place and press into an 8-9 inch glass or metal pie pan.  Place in the oven for about 11 minutes until fragrant and lightly golden.  Remove and set aside.

Increase oven temp to 425 degrees.

Place the condensed milk into a 9×13 pyrex pan – or of similar size.  Cover the pan with foil.  Then place that pan into a bigger roasting pan and place in the oven.  Fill the roasting pan (the outside pan) with enough hot water so that it comes about 1/3 up the sides of the condensed milk pan.  I like to do this with the pans in the oven so that I don’t have to carry the pan with water sloshing around.

Now bake the condensed milk for about 2 hours.  During this time, lift the foil and mix with a spatula.  Do this 3-4 times while it cooks.  It should thicken like dolce de leche  and turn nice and golden (versus the whitish color it started out as).  Don’t worry if lumpy – you can smooth out later.  Also – check the water level during this time and add more if necessary (keeping the water 1/3 up the sides of the pan.)

Remove from the oven and let cool.

Scrape caramel into pie crust.  Cover with plastic wrap (spray this with veggie oil spray so that it doesn’t stick to the caramel) and let sit until the filling is chilled and set (about 4 hours).

Whip up heavy cream and sugar (check out whipped cream post for more instruction).  Sprinkle with the fleur de sel/Maldon salt (best!)

And slice and serve…wait for the mmms….

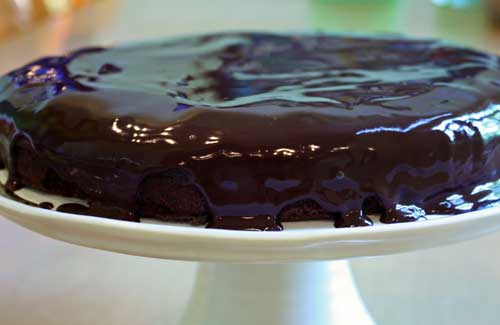
chocolate decadence cake

Chocolate chocolate decadence.  Delicious, delightful and rich.  Rob loved it and was thankful for a chocolate dessert in the midst of summer crisps and cobblers.  The kids too I think, unless I’m making that up.  (Made this a long time ago and lost my notes!)  I was a bit lazy this summer…my vertigo was mostly gone, nothing was hurting too much body wise save for the tend0nitis in my bum (I have to say bum now because the kids hate it when I say ass. Or butt. They are funny.)  I did bake though, but not a lot.  I photographed, but didn’t edit.  And then I just could not seem to write.  I’m sorry!  I don’t have much more to write since I’m terribly forgetful – however I do remember that I was upset because the cake took a lot less time than it stated in the recipe.  And although I checked on it 10 minutes early, it already seemed over-baked.  I fretted because I had friends coming over but Rob said DO NOT toss it and with a little ice cream all would be OK (as usual!)  The cake in the end, I do remember, was delicious.  Really good, and yes, slightly over-baked so it will be even better for you since you will learn from me.  OK, I can ramble on and on, but I’ll stop and just tell you that I found this recipe on the blog Joy The Baker.  As I’ve said before, I happen to be a fan and this cake looked too good to ignore.  Joy found this recipe from Tuesdays with Dorie back in 2008 and I happen to have Dorie’s cookbook that also holds the recipe.  It will be a perfect fall dessert that will be sure to bring many smiles on your chocolate lovers faces.

Enjoy –

Continuing on this lazy theme, I’m going to send you the link to Joy’s blog.  I followed her directions, but I used a simple ganache for the glaze.  And that recipe is below.

Oh, and please check the cake 15 minutes early.  Maybe mine was a fluke – but check and double check so as not to over bake.

almost fudge gateau from Joy the Baker (click on link below for recipe):

JOY THE BAKER

simple ganache:

3/4 cup heavy cream
6 oz bitter or semi sweet chocolate (chopped up)

Place chocolate in a heat proof bowl.  Heat cream until it just almost boils.  Pour over the chopped chocolate.  Let sit for a minute then gently whisk to combine.

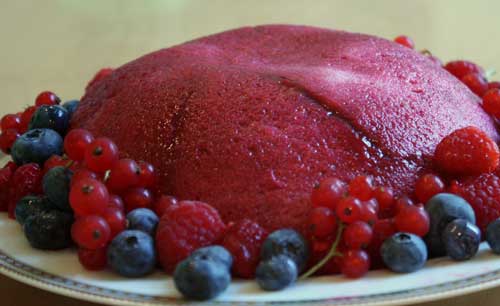
berry summer pudding

Scrumptious berries with very little adornment, cold and tasty, pure and simple surrounded by a layer of white bread – now sweet red bread.  This one really intrigued people.  “What is that?”  “What’s on the outside.”  “What’s on the inside.”  I said well, the outside is bread.  “That’s bread, white bread?” Debbie exclaimed.  Shari and Nancy kept repeating “bread bread?”  Yes, bread bread surrounding an obscene amount of berries and berry juices that sit for a night or two and turn into beautiful and interesting bright red dessert.  Sylvie said she liked it but the outside was the best.  (She does love white bread.)  Darren muttered good good and and Nancy and Rob echoed him.  Someone said awesome and that it looks heavy but its not.  And Jeff said it was perfect for 108 degree day (it was hot and he grilled for us).  I brought this to another BBQ and everyone who tried it gave it the thumbs up.  Jason and Marco especially – my fruit-loving friends.  Serve with freshly whipped cream this is a lovely light and different summer dessert.  Alice Medrich once again really prompts me to try new things.  She said that this summer pudding was described in Helen Gustafson’s memoir The Agony of the Leaves.  And Helen herself recited the recipe to her.  Give it a whirl, it certainly begs for discussion 🙂

This is best if you let it sit for two days although one is fine too.

This serves only about 5 or 6 people – feel free to double it and make two like I did.

berry summer pudding (slightly adapted from Alice Medrich’s book Pure Dessert):

3-4 slices white sandwich bread with a tight crumb
4 cups ripe berries (mixture of raspberries, blackberries and a handful of red currents if possible)
blueberries – I added some fresh blueberries to the recipe — you can ignore or use –
Alice also suggests boysenberries if you have them to put in the mix
1/2 cup sugar (well, to taste)
2 pinches kosher salt

serve with freshly whipped cream

Grease a 1 quart bowl (5-6 inches across the top and 3-4 inches deep) and line it with plastic wrap.  Try to press it into the bowl as crease free as possible.  Make sure there is overhang too.

Cut the crusts off the bread. then cut the bread in wedges.  Place the wedges in the bowl – trying to minimize space in between.  Feel free to press the bread together to make a tight fix.

In a nonreactive saucepan (big enough so that the berries are only 1-2 layers deep) heat the berries and sugar.  Turn them gently so that they throw off their juices.  You want to do this slowly and do not boil.  As Alice says, ” the aim is not to cook the berries but only to warm them and coax forth their juices.”

Adjust the sugar if necessary, add the pinch or 2 of salt.  At this point I threw in a few uncooked blueberries just for fun.  Up to you.

Spoon the prepared berries into the bread lined bowl.  Then fit more bread on top to cover.  Then fold the plastic wrap over to cover.  Next place a small saucer on top and weight it with a can of beans or something heavy.  Then place in the fridge at least overnight – 1 or 2 days even better.

To unmold, pull back the wrap and invert bowl onto plate – center it because it is hard to move after you invert it.  Serve with fresh berries and freshly whipped cream.

Enjoy –

delicious iced coffee

Refreshing and full of flavor this iced coffee is GREAT.  Really and truly tasty.  Every winter I think I’ll never need to switch to iced coffee again, and then suddenly the heat is upon us and it’s all I want first thing in the AM.  The way I made iced coffee was good, but it was a pain in the a__  to make each and every day.  So when my friend Melissa told me about a new recipe she found, I was eager and ready to try.  She loved it.  Jason loved it (her husband) and I loved it too!  I made mine with hazelnut and vanilla flavors – and Melissa, she made a strong blend (she’s a real true coffee lover) …but we are both very happy with the results.  Melissa found the recipe from the blog, The Pioneer Woman Cooks.  I simply followed Ree’s directions which were easy, and her write up humorous and fun.  I guess my only addition is to froth my milk.  I froth it in my Nespresso (the cold froth setting BTW) and then pour that on top.  It looks so pretty and I look forward to it with my Healthy 5 Grain Cereal Bowl – and wow – you’d think each day was a birthday treat – but it isn’t…it is just my breakfast!  Enjoy-

delicious iced coffee

Here is the link to the recipe:

http://thepioneerwoman.com/cooking/2011/06/perfect-iced-coffee/

Not much to add to her directions – but I will let you know that the cheese cloth can be a little tricky.  I happen to have a really really fine sieve, and I bought a course grind so that helped…but just take your time.  You can also split the recipe in half to make it a bit more manageable.  I did the second time around and easier for me to handle.

OK, more recipes coming soon…just haven’t had the time to write them up lately!!

peach peeling

My peach raspberry crisp was a failure.  Too soupy and the once crisp topping (now soggy) was laced throughout like cereal in milk.  Bummer.  I managed to eat some of it – but it was not blog-worthy.  Peeling peaches, however, is a blog-worthy skill.  Sorry no other real sweet to discuss.  I did make an interesting raspberry tart with a coconut crust, but I haven’t had the time to write about it!  Next week for sure…

Enjoy the weekend and peaches!

peeling peaches:

Prepare an ice bath (bowl of ice and water).

Bring a pot of water to boil – deep enough to cover the peach.  Using a slotted spoon, dip each peach in the boiling water  for 30-45 seconds.  Immediately place peach into ice bath.  Now pull the skin off with your hands.  You can also use a paring knife or give the peach a quick rub with a paper towel.

If the peach skin is not loose, just repeat the above.

ice cream cake (using a failure)

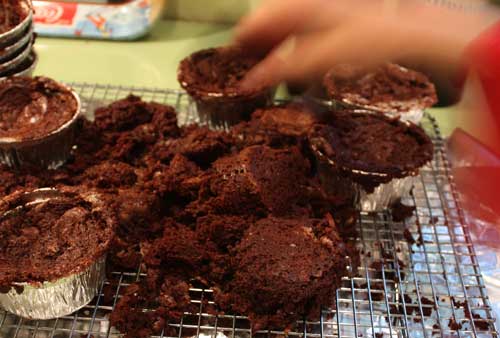
What a megaflop (Sylvie’s word)!  But no worries…you can easily turn a calamity into a triumph (again, she’s using the thesaurus).  On Sunday, Sylvie and I decided to bake together.  I directed, she executed, and we were happy with the scents and smells of rich chocolate filling the kitchen.  We were all smiles until the little brownie cakes came out the oven; we could immediately tell that they were not going to pop out nicely from their molds.  After a few failed attempts, I just gave up.  Luckily Linda, Patrick and cousins Stephen and Daniel are not too picky (well they like a good treat but didn’t mind the appearance) and happily sprinkled the chocolate mass on top of their ice cream and fruit.  I still had a lot left over today and figured I’d freeze the crumbles and throw them into my ice cream here  and there but instead decided to just make a cake with the messy leftovers.  An ice cream cake.  Use this method with any treat that doesn’t turn out well the only caveat being that the failure must actually taste good.  The variations are endless so have fun.  I kept mine fairly simple.  Enjoy –

ice cream cake:

ice cream
cake or brownies

Line a pan with plastic wrap so that it touches the bottom of the cake pan and comes up the sides as well.

Soften your ice cream.  50 seconds under defrost did the trick for me.

Scoop and smooth the ice cream into the lined pan.  Follow with your messy, failed, delicious treat then place back in the freezer.

Add another layer of softened ice cream (a different flavor is nice) and really – you can play around as much as you want.  Add more of your failure to the top (soon to be bottoms) of the cake pan.  (Use another flavor ice cream again if you choose, I only used two different ice creams.)

Freeze again.  Wrap plastic wrap around the cake.  This can sit for a while.

When ready, simple pull the cake from the plastic wrap and place on a cardboard round.  You can press jimmies, sprinkles, ground nuts, m&m’s, on the sides.  You can also make a ganache and pour over the cake as well – so that it has some nice drips around it.  You can also make whipped cream and spread all over.  Delicious.  Cut with a warm knife (run under hot water and wipe carefully with a towel).

Enjoy!