whole wheat (partially) banana bread

This banana bread was good.  It is good!  Great even.  On par with my normal banana bread which you can find here.  I might like this a bit more because it is a bit less sweet and I do love the addition of white whole wheat flour.  It gives the bread a heartier taste and I like the darker color which is irrelevant I know.  

I found this in my new  King Arthur Baking Company’s All-purpose Baker’s Companion book (that is a mouthful).  The book was updated in March of this year and I’m excited to try out a lot of recipes.  This was my first as I had extra bananas and felt like a change.  

As mentioned the recipe includes white whole wheat flour and also a little cinnamon sugar coating on top which is particularly yummy.  I added chocolate chips to some of my loaves (I doubled the recipe) and that was obviously very good (if you like chocolate).  

Not much more to say – well, the recipe calls for a 9×5 loaf pan and I always find that my loaf cakes come out better if I don’t fill the entire pan with batter.  I might use a bunch of small loaf pans or a large and small – but basically I find my cake cooks  more evenly when not stuffed into the pan.  Then I don’t have to overbake the cake in order to make the middle less raw.  You can also use a muffin tin and make a muffin or two with the extra batter.  Or just bake as the recipe is stated and I’m sure it will be fine.  

Enjoy – 

Ingredients

  • 2 cups (454 g) mashed banana (about 4-5 medium bananas).  Weigh everything if you have a kitchen scale.  And if you don’t – buy one!
  • 1/2 cup veggie oil (99 g)
  • 1 cup (213 g) brown sugar 
  • 2 large eggs
  • 1 teaspoon vanilla extract
  • 1 cup (120g) all purpose flour
  • 1 cup (113 g) white whole wheat flour
  • 1 teaspoon baking soda
  • 1/2 teaspoon baking powder
  • 3/4 teaspoon kosher salt (diamond crystal is best in my opinion)
  • 1 teaspoon cinnamon
  • 1/2 c (57g) chopped walnuts, toasted if desired (optional)
  • choc chips if desired
TOPPING
  • 1 tablespoon (13g) sugar
  • 1/2 teaspoon cinnamon 

Directions

Preheat the oven to 350 degrees.  If using glass or stoneware, reduce the oven temp to 325.  Lightly grease the loaf pan and line the bottom with parchment.

In a large bowl, stir together the mashed banana, oil, brown sugar, eggs, and vanilla

Mix together the flours, baking soda, baking powder, salt, cinnamon, and chopped walnuts and chocolate chips (if using) 

Combine the two and gently mix and fold until it is smooth.

Pour into prepared pan(s).

Combine the cinnamon and sugar for the topping and sprinkle all over the batter.

Bake until a toothpick inserted into the center comes out just clean – with a few moist crumbs but no wet batter.

If the bread appears to be browning too quickly, tent the cake with aluminum foil.

Also, if using stoneware or glass pan, increase the baking time 15 m or so.

As you know – I don’t really believe in baking times.  The recipe in the book calls for 60 to 75 minutes.  As mentioned in the intro – I don’t like to stuff my loaf pans and bake for this long.  I find it better to put a little less batter into the loaf pan – and then bake the rest in a mini loaf pan or a muffin or two.

In that case I would check the bread after 30 minutes and just see what’s going on.  If it all is jiggly and wet – you know you have at least 10 m and likely more.  Keep resetting the timer until it is done.

Let cool for 15 m and then run a knife around the edges, and turn it out of the pan onto a rack to cool completely.

Enjoy –

buttermilk cake

I was making Easter treats for the shelter and I realized there was a lot, a lot of chocolate.  And surprisingly there are many many people who don’t love chocolate.  Well, I’m not so surprised anymore.  I had buttermilk in the fridge and wanted to make something for the vanilla lovers. 

I’ve made a few cakes lately that just don’t hit the spot.  One I made from a blog that I had to toss into the garbage.  So I went searching through my books and remembered that I could always count on Flo Bracker.  Her book Baking for all Occasions is one I used to reach for and hadn’t in a while.  I’m really glad I revisited.

This buttermilk cake is simple, light, airy, tasty and well, just that.  All of that.  And it is great served as is – or with a little powdered sugar.  I decided I needed to counteract the chocolate even more by adding berries and whipped cream.  Well.  That did it!  

The top of my cake was scraped a bit because it rubbed up onto my cooking rack but whatever.  Cake is cake and I’ve never been one to make the prettiest of sweets. 

Flo urges you to bring everything to room temp – so try to remember that!  Pull everything out now, and wait 25 m – then begin.  Enjoy this 

Ingredients

  • 1 3/4 cups (7 ounces/200 g) cake flour
  • 1/2 teaspoon baking powder
  • 1/2 teaspoon baking soda
  • 1/2 teaspoon salt (kosher salt or use 1/4 teaspoon)
  • 2/3 cup (5 1/2 fl ounces/165 ml) well-shaken buttermilk (room temp if you can)
  • 1 teaspoon pure vanilla extract
  • 5 1/2 ounces (1 1/3 stick/155 grams) unsalted butter, at room temp
  • 1 1/3 cups (91/2 ounces/260 grams) sugar
  • 3 large eggs lightly beaten
I doubled this recipe btw – and used a bigger pan as I was baking for a crowd.

Directions

If you have a kitchen scale, then use the weighted measurements.  Your cake will have a better chance at being its best self – hah.  If you don’t know how to use the “tare” button then check it out here.  It is a 24 second video that will make your life so easy.  And get a scale – well worth it.

Preheat oven to 350 degrees.  Remember to pull out ingredients to room temp. 

Prep your 8 inch square pan.  You can do this a variety of ways.  I like to spray a little oil in my pan then squish parchement paper in there.  You can also grease and then flour the pan.  You can also line just the bottom of the pan with parchment.  

Whisk together in a small bowl the flour, baking powder, baking soda, and salt.  Measure out the buttermilk and add the vanilla to that.

In the bowl of a stand mixer (or beaters on electric hand held) beat the butter on medium speed until it is lighter in color, clings to the sides of the bowl, and has a statin appearance. This should take a minute or two.  Slowly add the sugar in a steady stream.  Continue to beat on medium speed until light and fluffy.  Another 3-4 minutes or so.  Scrape down the bowl now and then.

With the mixer on medium speed, add the eggs slowly.  About 2 tablespoons at a time, beating after each addition.  Bump the speed up to medium high if your eggs are not incorporated into the batter.  Again, scrape the bowl down here and there.

On the lowest speed, add about 1/3 of the flour mixture followed by half of the buttermilk.  Stop to scrape down the bowl, and don’t overmix here.  Repeat with another 1/3 of the flour and the rest of the buttermilk. Lastly add the last bit of flour.  Again, just mix a little.  Then remove from mixer and use a spatula to gently fold to just combing all ingredients.  

Pour the batter into the prepared pan and Flo says to spread the batter from the center outward, creating a slightly raised ridge around the outside rim.  (Since heat is conducted faster near the metal rim, mounding the batter around the edges ensures the cake will bake more evenly and will be more level.)

Bake the cake just until it is golden brown on top, springs back when lightly touched in the center, a toothpick comes out just clean and the sides are just beginning to come away from the pan.  

She places the time at 45 m – but if I’m remember right mine took less time.  So as usual check earlier and then often at the end of baking.  I’d set my timer for 35 m and just have a look see and plan from there.

Eat as is, or with confectioners’ sugar and/or with berries, whipped cream.  Whatever you like.  

Enjoy-


dairy free chocolate pudding ice cream

I used to kind of scoff at a non-dairy ice cream and I’m sorry about that.  (I don’t think I scoffed out loud though.)  But now that Greg is here, living with us, I’ve taken on the job of making him delicious gluten and dairy free desserts.  He is studying now for a big test so I’m on a mission to find delicious sweets for him – as it is something to look forward to at the end of the day.

Greg had told me about this vegan ice cream cafe called FoMu in Boston that he loved.  He said the ice creams were unreal and that he could safely eat so many of them.  So I bought the FoMu cookbook before the holidays (at the tail end of 2020) and surprised him with some chocolate pudding ice cream.

He was delighted!  And I was too.  Simple, cold, chocolatey, and smooth.  I’ve made it two more times since then as well as the vanilla which I can write about another time. 

I will say that this is best eaten a 4-6 hours after you run it through your ice cream machine.  It is soft and oh just so delicious.  Once frozen overnight it hardens (more than your ice cream) and it has to sit out a bit before you eat it.  And each day it recovers less from the thaw.  But this shouldn’t be a problem because you can eat it all right up ASAP.  Now you have an excuse to.  Also – you can freeze it it smaller portions to avoid re-thawing thawed ice cream.  You can purchase pint/quart containers easily online. 

Ingredients

  • 2.5 ounces or 70 grams premium dutch processed cocoa 
  • 2.5 cups or 600 ml coconut milk
  • 1/4 cup or 50 grams unrefined organic cane sugar (you can sub granulated sugar)
  • 1/2 cup or 120 ml agave 
  • pinch of sea salt I prefer Maldon 
  • 2 tablespoons or 30 ml espresso powder (optional) ( I used 1 of the two) 

Directions

  • In a heavy duty mixer or with an immersion blender, combing the coconut milk, cane sugar, agave and espresso (if you are using) 
  • Sift the cocoa powder into the mixture and mix again to combine well.  Add the salt and taste the ice cream base for flavor – add a tad more salt if it needs it.  Don’t skip this.  But don’t add table salt if that is all you have.
  • Run your ice cream in your machine – and store in freezer in freezer safe containers.  (Again, I buy the ice cream pint containers online).
  • Let freeze for a few hours before serving.  And let come up to room temp for a bout 10-15 minutes if it has hardened overnight.

sugar cookies (and more variations!)

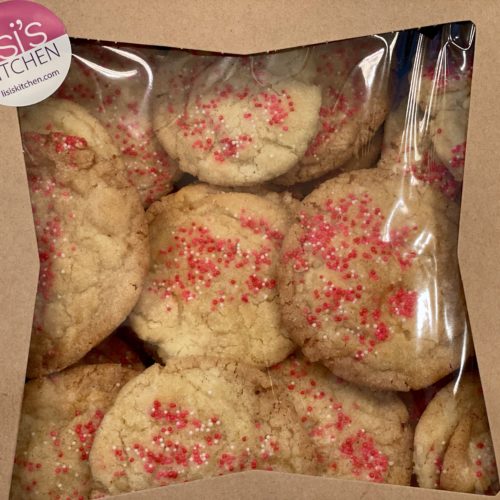
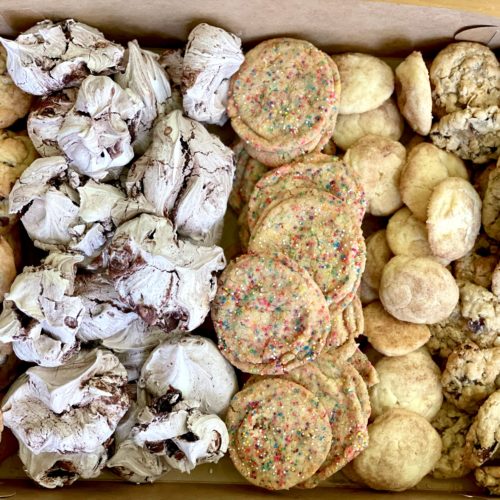
OK, these are terrific.  Seriously good cookies.  Goooood.  The cookies are pictured above in the box and ready to go, in a bigger box with other treats that I will blog about, and on the counter with some valentine treats.  I dropped a box of assorted cookies to my friend Jodi and all she wrote back was “the sprinkle cookies”.   She isn’t that verbose in text but this was the simplest compliment and it made me smile.  I had to add “good, right?” just to get some more feedback and praise.  So I urge you to try these!  The beauty of this recipe is that you can roll them in sprinkles, chocolate sprinkles, mini chips, toffee bits, really anything!  Have some fun.  II’m making more tomorrow so I’ll add some photos then.   

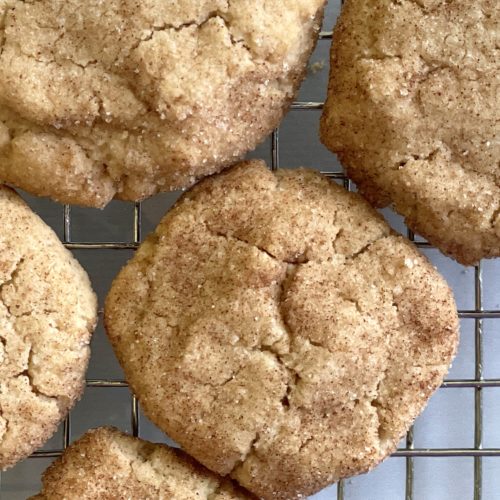
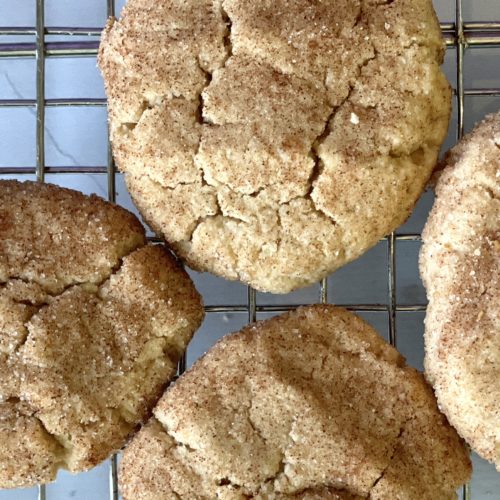
This recipe comes from my newest favorite cookie book called 100 Cookies The Baking Book For Every Kitchen by Sarah Kieffer.  And wow – I’ve made several of her recipes and I’m overwhelmed with the desire to bake the entire book.  This section in her book is called “sheet-pan banging” cookies and it points to her method of making the cookies rippled and flat.  My latest batch were the best looking but of course no photos.  She instructs the baker to make large balls of dough and I know that would be great but so far I’ve only done medium.  Tomorrow I’ll do large.  You can also make them small cute and rippled (a bit).

Although this method can take longer it is fun and worth it.  The bigger the cookie the less you can fit on one pan so be mindful of that.  Sarah has snickerdoodles and molasses and all kind of sheet pan banging recipes to try.  I like this sugar cookie one because of all the variations.  I doubled the recipe and kept some dough in the fridge.  You can then make more as you wish – but make sure the dough comes to room temp a bit so that the goodies will stick to it and the dough will spread.

Oh, and get out your kitchen scale as there are weighted measurements too which I love.  

Enjoy-


Ingredients

  • 2 Cups (284 grams) all- purpose flour
  • 1 teaspoon baking soda
  • 3/4 teaspoon kosher salt (diamond crystal is best)
  • 1/2 teaspoon cream of tartar
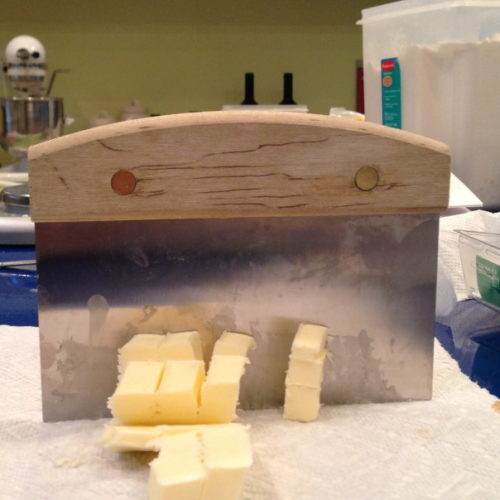
  • 1 cup (2 sticks or 227 grams) unsalted butter, room temp
  • 1 3/4 cups (350 grams) granulated sugar (divided) 
  • 1 large egg
  • 1 tablespoon pure vanilla extract 

Directions

Adjust the oven rack to the middle of the oven and set at 350 degrees.

  • Line the sheet pan(s) with parchment paper or tin foil (dull side up)
  • In a small bowl, whisk together the dry ingredients – flour, baking soda, salt and cream of tartar.
  • With the paddle attachment of stand mixer or with beaters, beat the softened butter on medium speed until creamy, about a minute or 2.
  • Add 11/2 cups (300 g) of the sugar (don’t add it all as I did my first time through)
  • Beat on medium speed until light and fluffy about 3-4 minutes.
  • Add the egg and vanilla and mix on low to combine.
  • Add the dry ingredients and beat on low until just combined.  Remove from mixer and finish mixing by hand so that you don’t overmix 
  • If you want to add sprinkles or chips or other treat into the cookies you can do that now.  Just don’t overdo it.  
  • Next roll the dough into 3 oz (85 g) balls.  Again, you can do these smaller if you choose.
  • Roll each ball into the remaining 1/4 cup of sugar and the addition of your sprinkles, chips, flakes, etc.
  • At this size (3 oz) place 4 balls on the cookie sheet.  And bake one pan at a time.  Again, I made smaller balls and was able to fit 9 on my pan.  But tomorrow I’ll do the real thing.
  • Bake for 8 minutes.  Then lift one side of the sheet pan up about 4 inches and gently let it drop down against the oven rack so that the edges of the cookies set and the center falls back down.  After the cookies puff up again in 2 minutes, repeat lifting and topping the pan.  Repeat every 2 minutes to create ridges and ripples around the edge of the cookie.  Some of my cookies weren’t really spreading so I took them out and kind of banged them on the counter – just a bit.  
  • Bake for 13-15 minutes in total, until the cookies have spread out and the edges are golden brown, but the centers are much lighter and not fully cooked. 
  • Remove from oven and place on a rack to cool for a bit – or, if you are lazy like me just on the counter.  
  • If the cookies are too dark or cooking too much remove from the pan after 10 minutes (and onto a wire rack) to continue to cool.  Or just leave on pan too cool.
  • Enjoy these babies!

snickerdoodles (dairy free, gluten free, no refined sugar)

I’ve made these gems a few times this winter.  I really liked them – the texture and taste.  I crumbed into my vanilla ice cream and it was true bliss.  Andy ate them too – and even vied for them (as they were made really with Greg in mind) which is pretty amazing too.  His friend Steve who is gluten free and Gabi my vegan hair colorist both gave a big thumbs up.  But most importantly, Greg loved them.  He went back to Boston with a little box full and he looked so happy about it.  It was nice to see that smile (for sweets) on my 24 year old as It is hard to bake for Greg given his restrictions (GF, DF).   I found this recipe in Bakerita:100 + No-Fuss Gluten-Free, Dairy-Free, and Refined Sugar-Free Recipes for the Modern Baker by Rachel Conners.  I followed the recipe – although the second time I made them I used refined sugar in the cinnamon sugar blend that you roll the cookies in.  The coconut sugar was fine but the real sugar better – but do what makes you happy.

These are so easy to throw together – but you will probably need to go to the store and get a few things – although if you have food restrictions you may have some of the ingredients already in your pantry.  

Take out your kitchen scale if you have one as Rachel gives us the weighted measurements!

I baked some of these right away and I left some dough in the fridge to bake off as needed.  Fresh baked warm snickerdoodles…well, yum.

Enjoy-

Ingredients

  • 1 3/4 cup (168 g) blanched almond flour
  • 1/4 cup (32 g) coconut flour
  • 1/2 teaspoon baking soda
  • 1/2 teaspoon cream of tartar
  • 1/2 teaspoon salt
  • 1/2 teaspoon cinnamon
  • 1/3 refined coconut oil (67 g), melted
  • 1/3 cup (113 g) maple syrup
  • 1 tablespoon pure vanilla extract 

    TOPPING
  • 1/4 cup coconut sugar (or regular refined sugar)
  • 1 tablespoon cinnamon 

Directions

Preheat oven to 350 degrees and line sheet pan(s) with parchment. 

Whisk together the two flours, the baking soda, cream of tartar, salt and cinnamon.

Melt the coconut oil and mix in the maple syrup and vanilla extract

Mix the wet and the dry until thoroughly combined. 

Prepare the topping by mixing the two ingredients.

With a cookie scoop or spoon, form your cookies.  Roll in your hands a bit then roll around in the topping.  The cookies are delicate so be a bit careful.  I like a lot of sugar and cinnamon so I kind of pressed them into the topping to really coat the cookie.

The size of the cookie depends on you.   Rachel measures about a tablespoon of dough.  You can do that, or smaller if you like.  It will change the baking time a bit (the smaller the cookie the less time to bake).

Place cookies on sheet pan about 2 inches apart (they don’t really spread).  And then flatten a tad with your palm.  

The larger cookie bakes for about 10 minutes.  Mine took a bit longer.  I will say that it is hard to tell when these are done.  You want them to be a nice golden color.  

I decided to use one cookie as a tester and also checked the bottom for clues.  The hard part is that these cookies crumble fairly easily so that tester cookie, although still edible, will likely fall apart.  Anyway, the bottom should look a nice golden brown too.  Try not to overtake though.  This is the trickiest part of making these – trial and error will help.  I hope you like them! 


chocolate crusted banana blondies

Jessie’s text to me after I dropped these nuggets off was “Avery just tried your desserts and said they were a miracle in her mouth!”  Avery is her daughter btw and that made me happy because I too felt the same way but couldn’t articulate it as well.  The chewy banana top and the chocolate crusted bottom are so good together.  The addition of pecans gave these bars additional texture and cut the sweetness which resulted in a treat that went from delicious to scrumptious.  These were featured in the New York Times by food editor (among other things) Melissa Clark.  Her sweet tooth rivals mine and I find I want to bake everything that she writes about.  Her savory recipes are equally impressive.  I have her two instant pot books as well as Dinner, Changing the Game and I use them all frequently.  Enjoy! 

This recipe calls for brown butter – Here is a video review and there are more videos on youtube should you want more instruction.

Ingredients

  • 2 1/2 sticks unsalted butter (1 1/4 cups), divided!
  • 200 grams Famous chocolate wafter cookies (to make about 3 cups of crumbs)
  • 55 grams of light brown sugar (about 1/4 cup)  
  • 1/2 teaspoon kosher salt 
  • 2 ripe bananas 
  • 2 large eggs
  • 455 grams dark brown sugar (about 2 1/2 cups) 
  • 2 tablespoons dark rum or 1 teaspoon vanilla extract
  • 130 grams all purpose flour (about 1 cup)
  • 80 grams toasted walnuts (I used pecans), chopped (about 1/2 cup) 
  • flaky sea salt for sprinkling

Directions

  • Preheat oven to 375 and line a 9×13 pan with parchment.  I usually spray the pan first to make the parchment stick
  • Melt 1 stick of the butter (just one stick) then place the wafer cookies, melted butter, light brown sugar and salt into your food processor and grind until the mixture is the consistency of wet sand.  Dump into prepared pan, and press into an even layer.  Bake for about 10 minutes or until the surface is a bit firm.  Reduce oven temp to 350 degrees 
  • Melt the remaining butter (12 tablespoons or a stick and a half) and continue to cook the butter over medium high heat until the foam subsides and the butter becomes a nice nut brown. This should take about 5 minutes.  You don’t want to burn the butter though.  Here is a video review of browning butter and there are more videos on youtube
  • Combine the mashed banana, eggs, dark brown sugar, and vanilla (or rum) and then add the brown butter.  
  • Gently fold the flour into the wet mixture and add the toasted walnuts or pecans (or not if you don’t want them!)  
  • Pour this batter onto the cooked cookie crumb crust and sprinkle a little flaky salt on top – as you may know I love Maldon sea salt for this.  
  • Place in the oven and bake for about 45-55 minutes — until a toothpick comes out with a few crumbs attached or clean – but not with wet batter. 
  • Cool and eat! 
  • These freeze really well

Recipes

baking tips

I’m going to update and add to this list but for a start…

Baking smart:

Pre-heat the oven!!  This is very important.  Do not put your cookies/cake/tart in the oven until it is fully preheated.

Avoid dry and crumbly cookies by the way you measure flour:

The difference between a heavily packed cup of flour and a lightly packed cup of flour can be even more than an ounce.  That is a lot in the baking world.  Do no pack flour into the cup and shave with a knife.  Also, don’t shake the flour in the cup to flatten it.  Instead, aerate the flour with a spoon or whisk then spoon the flour into the measuring cup until full.  Just filling it.  A cup of flour should weigh about 4.5 ounces – (always check the conversion chart in the cookbook and use that.)  If nothing there go with 4.5 ounces.  

Do you know how to easily weigh your flour?  Use the tare button (check out this video) it is simple.  And it is worth buying a small digital scale for this purpose.  Some cookbooks list the ingredients in ounces and some even in grams.  It is amazing.  Especially for “packed” brown sugar which is so irregular and dependent on the baker.  Overmixing your batter after the flour has been added to the moist ingredients can also result in a tough cookie or a heavy crumb in a cake.  It can also produce a cake with a big domed top.  Just mix/fold in flour and really try not to overwork the batter.

Butter:

Use good quality unsalted butter.  That way you can control the amount of salt in your recipes.  If a recipe calls for softened butter it means softened, not melted.  Butter should be malleable – not so soft it looks greasy.  If you leave butter out for too long or melt it too much, your cookies will spread and flatten.  For best results leave out for 20-30 minutes before you bake.  Otherwise carefully, and in increments, microwave the butter until soft.  Also, don’t rush the “creaming the butter” stage in cookies and cakes.  It is vital in making a light and fluffy batter or dough. 

If you need small pieces of butter (for pie dough or streusel), a bench scraper does the trick.  A scraper is great for clean up too.  Use it (horizontally) to clean up crumbs and flour before you wipe down your countertops.  

Vanilla

Use good quality vanilla extract.   They sell quality vanilla now almost everywhere.  I love the double strength vanilla extract from Penzeys.com but also the Madagascar vanilla that you often see in gourmet stores.

To scrape and seed a vanilla bean, place the long bean on a cutting board.  With your paring knife, slice the bean lengthwise – from top to bottom all the way down and through.  Open it up and you will see the soft brown inside.  With the back (dull side) of your knife, scrape the bean gently lifting the seeds as you run the dull knife down.  Here is a quick visual.  These pods contain so much flavor and deliciousness.  Buy  pods in bulk (less expensive) and you can store them in an airtight container.  I often put that into  the freezer. 

Apples:

One of my first jobs at the bakery was to peel and core a big box of apples.  Well, you learn quickly when you have that many to do.

I know when you see  – “8 apples roughly chopped”, your heart might sink a bit with the prep work.  So, here is the plan of attack.  First, put on some really good music.  These days I happen to prefer audiobooks but pick your passion

I’ll try to make a video fo this soon.  In the meantime, cut the top and bottoms off of the apples.  All of them.  Then peel each apple with a sharp paring knife (I do this) but try not to take too much of the flesh off.  If you are lousy at this – use a peeler.  Peel them all.  Slice the apples in half.  Cutting along the center, the stem.  All of them.

Taker your apple corer (you should get one) and scoop out the center core by gently pushing the scooper in and twisting.  Then use the scooper to take the little extra rough bits around the core.  Core them all.  Take each apple half and slice.  Now you have slices.  Turn apple, slice again – now you have roughly chopped apples.

Chocolate:

Melted chocolate means melted chocolate – not hot or heated chocolate.  Be careful with this because your chocolate can “seize” and you will have scorched and unusable chocolate.  

Purchase good quality chocolate.  I like Guittard and Callebau.  Also don’t melt chocolate chips when you are meant to be melting chocolate.  But a bar as the chips are made up differently and won’t give you what you probably need. 

butterscotch brownie bars

The title in the NY Times said “These Brownies are as sweet as candy” –  chewy, salty and run through with brown butter…   Well, come on, how could I not make them.  My mom sent me the recipe oh, I don’t know maybe 6 different times.  And I had already clipped it. 

I love these.  LOVE.  They are not for everyone because they are definitely on the sweet side.  I made them this summer for a hospital near by and I was told that they were a hit.  They are incredibly easy and use only one bowl so they are ideal for bulk baking.  Additionally they freeze well.  The brownies can be made with or without chocolate chips and with or without nuts – but to me pecans and chocolate are ideal.  There are choices too of vanilla, coffee or rum -and for me coffee hit the spot but you get to pick.  

As mentioned – I found this in the NewYork Times and created by Melissa Clark.  

Have a good time – 

Ingredients

  • 1 cup melted butter (2 sticks) 
  • 1 1 pound box of dark brown sugar (or about 2 1/4 packed cups)
  • 2 large eggs 
  • 2 tablespoons vanilla extract (or a shot of bourbon or espresso)
  • I used espresso – and like that it tamed the sweetness a bit
  • 1/2 teaspoon kosher salt
  • 2 teaspoons baking powder
  • 2 cups (255 grams) all purpose flour
  • optional 1 cup or so chocolate chips
  • optional 1 cup nuts – I used pecans – delicious

Directions

Preheat oven to 350 degrees.  Grease or better yet  foil a 9×9 pan or 9×13 pan. Let the foil have a nice overhang so you can use it to pull the brownies out of the pan.  

  • Put  the brown sugar in a medium sized mixing bowl.
  • Melt the butter in a saucepan and let it bubble and sizzle away until you notice that it gets quiet – at this point it should start to brown, you can swirl your pan around to see the color and allow the butter to brown more easily.  The butter should look amber – or a golden brown.
  • Immediately pour the butter onto the brown sugar.  Whisk until smooth, then let the mixture cool for a few minutes before you add the eggs.  You don’t want to curdle the eggs –
  • Whisk in the eggs and the vanilla extract (or bourbon or espresso) 
  • Add the dry ingredients to the bowl sprinkling the salt and baking powder as you add it – add the flour then gently mix to incorporate.
  • Fold in optional chips and nuts and pour into baking pan.  Sprinkle if you like with a little sea salt – Melissa Clark does this – I didn’t – but do what you like and what suits your taste.
  • Bake until the top is firm and a toothpick inserted in the center comes out without any wet batter clinging to it.
  • In a 9×9 pan this can take 25-35 minutes.  Larger pan 20-30 m.
  • Let rest in the pan and if you used foil you can lift out by the foil overhang and cut and enjoy.  These freeze really well! 
  • I hope you like them!!

blueberry pancakes (one bowl, healthy)

Andy learned how to cook last year- how to make dinner for himself – and breakfast – and well he is pretty good!  Being home however, brings out the little boy in him – pleading (well truly just asking now that he is 21) for me to make him waffles.  At the start of the pandemic with all the kids home I was eager and excited to cook for them.  As time passed, the morning waffles became a bit tiring especially because Andy knows how to make them – and dinners are a handful because of Greg’s dietary needs and Andy eating a ton and everyone wanting leftovers!  Recently though he asked me to please make him blueberry pancakes (he has moved on from chocolate chip).  I have many old recipes in the blog – but I’m always searching for the next best recipe.  Be it brownies, chocolate chip cookies or pancakes – it is a never ending endeavor.  I succeeded I think – I found this recipe from the blog Amy’s Healthy Baking (I fiddled with it a bit) and I have to report that they might be the best to date.  Oh and don’t skip the vinegar.  I know it seems weird but I promise you cannot taste it.  And please don’t compare these to buttery, white flour, decadent pancakes.

For measuring flour it is best to use a small digital scale.  Jamie from My Baking Addiction gives a really thorough tutorial on how to measure flour with a measuring cup – and how that this specific measurement can make or break your cookies (in this case pancakes!) 

Sylvie said “delicious, truly good mom” and Sarah (Greg’s girlfriend) said “I’m really full but I wan’t more – these are REALLY good!”  And Andy said “They are fire”.  So there you have it.  Bake and enjoy – 

Oh, I usually double the recipe – esp if I have a crowd.

20 small pancakes

Prep time: 5 minutes

Easy

ingredients

  • 1 tablespoon unsalted butter, melted 
  • 1 large egg
  • 1.5 teaspoons vanilla extract
  • 1 teaspoon maple syrup
  • 1/4 teaspoon salt
  • 1/4 cup (60 g) plain nonfat greek yogurt 
  • 2 tablespoons milk (I used 1 percent)
  • 1/4 cup water
  • 1 cup plus 2 tablespoons (135 grams) white whole wheat flour (or half whole wheat and half white) 
  • 1 teaspoon baking soda
  • 1/2 teaspoon baking powder
  • 1 cup fresh blueberries

Directions

Melt the butter.  And in a medium bowl, whisk together the butter, egg, vanilla, maple syrup, and salt.

Stir in the Greek yogurt and mix until there are no lumps.  Stir in the vinegar and then the milk and water. 

Pour the flour evenly over the patter and sprinkle the baking soda and baking powder on top.  Stir until just incorporated and fold in the blueberries.

I use my griddle to cook these – and they work fine with or without butter.  You can also use a non stick pan.  You really can make any size you want so have some fun!

If you look at Amy’s Healthy Blog blueberry pancake post  she gives a lot of advice regarding substitutions for special diets.  So check that out too.

Gluten Free Chocolate Chip Banana Pancakes

Gluten Free pancakes
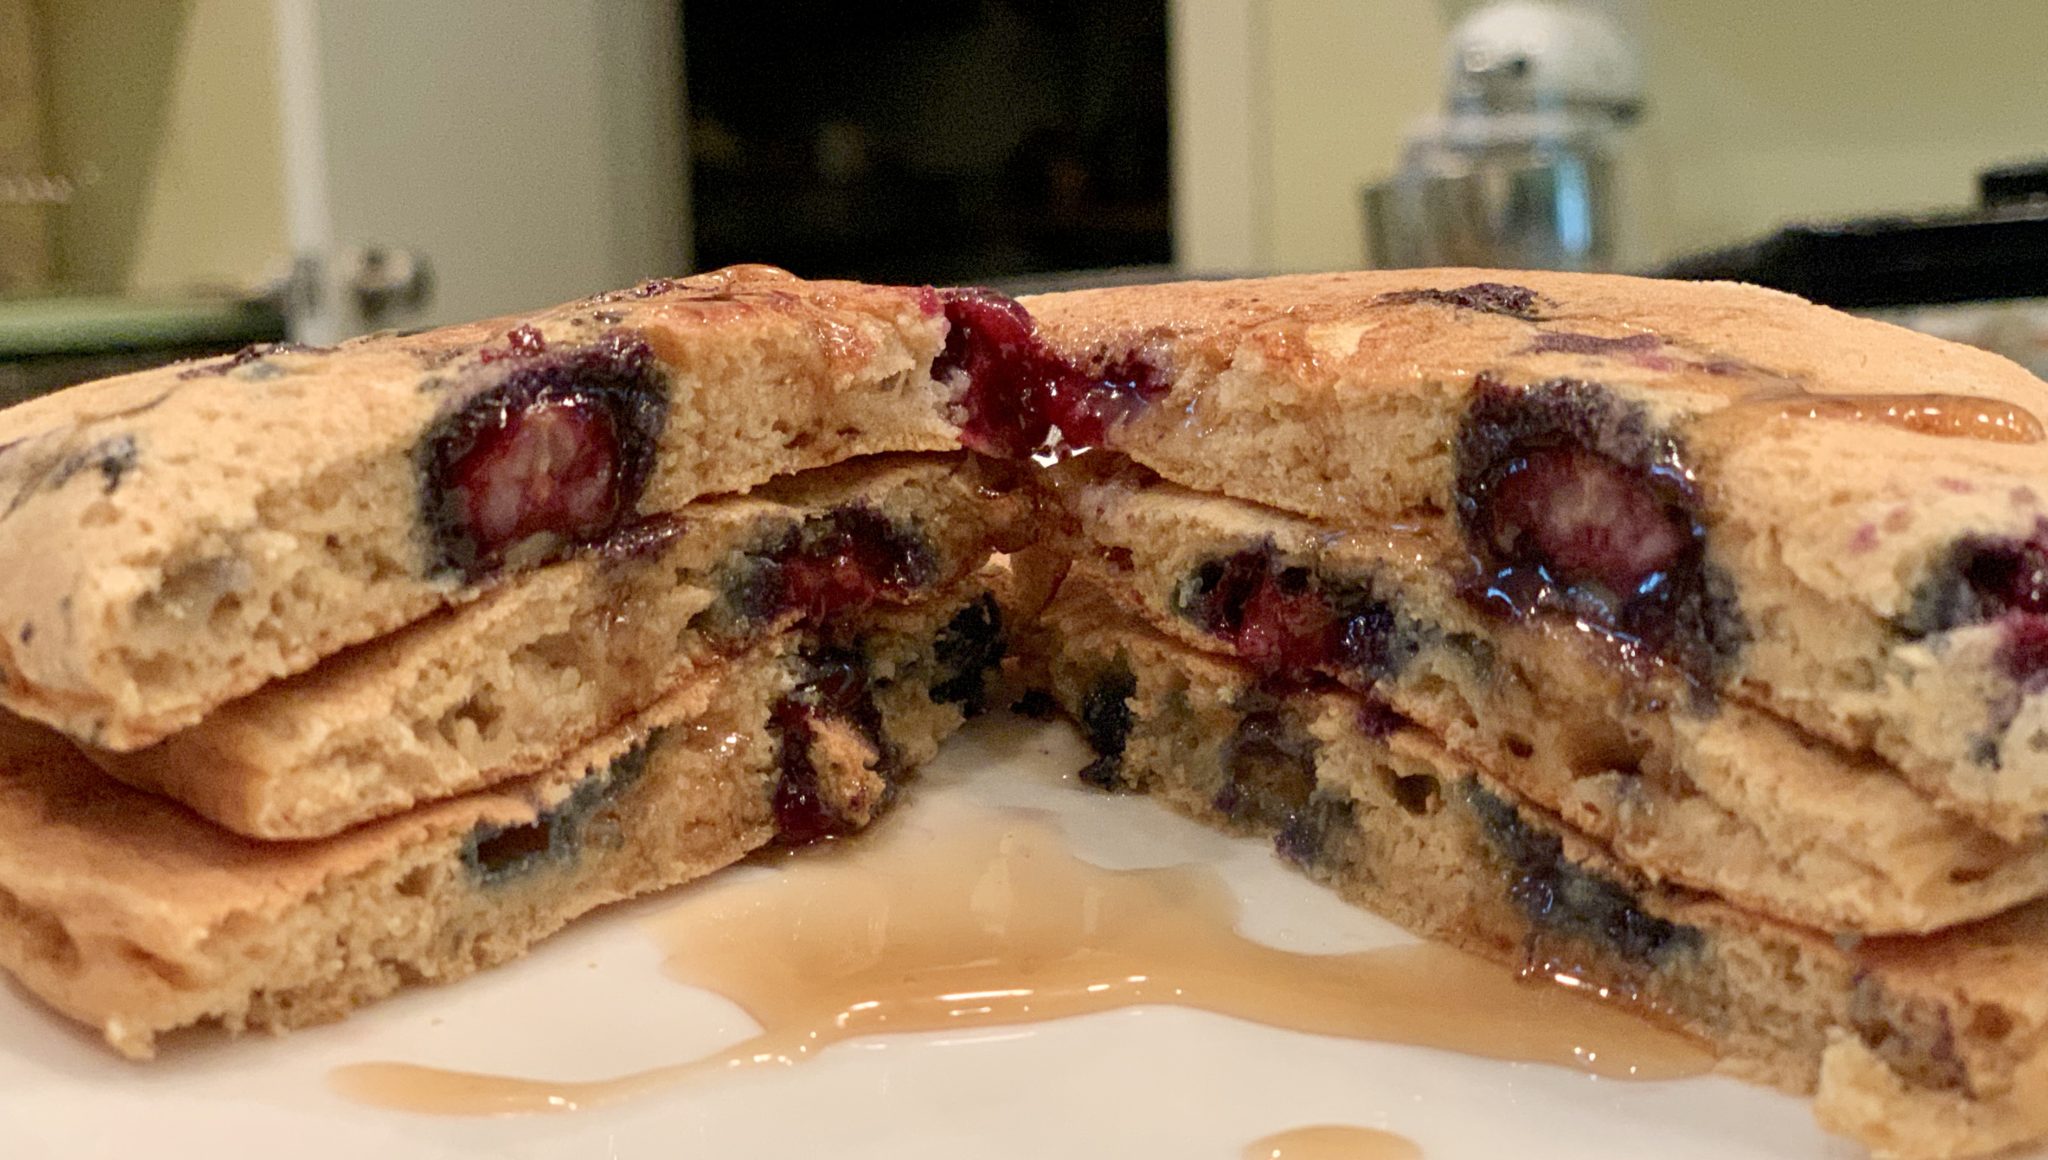
Made gluten free pancakes and didn’t tell Andy.  He had one and said “This is awful, are they gluten free?”  So I researched and made them again. This time success for Andy, Sylvie, Rob and me.  Made them the next couple of days…then decided to try a different recipe for fun.  Andy complained – “Why are you trying again??  We like the other one.  Stop.  No more!”  So I’m sticking with these and everyone is happy.  Even Andy who is not on a gluten-free diet.

I found the recipe from Taste of Home.

I add diced bananas and add extra mini chips.  I also reduce the sugar by half because well, the chips and banana make up for it.

Enjoy!