pumpkin waffles

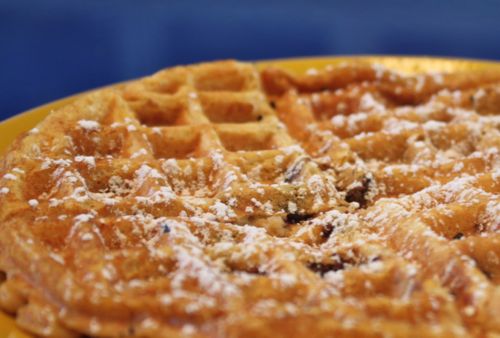
After about two years of eating the same healthy pancakes, Andy finally tired of them.  Eager to find him a new healthy breakfast, I perused many books and eventually found these scrumptious waffles.  Filled with good things like flax-seed, pumpkin, eggs, milk, and ground walnuts (that you don’t even taste) – these keep Andy running and running and running.  What’s nice about these is they have really good flavor – the pumpkin, cinnamon and nutmeg make it feel like a holiday treat – and the walnut and eggs add some good protein.  Andy is not a nut lover so I put the nuts in a processor and finely ground them – making them undetectable.  Of course if you have nut allergies – just leave them out.  The waffles are tender and tasty and with the addition of chocolate chips (always a must here) you don’t need any syrup on them – however a little drizzle of pure maple syrup happens to be delicious.

pumpkin waffles (slightly adapted from No Whine With Dinner by Liz Weiss and Janice Newell Bissex):

1 cup all purpose flour
1/2 cup whole wheat flour
1/2 cup walnuts (finely chopped – or like me in the food processor to almost a flour)
2 tablespoons flax seed
1 tablespoon baking powder
1 1/4 teaspoon ground cinnamon
1/4 teaspoon ground nutmeg (or slightly less)
1/2 teaspoon kosher salt (use 1/4 if using reg table salt)
3/4 cup low fat milk (I used 1 percent)
3/4 cup canned 100 percent pure pumpkin
3 large eggs, slightly beaten
1/4 cup canola oil
3 tablespoons light brown sugar
1 teaspoon vanilla extract chocolate chips (optional)
pure maple syrup (optional)
powdered sugar (optional)

Preheat the waffle iron.  Chop or grind the nuts.

In a small bowl whisk together the flour, whole wheat flour, ground nuts, flaxseed, baking powder, cinnamon, nutmeg and salt.

In a larger bowl, whisk together the milk, pumpkin puree, eggs, oil, brown sugar and vanilla extract.

Pour the dry into the wet and whisk gently until combined. Likely oil or coat the waffle iron and cook as your waffle iron directs.  As mentioned, we add a small handful of chocolate chips. Serve with added walnuts on top – banana and a dash of syrup or 10x if you like! Enjoy –

lemon curd cake

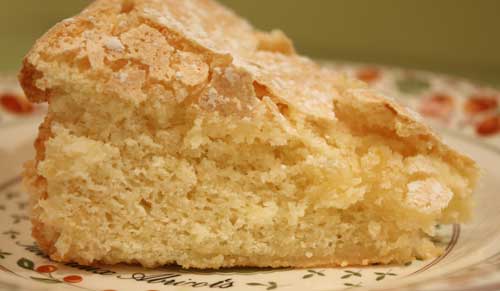
Loved this cake!  Like an angel food that has been compressed and moistened and bathed in luscious lemony goodness.  Rob and I both loved this – and our company did too.  Served it with macerated raspberries and freshly whipped cream, well, delightful.  This takes a little bit more effort since you have to make the lemon curd first – but it is not difficult and worth the time.  You can make the curd a day or 3 before you make the cake – and that will make it all the easier.  This is perfect for Spring which is right around the corner (thank goodness!)

lemon curd cake (from 4 Star Desserts by Emily Luchetti):

4 large egg yolks
2 large eggs
1 & 1/4 cups sugar
1/2 cup plus 3 tablespoons fresh squeezed lemon juice
2 cups sifted cake flour
1/2 teaspoon salt
1 tablespoon baking powder
4 tablespoons (half stick) unsalted butter, softened
2 teaspoons finely chopped lemon zest (yellow only)
6 large egg whites
1 tablespoon confectioners’ sugar

Gather ingredients from above, bring eggs to room temp, set butter out, make lemon juice, and measure out the rest.  Being organized will help you here.

Butter and flour a 9 inch round cake pan that is 3 inches high.  (I used a spring-form pan since my cake pans are only 2 inches high.)

Fill a medium saucepan 1/4 full of water.  Bring to a low boil.

In a medium stainless steel bowl, whisk together the egg yolks, eggs, and only 1/2 cup of the sugar.  Stir in 1/2 cup of lemon juice.

Now place the bowl on top of the saucepan of low boiling water.  Make sure that the bottom of the stainless bowl does not touch the water or it will get too hot.

Set up a mesh strainer over a container to place the curd (once cooked).

Cook the mixture over the hot water, stirring with a wooden spoon until thick.  This might take about 10 minutes or so.  You will see it visibly thicken – then immediately remove from heat and strain the curd into the container.  Place plastic wrap directly on the surface of the curd and chill until cold (or hold in fridge for a couple of days until you are ready to make the cake.)

Sift together the cake flour, 3/4 cup of the sugar, the salt and the baking powder and set aside.

With the paddle attachment of your mixer, mix together the lemon curd, butter, lemon zest and remaining 3 tablespoons lemon juice.  Mix until well combined.  On lowest speed stir in the dry ingredients.  Place into a medium bowl and clean out your mixer bowl to beat up the egg whites.

Preheat oven to 325.

With the whip attachment of the electric mixer, beat the whites on medium speed until a frothy (white bubbles will appear).  Increase to high speed and gradually add the remaining 1 1/2 cups sugar.  Whip until soft peaks form.

Fold the egg whites into the cake batter.  Spread the cake batter into the pan.

Bake until a skewer or toothpick comes out just clean (about 50-55m).  Cool and then unmold cake.  Sprinkle with the confectioners’ sugar and serve.

Enjoy-

creamsicle cookies

Baked again for My Sister’s Place — and decided to once again make a cookie.  These are flecked with orange zest and taste fresh and bright.  The white chocolate sweetens them up and adds another scrumptious dimension.  Greg had one and said, “hmmm, good mom!”  He had another the next day (cuz he never eats more than one at a time!) and said, “I really really like these mom” and on the third said “you should def make them again.”  Rob too – which was surprising since he doesn’t like white chocolate at all – said good.  (Please use good quality white chocolate!)  I loved them.  And Mike if you are reading this (which I doubt) I will share with you next time, since orange is one of your faves.

Got this recipe from a fun blog called Cookies & Cups…

creamsicle cookies from Cookies & Cups:

click here

pecan, cranberry, white chocolate oatmeal cookies (with a dash of sea salt)

These cookies are my new favorite non chocolate cookie.  Seriously crispy yet textured with nutty nuts, sweet white chocolate, oatmeal and tart cranberries – all I can do from eating them is to give them away!  I just gave some to Karen – well, to her 14 year-old student (visiting from France) who broke his arm last night -hoping to cheer him up.  Let’s hope so because these are so good.  The salt on the top (I use Maldon) brings out all the other flavors and really is such a great counterpart to the white chocolate.  The nuts and cranberries too…try to include it all (or opt for dried tart cherries — that would be delicious too.)  Please please don’t skimp on your white chocolate.  Purchase high quality chocolate – like Callebaut, Guittard, Ghirardelli or Valrhona.  All great choices and cut some into small chunks and some into slivers so that the chocolate is scattered throughout the batter.  So good – perfect for a fall day.  Enjoy –

pecan, cranberry, white chocolate, oatmeal cookies (slightly adapted from Smitten Kitchen):

1cup all-purpose flour
3/4 teaspoon baking powder
1/2 teaspoon baking soda
1/4 teaspoon table salt
14 tablespoons (1 3/4 sticks) unsalted butter, slightly softened
1 cup sugar
1/4 cup packed light brown sugar
1 large egg
1 teaspoon vanilla extract
2 1/2 cups old-fashioned rolled oats
6 ounces chopped white chocolate (again, high quality!)
1/2 -3/4 cup toasted, chopped pecans (to taste)dashes of sea salt – I like Maldon – but you can use another…

Preheat oven to 350 degrees.

Pull butter and eggs – so that they might come to room temp.

Place pecans on sheet pan and bake for about 7-9 minutes.  Remove and chop.  Set aside to cool.

In a large bowl, whisk together the flour, baking powder, baking soda and salt.  Add the oatmeal and mix to combine.  Add the pecans, white chocolate and cranberries and again – mix to combine.

With the paddle attachment of your mixer, beat the butter on medium high speed until lighter and fluffy – add the sugar and continue to mix until light.  Add the brown sugar and mix to combine.

On medium speed, add the egg and then the vanilla extract.

Remove butter from bowl and scrape into large bowl with all the remaining ingredients.  Use your (clean) hands to mix all together.

Drop onto parchment lined cookie sheets (btw – make whatever size you would like.  I did mini ones for an event, and big ones  for the family) — just vary your cooking time.  You can roll into balls for pretty and even cookies then gently press down on each one to about 3/4 of an inch.

Bake until golden brown.  Rotate the pans front to back and bottom to top after 8 minutes or so – then keep checking until done — 13-16 minutes -but more or less depending on the size of the cookie.

Enjoy!

simple pumpkin cookies

Light and airy — this simple pumpkin cookie was an easy hit.  Jason was coming over and I needed a non-chocolate sweet for him.  I looked through my To Bake file and decided to try these cookies.  Sylvie loved the cake-like consistency.  And said, “blogworthy mom.”  Andy exclaimed – “so good!” and Jason mmm…ed and mmmm…ed.  I know I have another pumpkin cookie on the blog – but hey – another is fun too!  The sweet glaze was perfect drizzled on top.  Oh, and perfect to make with your kids.  Enjoy –

simple pumpkin cookies (from the Very Best Baking):

1 1/2 cups all purpose flour
1 teaspoon baking soda
1 teaspoon baking powder
1 teaspoon cinnamon
1/2 teaspoon nutmeg
1/2 teaspoon kosher salt
1 and 1/2 cup sugar
1/2 cup (one stick) unsalted butter, melted
1 cup Libby’s Pure Pumpkin puree
1 large egg
1 teaspoon vanilla extract

glaze –
2 cups sifted powdered sugar
3 tablespoons milk
1 tablespoon melted butter
1 teaspoon vanilla extract

Preheat oven to 350° F.  Line baking sheets with parchment – or butter or grease pans.

Combine flour, baking soda, baking powder, cinnamon, nutmeg and salt in a small bowl and set aside.

Beat sugar and butter with paddle attachment of mixer until well blended.

Beat in pumpkin puree, the egg and the vanilla extract.  Mix until smooth.

Gently fold in the dry ingredients.

Drop by rounded tablespoon onto baking sheets.

Bake for 15 to 18 minutes or until edges are firm.  Cookies will be soft though.

Once cool, drizzle glaze over cookies.

raspberry crisp

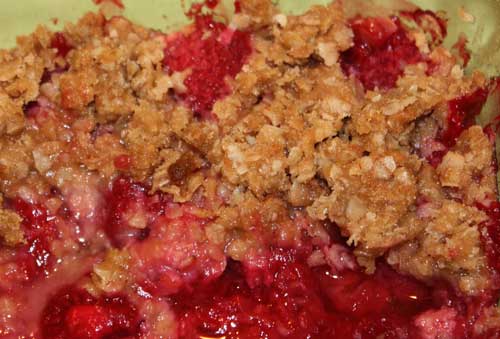
Raspberries, raspberries, raspberries.  If you like them – you will LOVE this.  This one speaks summer.  Tasty, simple, and not too sweet this is a perfect ending to a summer dinner.  Serve with barely sweetened freshly whipped cream and swirl any leftovers into vanilla ice cream for a berry streusel ice cream.  Yum!  Really, yummy.  I made 3 crisps/cobblers this week and although all were tasty, the raspberry crisp was the only one that is truly a bit more special and blog worthy.  I found this on this on the Taste of Home website.  The directions are so easy – so I have no extra tips.  Just follow the recipe from the link.  Oh, the only thing I did was to add a bit of kosher salt to the crumb topping.  Enjoy –

raspberry crisp:

http://www.tasteofhome.com/Recipes/Raspberry-Crisp

remember to add a 1/4 teaspoon kosher salt to the crisp topping (if you want) — brings out the flavor a bit more.

apple cinnamon muffins (very healthy – made with almond meal)

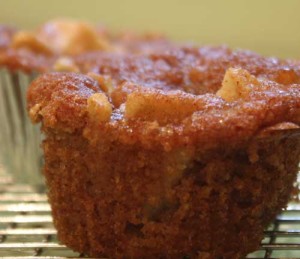
Andy came into the kitchen and said omgoodness what is that smell?  It smells sooo good!  I told him I was making muffins but didn’t mention the healthy part of the description.  Hot out of the oven Andy asked if he could have one – I said sure and his eyes lit up with joy and disbelief because he usually does not get to eat a muffin close to dinner.  He mmmmed and mmmmed and declared these AMAZING!  I said you know these muffins are healthy and he smiled and said, “good, I can have them for breakfast!”  I will say that he said (on his second one) that the consistency was a little soft and that they were best when hot and fresh out of the oven.  And yes, all that is true – but my thought is that if you have a kid like him – who loves muffins and loaf breads, it is awesome to have a treat that is full of protein and apples and cinnamon!  Unfortunately, Sylvie didn’t love them as much.  The consistency bothered her a bit more and Greg too – thought they were ok but not memorable.  So – well – after reading all that you can decide whether you think your family (or a member of your family) might enjoy.  Oh and btw, I did!

I kept the muffins unwrapped and out so that they wouldn’t get even softer.  You could slice and toast the next day to recreate the warm flavor.

apple cinnamon muffins (from elana amsterdam’s book The Gluten-Free Almond Flour cookbook):

2 cups blanched almond flour (almond meal)
1/2 teaspoon sea salt
1/2 teaspoon baking soda
1/4 cup arrowroot powder
1 teaspoon ground cinnamon
1/4 cup grapeseed oil
1/2 cup agave nectar
1 large egg
1 tablespoon vanilla extract
2 medium apples, peeled, cored, and diced into 1/4 inch cubes

Preheat the oven to 350 degrees.  Line muffin cups with paper liners.  Peel, core and dice apples.

In a large bowl, whisk together the almond flour, salt, baking soda, arrowroot powder and cinnamon.

In a medium bowl, stir together the oil, agave, egg, and vanilla extract.

Next, stir the wet ingredients into the dry and mix fairly well  then fold in the apples.

Bake for 30-35 m – until the muffins are golden brown on top and a toothpick comes out clean.

These are best warm outta the oven or soon after.  Remember though – they are soft,  so you might need a spoon when hot!

Enjoy-

banana caramel cream pie

Lousy photo I know!  Forgot to take picture and this is on a plate, mostly eaten, with berry ice cream.

This is part of an email I received in the morning after serving this pie the night before:

Gregg just came in from a run, opened the fridge and asked if there was any more of your pie!  He said that it was “the most decadent outstanding thing he has ever eaten”… coming from a non dessert eater, not a bad compliment!  So I found the recipe on your blog, but where did you add the bananas?
Nice, right?  So yes, this is very similar to the salted caramel pie – but the caramel is a little richer (omgoodness) and there is the addition of bananas.  So delicious.  Rich though.  VERY rich.  Beth called me the morning after I brought the pie to her house and asked if I could bring some back (she made me take it home the night before!)  She said Jason (her son) wanted to try it because Sarah (her daughter) told him how good it was (she sampled the night before).  I also think Beth wanted it too and regretted forcing it upon me as I left her house!   I was more than happy to get it out of my house because although I do have decent restraint, I couldn’t stop taking spoonfuls in the early am! And honestly at that point it was making me feel sick.  Anyway – that is how Gregg was lucky to find it in his refrigerator the next AM.   This recipe came from Jill O’Connor’s cookbook Sticky, Chewy, Messy, Gooey.  And it is a good one!  Enjoy –

You can start this pie the day before you plan to serve it if you like.  Just save the bananas and whipped cream for the next day.  You can also make the caramel filling 2-3 days before and store in a container until ready to use.  This would be nice also in parfait glasses — no crust and just layer with whipped cream and bananas.

banana caramel cream pie (slightly adapted from cookbook above):

filling-

2 cans (14 oz) sweetened condensed milk
1 teaspoon pure vanilla extract
1/8 cup firmly packed dark brown sugar
3 tablespoons butter (melted, unsalted)
1/2 teaspoon kosher salt

crust –
2 1/2 cups wholemeal digestive biscuit crumbs — or graham cracker crumbs
1/4 cup sugar
1/2 cup (1 stick) unsalted butter, melted
1/3 teaspoon kosher salt

topping –

3 medium barely ripe bananas
2 cups heavy cream
1.5  to 2.5  tablespoon sugar (to taste) – I prefer my whipped cream to be less sweet here since the caramel is very sweet.

Place rack in middle of oven and preheat to 400 degrees.

For the filling, stir together the condensed milk, vanilla, dark brown sugar, melted butter and salt.  Place mixture in a 6 cup oven proof dish – a Pyrex pan is good.  To see if 6 cups will fit in your pan, just pour 6 cups of water into it and see.  If you need to go bigger that is fine, but cooking time will be less.  Cover the pan with foil.

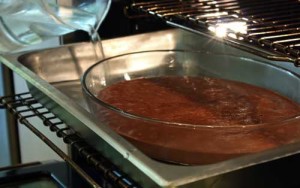
Place the pan with the covered mixture in it into another pan (9×13) and place in the oven.  Similar to chocolate photo below (although your’s will be covered and likely in a rectangular pan.)  Next pour very hot water into the larger pan so that it comes up about 1/2 way up the sides of the dish.  Bake this mixture until it as reduced and thickened and turned a nice toasty caramel color.  This should take 1 1/2 -2 hours – and try to stir with a spatula every 15 minutes or so.

When done, carefully remove from oven and the water bath and let cool.  Reduce temp to 350 degrees.  If you are waiting to use the filling cover and refrigerate once cooler.

For the crust — in a medium bowl, combine the crumbs, butter and sugar and salt.  Stir until crumbs are wet and all is combined.  Press into a 9 inch pie plate or a 9 inch tart pan (3 inches deep).  Bake at 350 until fragrant and a little crisp about 8-10 minutes.  Place on rack and let cool.

When the caramel is cool but still soft, spoon into the cooled crumb crust – spread in an even layer an refrigerate until the filling is set.  You can cover and keep pie at this point for 24 hours.  Or, just chill for 2 hours.

Cut the bananas into 1/2 inch thick slices and place them all over the caramel filling.

Place the heavy cream and sugar in the bowl of your electric mixer – or with hand held beaters and whisk on medium speed until medium peaks form.  Spoon the whipped cream on top of the bananas – and make sure to cover the bananas to prevent browning.

Chill in fridge until ready to serve.

Yum!

coconut mounds (the best ever) (dairy and gluten free btw)

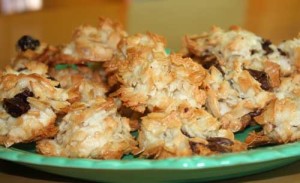
Loved these!  We all did – even those of us who don’t love coconut (including me, although I think I may have moved over into the like category.)  Judy and Marco really enjoyed – and she is a true coconut aficionado.  Alice Medrich calls these New Classic Coconut Macaroons because she recreated the recipe with unsweetened dried  coconut flakes (not sweetened, shredded and artificially preserved.)  Maybe that is why I like them so.  The cookie consistency is chewy and soft inside, and crispy on the outside and so very flavorful and quite pretty to look at.  (Long run-on, I’m aware.)  I threw some bittersweet chocolate shavings into some and wow — even better!  In others, I added dried cherries, and that too was another nice alternative.  Make these soon and make a lot!  They last 4-5 days in an airtight container.  Enjoy –

coconut mounds (from Chewy, Gooey, Crispy Crunchy by Alice Medrich):

makes about 22 cookies

4 large egg whites
3 1/2 cups (5.25 oz.) unsweetened dried coconut flakes (also called coconut chips)
3/4 cup (5.25 oz.) sugar
2 teaspoons pure vanilla extract
slightly rounded 1/4 teaspoon kosher salt

Combine all the ingredients in a stainless steel bowl.  Set the bowl over a sauce pan filled with an inch of barely simmering water (the bowl should be on top of the sauce pan, it should not fit inside the sauce pan.)

Mix the ingredients with a rubber spatula over the heated water until the mixture becomes more opaque and less translucent.  This should take about 5-7 minutes.  The mixture will get hot – which you want, but you don’t want to cook the egg whites.

Set batter aside for 30 minutes to fully absorb the coconut flavor.

Preheat the oven to 350 degrees.  Place 2 tablespoons of batter for each cookie onto a parchment lined baking sheet.  Bake for about 5 – 7 minutes (rotating pans).  You want the coconut tips to just start to color.  Reduce the oven temp to 325 and continue to cook for 10-15 minutes (again, rotating your pans) until the cookies are a beautiful cream color with golden brown edges.

If the coconut tips are browning too fast, you can reduce the oven temp to 300.

Let cool on pans, and oh, best to enjoy day one as they are gooey and soft on the inside and crispy on the outside.  Yum.

gluten free banana cake

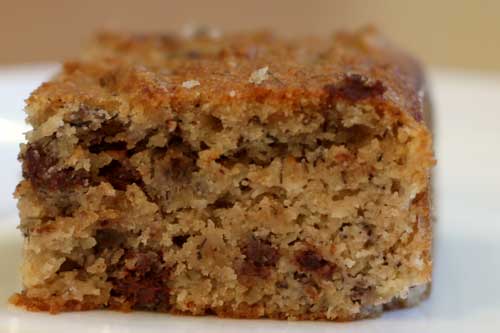
Another recipe that is gluten and dairy free…and protein packed, and very tasty!  Rob, Alisa and I enjoyed in the morning as it is a healthy way to start the day.  Eggs, bananas, almond flour…dark chocolate.  All good!  The kids didn’t love this one I think because I used bitter chocolate, but I imagine semi-sweet chips would change that a bit.  Just don’t expect a buttery rich cake.  Obviously.  But it is good, and fits the bill especially if you are sensitive to gluten.  I have to make next time John is over and truly see if it passes the test.  I’ll keep you posted…in the meantime, enjoy!

chocolate chip banana cake (from The Gluten Free Almond Flour Cookbook by Elana Amsterdam):

3 cups blanched almond flour
1/2 teaspoon kosher salt
1 teaspoon baking soda
1/4 cup grapeseed oil
1/4 cup agave nectar
3 large eggs
1 tablespoon vanilla extract
1 cup coarsely chopped dark chocolate (she suggests 73 percent – but again for kids or for sweeter flavor go semi-sweet)
1 cup (2 to 3) very ripe bananas (mashed)

Preheat oven to 350 degrees.  Grease a 9 inch pan with grape seed oil and dust with almond flour – or use a parchment or foil liner.

In a large bowl, combine the almond flour, baking soda, and salt.

In a medium bowl whisk together the grape seed oil, agave nectar, eggs and vanilla extract.

Pour the wet ingredients into the dry and gently stir to combine.  Fold in the chocolate and mashed bananas and then pour into prepared pan.

Bake for 33-43 minutes – but check often and try not to over bake as usual!

Let the cake cool in the pan then serve.

Enjoy-