
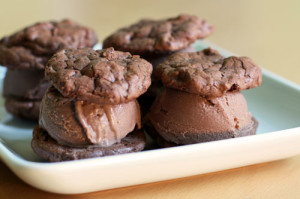
 These ice cream sandwiches are delicious. My son Greg asks for them often – and since it is a little work (not crazy work) to make the ice cream, I often blow his request off. But he was very happy last night. He turned to me… gave a quiet groan of delight, looked me in the eyes and simply thanked me. My dad who really only likes Haagen Daaz choc choc chip also loves these little sandwiches. He seemed surprised that he liked them so much – especially given the milk chocolate title. But the addition of bittersweet chocolate and malt really make the ice cream special and not too sweet. The cookies are extra delicious too. A little espresso deepens the flavor and I happen to love the texture of the mini chips. And they are very easy to make. My husband Rob can’t eat/drink milk (sadly) but is very content with these brownie-like cookies alone. I am too! I’ve also made the sandwiches with chocolate sorbet which he truly appreciates. This recipe
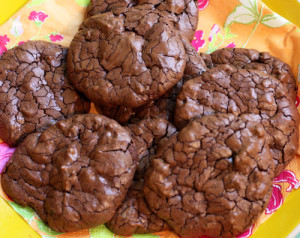 originated from Claudia Fleming – the former pastry chef of Gramercy Tavern. The cookbook is lovely. She suggests adding dried cherries to the cookies which I did (only to a quarter of the batter because my family would not be happy). And they too were yummy. Oh and by the way, you can also crumble the cookies and mix them into the ice cream which is also verrry good!
chocolate brownie cookies (barely adapted from The Last Course by Claudia Fleming):
1/4 cup all purpose flour
1/4 teaspoon baking powder
1/4 teaspoon kosher salt
2 large eggs, room temp
2/3 cup sugar
1/2 tablespoon brewed espresso
1 1/2 teaspoons vanilla extract
2 tablespoons unsalted butter
5 oz extra bittersweet chocolate, chopped
2 oz unsweetened chocolate, chopped
3/4 cup mini chips
toasted nuts or dried cherries (optional…to taste)
Preheat oven to 375 degrees. Whisk together the flour, baking powder and salt in a small bowl and set aside.
With whisk attachment, beat the eggs for a few seconds then add the sugar, espresso and vanilla. Beat until this turns thick. It should take about 15 minutes on high speed.
In the meantime, over a pot of barely simmering water (or double boiler) – melt chocolates and butter. You only need about an inch of water in the saucepan, bring it to a boil, and reduce to simmer. Place a metal bowl on top of the saucepan making sure that the water does not touch the bowl of chocolate. Once melted, remove from heat. Do not cook the mixture, just melt it.
Remove the thick egg batter from the mixer and gently fold in the melted chocolates and butter. Fold about half way – you should still see streaks – and then fold in the flour mixture and mini chips. Fold all until just incorporated. (Add dried cherries or chopped nuts if desired.)
If batter seems runny at this point, let it sit for about 5 minutes. If thick, you are good to go. Drop by rounded teaspoons onto parchment lined baking sheets and bake until puffed and cracked about 8-9 minutes – you can rotate the pans mid-way. Try not to over cook these cookies…otherwise they will dry out.
Cool and enjoy! If you plan to make ice cream sandwiches with these (either with the malted ice cream or store bought ice cream), I find it is easier to handle the cookies if you freeze them first. This prevents them from breakage when trying to squish the cookies and ice cream together when making the sandwiches.
milk chocolate malted ice cream (adapted from The Last Course by Claudia Fleming):
3 cups milk
1 cup heavy cream
1/2 cup plus 2 tablespoons sugar
12 large egg yolks
3 oz milk chocolate, chopped
1 oz extra-bittersweet chocolate, chopped
1 1/4 cups chocolate Ovaltine mix
1/4 – 1/2 teaspoon salt to taste
In a medium saucepan mix together the milk, heavy cream and 1/4 cup sugar. Heat the mixture over medium heat and bring to a simmer. Watch it carefully – you don’t want it to boil.
In a medium bowl, whisk together the egg yolks and remaining sugar (1/4 cup plus 2 tablespoons). Chop the milk and bitter chocolates and set aside in a large bowl.
Now you will “temper” the eggs which means warming them slowly so that they do not turn into scrambled eggs! With a ladle, spoon a small amount of hot cream/milk into the eggs. Continue slowly ladle by ladle and constantly whisking the eggs while you do this. Keep going until you’ve incorporated about 3/4’s of the hot milk into the eggs.
Pour the warm egg and milk/cream mixture into the remaining cream and milk on the stove. Over low heat, mix the custard constantly with a wooden spoon keep the mixture moving at all times. The custard should thicken so that it coats the back of the wooden spoon. It should take about 7 minutes. Do not boil. Cook slowly and carefully.
Immediately pour custard over the chopped chocolates. Mix and stir until the chocolate is melted and smooth. Add the Ovaltine and stir until combined. Strain through a fine sieve and into a container or bowl. Cover and chill in refrigerator preferably overnight but for at least 4 hours.
Freeze in your ice cream maker and enjoy!!

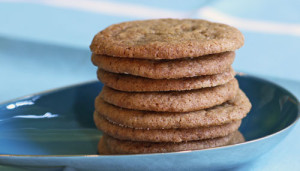 My friends Joy and Lauri absolutely rave about these cookies. I must say they are my favorite ginger cookies as well. No big story here…everyone just loves them. Greg, Andy, Sylvie, and all of their friends. Most of my friends. I usually double the recipe and freeze some dough for later because we go through them so fast. (Look at the
 This past week I had grand plans for baking…I bought ingredients for creamsicle ice cream (pictured below) that I couldn’t wait to make for our friend Mike who loves orange and fruit flavor. I was also oddly excited to make a grapefruit yogurt cake (again photo below) which I know sounds kind of weird, but I had a really good feeling about. The grapefruit cake – for lack of a better word, sucked. It didn’t taste like anything. Awful. Had to toss it. The orange ice cream was great right out of the ice cream maker. Soooo good – like a real creamsicle – yet in ice cream form but once it sat in the freezer it became chalky and kind of started to taste like baby aspirin. I brought it to Mike and he sadly agreed. The funny part is that Greg came home that day – and announced that we needed
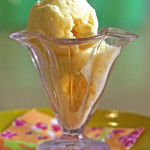
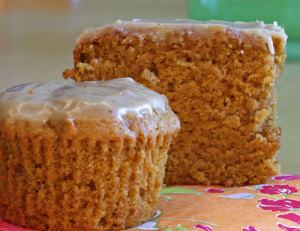
 an Irish dessert for school. He signed me up to bake. Well, I was in no mood after my failures and I was wiped, and I’m not Irish – nor know much about Irish baking! So I looked for the easiest recipe that I could find that we could do together. I decided to double the recipe so we could taste it (what else is new) and also decided to spike the raisins in our cake with rum. Well, even though this is not something I thought I would love – it was really good! The cake was light and fluffy – the rummy raisins were a tasty addition and the light glaze on top was really good too. I find out today if the kids liked their cake (no rum). Hope so. (Greg just came in and said eveyone in the whole class loved it!) Enjoy this – it is nice in the afternoon with coffee or tea (if you like raisins).
 So if you’ve been reading my blog – you’ll remember that although we all really liked the
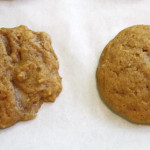
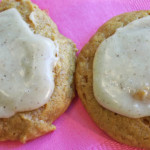 some people. Soo…now you have your muffin pans or loaf pans! Problem solved. Or…drop by spoonfuls onto parchment. I did a side by side comparison to show you the difference – the right side is the cookie that was piped, the left dropped. Honestly no biggie here…right? Plus, once you add the icing it makes even less of a difference. 🙂 If you do decide to pipe the cookies, here are some tips: 1 – do not overfill piping bag. You will lose control of the batter. 2 –
 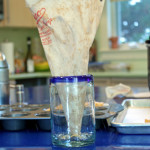 to fill the bag, place it in a large container – a glass or measuring cup or vase – so that you have two hands to fill it. 3 – twist the end of the bag and with light pressure, squeezing from the twist, gently pipe the cookies. Use a round 1- 1 1/2 inch tip – I just used the coupler but do what makes you happy.
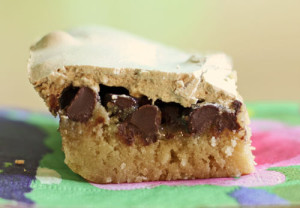 These bars were my favorite childhood dessert. I recently asked my mom for the recipe – but being that she is so neat and tidy (which is great), she often throws things away (not so great). I suffer the same affliction at times. Anyway, luckily my very good friend Michelle also loved these as a child (we were family friends so she was treated to my mom’s sweets). And Michelle held onto the recipe! It is a weird recipe and I had some doubts as I made them – but they were the same ones from my childhood. I should tell you that these are very very sweet. Not for the tame hearted sugar eaters here – but oh…for me – they are decadent and heavenly. Rich and gooey. I cut one up and put it in my vanilla ice cream last night and really, I felt so content. My kids wouldn’t eat them the first night. I said ok everyone – time for something new…my favorite… and I was met with groans of “more dessert?” And “can’t we just have a little candy tonight” Oh boy. The second night they tried it – and loved it – especially Sylvie and our neighbor Danika. Greg said it tasted like cookie dough. My friend Suzanne said a tiny square with her tea was all she could eat because she felt the sugar on her teeth (although she reported she’s excited to eat another small bite with lunch). And her husband Jamie said yes, sweet, but good – and ate a hearty slice. Again, this is not for everyone.
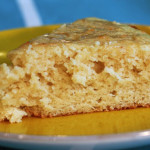
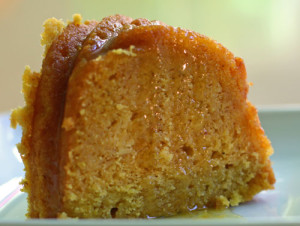 I noticed this recipe in Fine Cooking’s Sweet Cakes magazine because of the beautiful photograph of the cake – it looked delicious and pumpkiny – perfect for fall. I was also curious about the mix of orange, pumpkin and cornmeal. So off I baked. This cake is rich in color and texture and so very very moist. I will say that it is not as pumpkiny as I hoped. But agreed by all – especially the kids – that it was yummy. I asked Greg’s friend Alex if he tasted the pumpkin and he replied “well, what does pumpkin taste like?” Greg then followed with…”it doesn’t matter – it is good!” Friends (kids) Lauren and Zach had equally positive things to say – but again, not about the pumpkin more like “oh, is it lemon?” and “oh, I like carrot cake!” and more…”doesn’t matter, it’s good.” Another taster commented how long the
 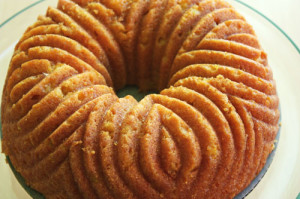 cake stayed moist and that it was perfect in the afternoon with her tea. Regardless of the pumpkin business…it is good. (Just wanted full disclosure.) This recipe has a few different steps, but each fairly easy. Enjoy this fall treat with surprising notes of citrus. Serve with vanilla yogurt to add another dimension to this sweet.
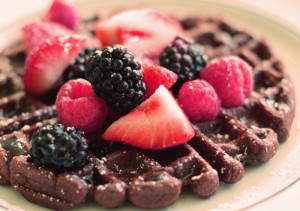 Sometimes the recipe that comes in the instruction manual is actually pretty good! In this case, very good. You may know (from a
 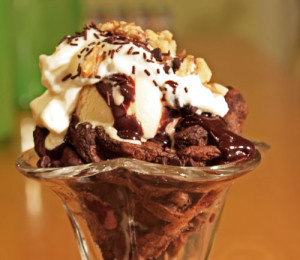 14 – 6 inch waffles. I wrapped each individually in plastic wrap and then into a freezer bag. (I just read about
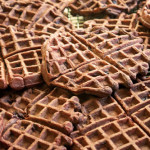

 The week of my daughter Sylvie’s school bake sale, my son Andy was sick with fever. I normally go cookie crazy the days leading up to the sale because as I’ve mentioned, I like baking! But this week was a little different – dividing my time between keeping him company, taking him to the doctor, talking to my friends about him, asking my dad and brother (who are docs) about him, and worrying about him (was it swine? no, it wasn’t, well, not sure). Luckily I made a large sheet pan of brownies last week – and froze them in preparation. I had the Halloween Peeps as well. I planned to make my soft meringues the day of the sale but really wanted to do more but keep it simple. I found what looked like a good recipe in
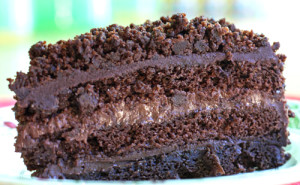 When I asked Ali (my friend and neighbor) what I could bake for her birthday, she looked hard and focused and said “chocolate.” I said like chocolate chocolate crazy chocolate? And she replied with a good happy grunt. So I started to hunt for a cake recipe that would suit both of us since I was going to celebrate too! I can get lazy with cakes and pies – which is why I’m psyched about this blog. It forces me to really bake out of my box. And I can be very tentative about cakes because I unfortunately do not have that artistic flair that makes it all just look good. But the blackout cake is perfect because you get to cover your cake with lots of cake crumbs,
 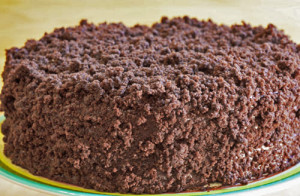 hiding any imperfections. I found and slightly adapted this recipe from the Nordstrom Flavors cookbook. I cook from this cookbook all the time – really great recipes here – but this is my first dessert. And wow, what a success. We ALL loved it. Ali and her husband Jonathan, their daughter Danika (their little guy Leo just wants Dove chocolates so no cake for him), my kids Andy and Sylvie (not Greg because he won’t even try chocolate cake), my husband Rob and my daughters piano teacher too (who I happened to give a piece to). Oh, and me! I overate and actually still feel slightly sick but it was worth it! If you make it in stages it is not overwhelming. I made the pudding first day, the cake the next day, and the ganac
 he and assembly the third. But if you’ve got the time you can make it happen in a day. Just read the recipe all the way through – so you can get yourself very organized.
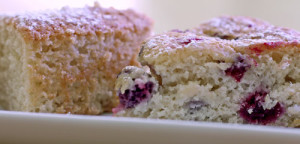 I loved the write-up of this recipe in Cake Keeper Cakes – in that you usually have the ingredients for it on hand. This is a great simple plain cake. One that my son Greg loves. He said “mom, this is amazing – it is just perfect for me!” Every day this week there was a piece in his lunch – and he was a very happy person. Laura Chattman’s recipe calls for the cake plain which is delicious, but I happen to have some mixed frozen berries and I added them to half the batter (I doubled the recipe and made two cakes). The result was equally as great. Greg’s friend Jamie was over and exclaimed that he loved berries and cake and “oh, Lisi, this is really really good.” My daughter Sylvie loved the berries in it too. I like this cake because there is no butter, and the low fat yogurt and eggs somehow make this feel like a healthy treat despite the sugar and white flour. (So I didn’t scold my au pair Alisa for eating it for breakfast.) Enjoy!