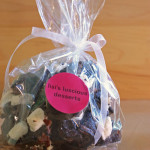

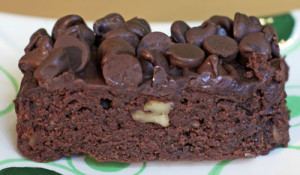
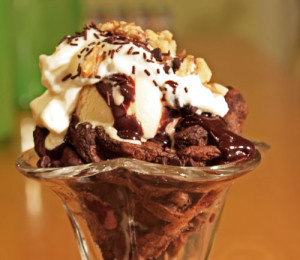
 I’m always on the lookout for a good frosted brownie. Always. I love my fudgy brownies and they are my “go to” brownies…but Rob loves and often asks for a frosted one. I made these thinking they were frosted, but they were really glazed – so I’m actually still on the lookout for Rob. But despite the glaze/frosting misunderstanding, these were delicious! Our friend Rob (another Rob) liked them so very much. He was impressed that with all the other desserts I offered – that a simple brownie stood out. Waaay out. I found these in Great Cookies by Carole Walter. Carole’s write up was so compelling that I had to try them. I didn’t change too much although I really loved the glaze in the espresso brownies so I put the two together. I added some chocolate chips to the top – just to continue the chocolate overdose theme and wow, great. These are a little bit crumbly – but if I can say so – in a really good way. I loved them as the base of a mini brownie sundae I ate Sunday night. Super mini, but delicious with my coffee ice cream. I will however, continue to try and test for a true frosted brownie, and a cakey brownie as well as a cracked topped brownie…as that is half of the fun! Enjoy-
glazed nutty brownies (adapted from Great Cookies by Carole Walter):
8 oz bittersweet chocolate – coarsely chopped
1/2 cup plus 2 tablespoons (1 1/4 sticks) unsalted butter – room temp for 15 m
3/4 cup firmly packed light brown sugar
1 1/2 teaspoons instant espresso powder
1 teaspoon vanilla extract
1/4 teaspoon finely ground black pepper (optional)
1/2 teaspoon kosher salt
3 large eggs (room temp)
3/4 cup all purpose flour
1 1/2 cups coarsely chopped walnuts (best if toasted first for 6-10 minutes in a 325 degree oven – until fragrant)
icing–
4 tablespoons butter
1/4 cup milk
1/2 cup sugar
1/2 cup light brown sugar
1/3 cup cocoa powder
1 teaspoon vanilla extract
1/3 teaspoon salt
chocolate chips – 1/2 cup to 1 cup depending on you (optional)
Preheat the oven to 325 degrees and line your pan with foil so that it comes over the edges of the pan. You can do this with parchment too. (That way, when cooked, you can pull the brownies from the pan – holding onto the foil – in one quick and easy effort. Then smooth down the sides of the foil, and easily cut and serve.) If you don’t care about appearance, then just butter the bottom of the pan – and you can dig them out later. Up to you.
If you plan to toast the nuts now is a good time – in a preheated oven at 325 degrees and place nuts in a single layer on a foil lined sheet pan (less cleanup). Cooking time varies based on the size of your nut so check these often – you want them to be fragrant and have a warmer color – but do not burn (obviously). This can take from 6-10 minutes.
Melt the chocolate in a metal or heatproof bowl atop a small amount of simmering water. (Or a double boiler.) Slowly melt the chocolate and stir occasionally. Remove when melted and set aside to cool a bit.
In your mixer – with paddle attachment, beat the butter until smooth then add the brown sugar, espresso powder, vanilla, pepper, and salt. Mix well. Scrape down the sides of the bowl, and mix again.
Add the eggs one at a time (wait to add next egg until you can’t see the egg before). Scrape down the bowl, and mix again – for another minute or two on medium speed. The mixture will look curdled but don’t worry.
I like to do the rest by hand, but either way by hand or the mixer on low, lightly mix the melted chocolate into the batter. Fold the flour in very gently and mix until almost incorporated. Add the cooled nuts and fold in as well incorporating the nuts and the rest of the flour. Do not over mix.
Place in prepared pan and bake for approximately 30-35 minutes. Mine took 33 – Carole’s took 35 so as usual check often and before…checking every 2 minutes or so towards the end. These brownies should come out slightly wet with a toothpick. You want them that way – and they will continue to cook a little bit more on the counter. Let cool a bit maybe 15 minutes or so.
In the meantime, make the icing. Bring the butter, milk, sugars, cocoa, vanilla and salt to a boil in a small saucepan. Continue to stir and whisk as it comes to a boil.
Pour the icing over the warm brownie (you may not need all of it – but save it! Use it with something else). I then scattered semisweet chocolate chips all over the glaze – for an extra extra chocolate explosion. This is really optional! I’m just crazy about texture. Then let all set and harden for a few hours.
When cool and set, using the foil as an aid, pull the brownies from the pan and place on cutting board. Smooth down the edges of the foil and there you go – no fighting to get them out of the pan. All pretty and all neat (if you care!)
Feel free to freeze.
Enjoy!

 These are incredible. They are very very strong in coffee flavor – made with ground espresso beans that give them great chewy/crunchy texture. Lauren – a 10 year old exclaimed that “they taste like Starbucks.” I love them – the icing is sweet and delicious and although the brownies are very rich, they are addictive. I nibbled throughout the day. And now I’m full of caffeinated energy! (I’m writing very late for me…after watching the entire Sound Of Music with my daughter…she ate them too!) I also made an espresso brownie ice cream by chopping the brownies into small bits and adding them to freshly churned vanilla ice
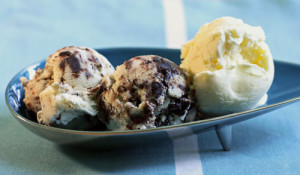 cream. So very good! I found these brownies in Saveur Magazine. The article listed three different and highly regarded brownie recipes. Since I was familiar with the first two (Nick Malgieri’s and Kate Hepburn’s) and loved both, I decided that I had to try these – developed by Krystal Stone – an assistant at Saveur. I tweaked the recipe just a little here and there. There are a few special pantry items that you’ll need:
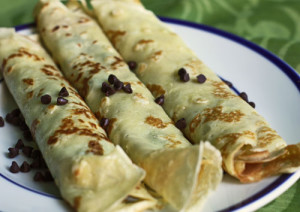 If you read this regularly, you know that Andy, my 10 year old, is a huge fan of chocolate in the morning. Last year he came home very happy and full after a sleepover with his twin friends Zach and Davis. He excitedly told me that their father made these Danish pancakes – and that they were delicious. I immediately called Tracy (my friend, their mom) and got the recipe. My brother-in-law Patrick who is French does not understand why they are called Danish Pancakes – he seems somewhat irritated by this and claims that they are simply French crepes! Oh well, either way, they are good and fairly easy to make once you get the hang of it. Oh, and we fill them with cinnamon sugar and mini chips – but my Nutella loving nephew Daniel fills them with…Nutella. Be creative, have fun – skip the chocolate if not for you and add fresh fruit or jam, or eat plain with confectioners’ sugar. Enjoy!
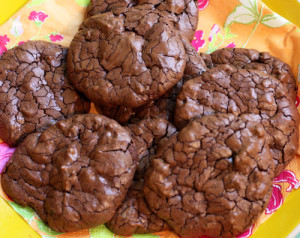

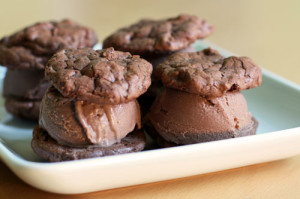 These ice cream sandwiches are delicious. My son Greg asks for them often – and since it is a little work (not crazy work) to make the ice cream, I often blow his request off. But he was very happy last night. He turned to me… gave a quiet groan of delight, looked me in the eyes and simply thanked me. My dad who really only likes Haagen Daaz choc choc chip also loves these little sandwiches. He seemed surprised that he liked them so much – especially given the milk chocolate title. But the addition of bittersweet chocolate and malt really make the ice cream special and not too sweet. The cookies are extra delicious too. A little espresso deepens the flavor and I happen to love the texture of the mini chips. And they are very easy to make. My husband Rob can’t eat/drink milk (sadly) but is very content with these brownie-like cookies alone. I am too! I’ve also made the sandwiches with chocolate sorbet which he truly appreciates. This recipe
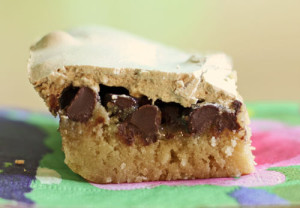 These bars were my favorite childhood dessert. I recently asked my mom for the recipe – but being that she is so neat and tidy (which is great), she often throws things away (not so great). I suffer the same affliction at times. Anyway, luckily my very good friend Michelle also loved these as a child (we were family friends so she was treated to my mom’s sweets). And Michelle held onto the recipe! It is a weird recipe and I had some doubts as I made them – but they were the same ones from my childhood. I should tell you that these are very very sweet. Not for the tame hearted sugar eaters here – but oh…for me – they are decadent and heavenly. Rich and gooey. I cut one up and put it in my vanilla ice cream last night and really, I felt so content. My kids wouldn’t eat them the first night. I said ok everyone – time for something new…my favorite… and I was met with groans of “more dessert?” And “can’t we just have a little candy tonight” Oh boy. The second night they tried it – and loved it – especially Sylvie and our neighbor Danika. Greg said it tasted like cookie dough. My friend Suzanne said a tiny square with her tea was all she could eat because she felt the sugar on her teeth (although she reported she’s excited to eat another small bite with lunch). And her husband Jamie said yes, sweet, but good – and ate a hearty slice. Again, this is not for everyone.
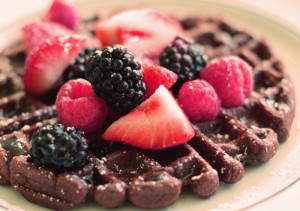 Sometimes the recipe that comes in the instruction manual is actually pretty good! In this case, very good. You may know (from a
  14 – 6 inch waffles. I wrapped each individually in plastic wrap and then into a freezer bag. (I just read about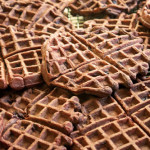

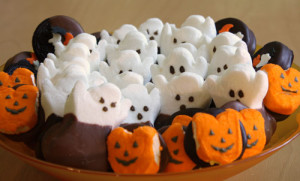 A plain Peep is not something that I love. However…a chocolate covered Peep is divine. Seriously. I did a short stint at Chocolations (a local chocolate shop) last year and Maria, the owner, was dipping Easter Peeps in chocolate. Well, that was it. Done. Count me in. My early resistance to Peeps was no more. I lovingly dip, serve and eat them often. Surprisingly it is not just the kids (and I) who love them. Rob loves them coated in dark bitter chocolate – to cut the sweetness – and both milk and dark make me happy. The ghosts are almost fully dipped in chocolate while the pumpkins are placed on a chocolate disk. While I was at it, I decided to make some chocolate covered Halloween Oreo treats as well.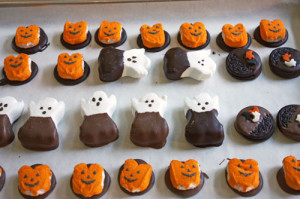

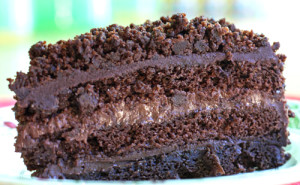 When I asked Ali (my friend and neighbor) what I could bake for her birthday, she looked hard and focused and said “chocolate.” I said like chocolate chocolate crazy chocolate? And she replied with a good happy grunt. So I started to hunt for a cake recipe that would suit both of us since I was going to celebrate too! I can get lazy with cakes and pies – which is why I’m psyched about this blog. It forces me to really bake out of my box. And I can be very tentative about cakes because I unfortunately do not have that artistic flair that makes it all just look good. But the blackout cake is perfect because you get to cover your cake with lots of cake crumbs,
 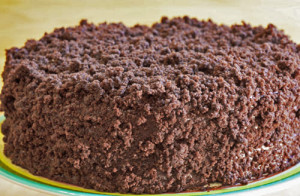 hiding any imperfections. I found and slightly adapted this recipe from the Nordstrom Flavors cookbook. I cook from this cookbook all the time – really great recipes here – but this is my first dessert. And wow, what a success. We ALL loved it. Ali and her husband Jonathan, their daughter Danika (their little guy Leo just wants Dove chocolates so no cake for him), my kids Andy and Sylvie (not Greg because he won’t even try chocolate cake), my husband Rob and my daughters piano teacher too (who I happened to give a piece to). Oh, and me! I overate and actually still feel slightly sick but it was worth it! If you make it in stages it is not overwhelming. I made the pudding first day, the cake the next day, and the ganac
 he and assembly the third. But if you’ve got the time you can make it happen in a day. Just read the recipe all the way through – so you can get yourself very organized.
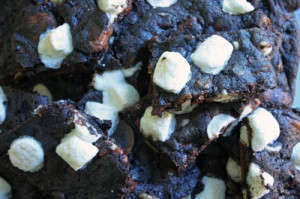 This stuff is heaven. I really truly mean it. Moist, very chocolaty cookies, filled with various chips, nuts and marshmallows all creating a mouthwatering texture and taste that seriously rivals most cookies I’ve eaten. The free form shape adds to my delight (for reasons I can’t explain). I made these for the last school fair and they were a serious hit. I always double the recipe (the recipe below is doubled) and freeze a bunch for my son Greg who is normally not a crazy chocolate lover. He takes these from the freezer and pops them in the microwave and eats them warm and gooey. He groans with pleasure and raves and raves and thanks me for making them. Gotta love that at 13. I like them with vanilla ice cream (what else is new). This recipe is adapted from The Baker’s Field Guide to Chocolate Chip Cookies by Dede Wilson. She calls them Heavenly Hash Break-up Bars, but Greg (my son) quickly named them Cookie Bark but no matter what you call them they are good. Seriously good. So bake them soon and enjoy!! *Reader – order the
 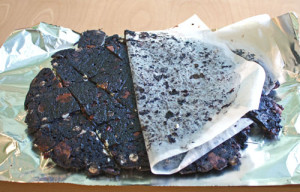 nderbaked this last batch and they were really really good, although a little bit harder to handle. Getting them off of the parchment was a little tricky, so I picked the whole piece of parchment (with cookie attached) and flipped it over a piece of tin foil and just peeled back the parchment. That did the trick. You can cut before or after. These are great gifts as well. I was baking for Gilda’s Club and decided to package them up in a little bag – nice for the holidays or just a little treat for a friend or family.