
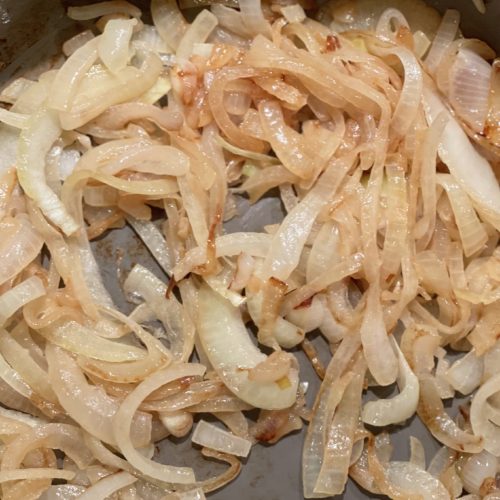
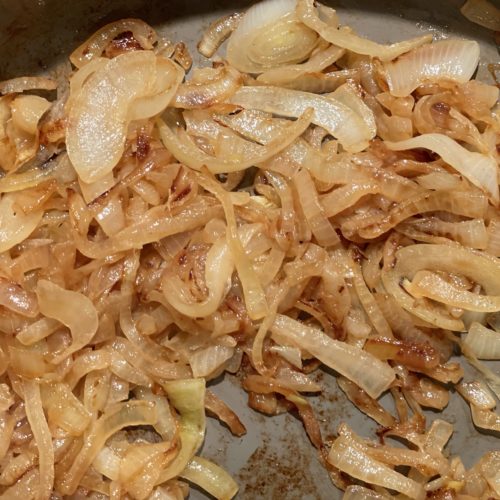
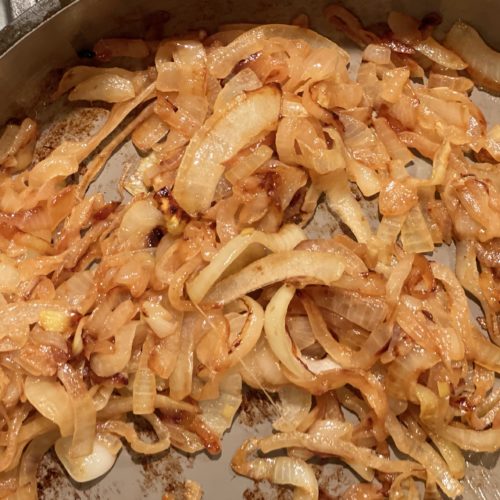
I went further on these but forgot to take a final photo – but this is what the onions looked like as they cooked for the French onion chicken meatballs in the last post. So cook and cook and cook some more. If you plan on serving the onions alone – there are several recipes on-line that add wine, broth, or balsamic vinegar. Pair with a burger or steak – add some mushrooms and you’ve got something delicious going on.

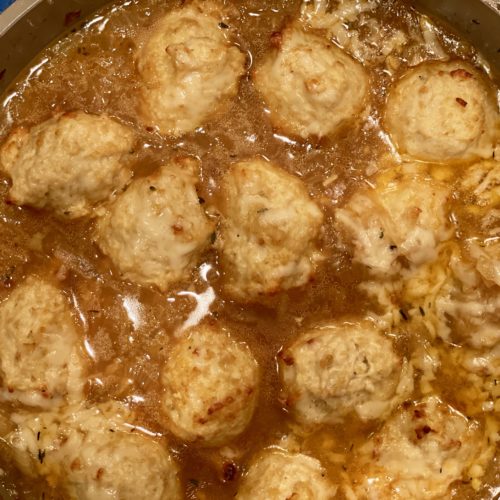
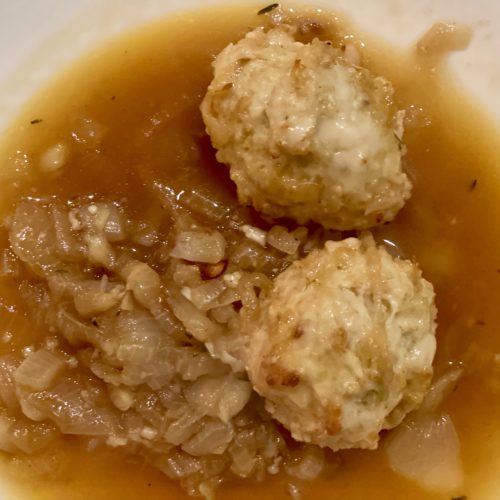
I love French onion soup so when I saw this recipe I knew I had to try it. So glad I did. The caramelized onions, rich beef broth and little tasty meatballs are the makings of this perfect dish. “Delicious” said Rob today at lunch as he ate his leftovers. “Mmm mmm so good!” I said exuberantly to Rob and Sylvie to which they indulged me with kind smiles.
The first time I made the meatballs with a mixture of ground turkey and chicken and used a beef/chicken/turkey stock. I used less butter than the recipe called for but left most everything else as is. The second time I used just chicken meat in the meatballs and beef stock. This time I cut the cheese in half (inside the meatballs) and also put less on top figuring you can add more cheese if you like on your own. They were equally delicious. Really. Well obviously the more cheese the better (if you like cheese).
Both times I did not have gruyere cheese and substituted parmesan. But really gruyere would be great. I just flaked on it.
In terms of stock – and this is for all recipes, purchase the richest stock/broth/bone broth you can find and afford. Or make homemade. The freezer section has some great options these days and yes, I know pricey but this will really make a difference. Bonafide provisions makes good broth and I see it often in stores. Brodo also has great stock. If your stock tastes bland – or you only have boxed broth then I have a small trick. More than gourmet is a product that I really love. They sell little packets of glace stock (that’s what they call it). The glace is chicken, veal, or beef stock and reduced so much that it lands in this little packet in the palm of your hand. You can actually make a broth from this little packet by and adding water. But I use it to enrich my broths and stocks – I don’t use the whole packet I use just a bit and mix it in and taste, and readjust. A teaspoon might help, or 2 teaspoons. In this case I added a little bit of the beef and although my broth was tasty, this put it over the edge into scrumptious.
The kids put it over noodles and Rob and I had with a cauliflower/veggie rice. At lunch he heated up leftover butternut squash and ate it all together and just loved it. I just ate mine as is – and slurped the remaining liquid right out of the bowl and into my mouth. That is when I declared my happiness.
I found this recipe at delish.com – if interested check out the comments at the bottom of their recipe for changes, additions and thoughts. I’m always interested in how others change a recipe to improve it or just make it their own. They also have a 1 minute video that shows how to make this all come together so check that out too.
You can make the meatballs in advance and make the sauce closer to dinner to break up the time. I listen to an audio book while I cook so it is very enjoyable. I recommend it.
I DOUBLED THE RECIPE BELOW

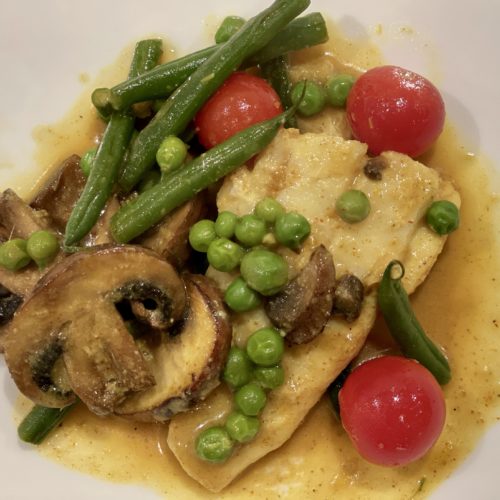
This curry is a new favorite of ours – I made it with flounder which was not the best choice as it fell apart a bit. I managed to take a lovely photo but next time I’d try with a firmer fish like cod or haddock or cod. I found this recipe in an older cookbook of mine. Periodically I go through my books and donate a bunch that I rarely use. This one though, The Mediterrasian Way, I always hold on to. It is weird because the concept of the book is Mediterranean and also Asian. The recipes are not mixed – no fusion here. Just simple healthy meals that are spicy and flavorful.
Prep the ingredients before you cook as it all comes together fairly fast and easy. Serve with rice or cauliflower rice – or over a bed of baby spinach (that will soften when you add the hot curry) or add extra veggies and eat just like that. You can also add the fresh spinach at the end – and that is also when I add peas and tomatoes and any veg that doesn’t take long to cook.
I will give you the basic recipe here – but as you can see from the photo, I used haricot beans, baby Bella mushrooms, peas and tomato. But have fun and make what you enjoy. If you want your fish to have a little color to it, just pan sear right before you place it into the curry broth. I didn’t here – but I know if I was cooking for a reluctant fish eater, I might because for some reason fish with color is a little less intimidating. Maybe…
Serves: 4
medium to fairly easy
Prep all ingredients and set up by the stove.

I’m going to update and add to this list but for a start…
Baking smart:
Pre-heat the oven!! This is very important. Do not put your cookies/cake/tart in the oven until it is fully preheated.
Avoid dry and crumbly cookies by the way you measure flour:
The difference between a heavily packed cup of flour and a lightly packed cup of flour can be even more than an ounce. That is a lot in the baking world. Do no pack flour into the cup and shave with a knife. Also, don’t shake the flour in the cup to flatten it. Instead, aerate the flour with a spoon or whisk then spoon the flour into the measuring cup until full. Just filling it. A cup of flour should weigh about 4.5 ounces – (always check the conversion chart in the cookbook and use that.) If nothing there go with 4.5 ounces.
Do you know how to easily weigh your flour? Use the tare button (check out this video) it is simple. And it is worth buying a small digital scale for this purpose. Some cookbooks list the ingredients in ounces and some even in grams. It is amazing. Especially for “packed” brown sugar which is so irregular and dependent on the baker. Overmixing your batter after the flour has been added to the moist ingredients can also result in a tough cookie or a heavy crumb in a cake. It can also produce a cake with a big domed top. Just mix/fold in flour and really try not to overwork the batter.
Butter:
Use good quality unsalted butter. That way you can control the amount of salt in your recipes. If a recipe calls for softened butter it means softened, not melted. Butter should be malleable – not so soft it looks greasy. If you leave butter out for too long or melt it too much, your cookies will spread and flatten. For best results leave out for 20-30 minutes before you bake. Otherwise carefully, and in increments, microwave the butter until soft. Also, don’t rush the “creaming the butter” stage in cookies and cakes. It is vital in making a light and fluffy batter or dough.
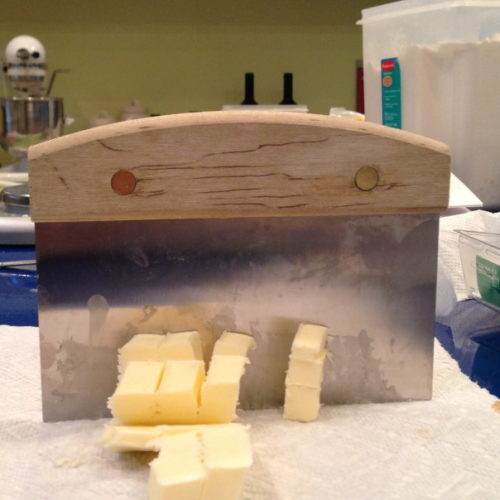
If you need small pieces of butter (for pie dough or streusel), a bench scraper does the trick. A scraper is great for clean up too. Use it (horizontally) to clean up crumbs and flour before you wipe down your countertops.
Vanilla:
Use good quality vanilla extract. They sell quality vanilla now almost everywhere. I love the double strength vanilla extract from Penzeys.com but also the Madagascar vanilla that you often see in gourmet stores.
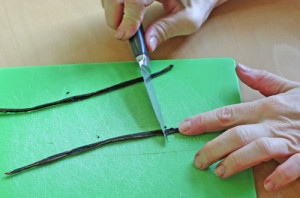
To scrape and seed a vanilla bean, place the long bean on a cutting board. With your paring knife, slice the bean lengthwise – from top to bottom all the way down and through. Open it up and you will see the soft brown inside. With the back (dull side) of your knife, scrape the bean gently lifting the seeds as you run the dull knife down. Here is a quick visual. These pods contain so much flavor and deliciousness. Buy pods in bulk (less expensive) and you can store them in an airtight container. I often put that into the freezer.
Apples:
One of my first jobs at the bakery was to peel and core a big box of apples. Well, you learn quickly when you have that many to do.
I know when you see – “8 apples roughly chopped”, your heart might sink a bit with the prep work. So, here is the plan of attack. First, put on some really good music. These days I happen to prefer audiobooks but pick your passion
I’ll try to make a video fo this soon. In the meantime, cut the top and bottoms off of the apples. All of them. Then peel each apple with a sharp paring knife (I do this) but try not to take too much of the flesh off. If you are lousy at this – use a peeler. Peel them all. Slice the apples in half. Cutting along the center, the stem. All of them.
Taker your apple corer (you should get one) and scoop out the center core by gently pushing the scooper in and twisting. Then use the scooper to take the little extra rough bits around the core. Core them all. Take each apple half and slice. Now you have slices. Turn apple, slice again – now you have roughly chopped apples.
Chocolate:
Melted chocolate means melted chocolate – not hot or heated chocolate. Be careful with this because your chocolate can “seize” and you will have scorched and unusable chocolate.
Purchase good quality chocolate. I like Guittard and Callebau. Also don’t melt chocolate chips when you are meant to be melting chocolate. But a bar as the chips are made up differently and won’t give you what you probably need.


IN GENERAL
Please try to read all of this section. It will just take about 4 minutes and you might learn something. You never know.
There is a separate section with baking tips.
Decide what you will make for the week over the weekend or when you have extra time and start a grocery list – look at ingredients, make a list, then go to the store for whatever is missing from the pantry or fridge.
Always preview a recipe – sometimes you will need to marinate overnight. It’s good to know that the day before!
Before you cook, read the recipe through first and a second time so you have a basic understanding of what has to happen.
Try to get all ingredients prepped before you start (esp as a beginner). Dice, chop, mince, etc.
Ignore cooking times. Well – ballpark is good – but otherwise, check your dishes by using your own senses (smell, taste, touch) to decide when they are done. Use a meat thermometer for safety with poultry.
You can always google questions like “what is a good substitution for xxx?” It’s all at your fingertips.
I often double the sauce or spices in a recipe because it often needs more sauce (esp. Asian) and I like things with extra flavor. I also tend to add more kosher salt. And I finish my recipes with Maldon Salt which is delicious. (You can find this in “my favorite things”.
Experiment. Recipes are only a guideline. Feel free to substitute ingredients that you prefer. And always taste your dishes before serving. Then you can adjust your salt/pepper, or add a splash of lemon juice if too sweet.
And remember, If you don’t like your food too spicy you can always ADD spice but you cannot take it away!
This is a good one that I learned in cooking school. Anchor your cutting board to the counter with a wet paper towel under it to keep it from moving around – this will steady the board and it will be safer and easier for you to chop.
Prevent bacteria growth by cooling hot food in a shallow dish in the fridge – or break into smaller bowls.
You can substitute ground turkey, chicken and beef for each other. Do not buy the “leanest” chicken or turkey – or “plain white meat” as it needs a bit more fat to be tasty.


Learning how your oven works will take time. Although if it is very basic it shouldn’t take too much time. I’ve had ovens that run hot and cold also differing in temp between the front and the back. This can result in uneven browning so I usually rotate my sheet pans half way through cooking.
Remember to let the oven preheat fully before you cook. This is very important. Don’t rush.
Most recipes will say “bake” and you can certainly follow that. Bake is when the bottom heating element in the oven heats up.
Convection – newer ovens have a convection button that you can add to bake or roast. Convection means there is a fan inside the oven blowing the air all around – this can make the food cook faster and more evenly. If you are using two racks at the same time, it might be good to put convection on. Lower the oven temp if switching to convection by 15 degrees or so. And check on your food earlier than stated in the recipe.
Roast – This is like bake, but it adds heat from the heating element on the top of the oven along with the bottom element. So you have heat coming in both directions. Your food will likely cook faster and brown both the bottom and the top.
Convection Roast – both the top and bottom heating elements are on as well as the fan that blows the hot air. I often cookie sheet pans of vegetables this way as we like them crispy.
Broil – is when only the top heating element is on and it is very hot. This is how you quickly brown your meats, or crisp up that chicken skin – or produce that yummy crackly sugar on a creme brûlée.
When sautéing, it is important to first heat the pan, then heat the oil, then add the ingredients.
Never overcrowd your pan/skillet with food. The heat will not distribute evenly. And instead of sautéing the food it will almost boil in their own juices which isn’t terrible but way less appealing.
When you sauté – make sure the oil is hot before adding all of your ingredients. Throw a small piece of something in the oil and make sure it sizzles before adding the rest.
Seasonings are up to you – if you know you like hot spice, add a little extra of it. If you know you don’t like oregano (me), then omit it. I often add a bit more kosher salt in the recipe. Usually a lot more – and then I finish with Maldon Sea salt which is delicious.
If you are using a rice cooker, the brown rice takes almost an hour to cook and it can stay in the rice cooker for a while. It will automatically stay on “warm” until you unplug it. White rice cooks a bit faster. Rice cookers make life easier because once you set it up, you are done with it until you eat.
Sauté with regular olive oil or canola oil or another high spoke point oil. Use the extra virgin olive oil for finishing a dish – like drizzling it on salad or meat – or naan – or for roasting veggies.
Usually it is large eggs in a recipe unless otherwise noted
If your recipe calls for buttermilk, you can use regular milk with lemon juice – google that.
Let raw steaks come to room temperature before seasoning and grilling. Allow cooked or grilled meat to rest at room temperature for 10 minutes before serving.
(I’ve quoted from others…) Embrace salt. Don’t be afraid to use salt; it pulls the flavors out of your dishes. Cook with kosher salt and season with sea salt. Season! your! food!
Salt is the key to making food’s flavor jump around on your tongue. Most recipes will mention when you should add salt (and probably pepper as well), but it’s a good rule of thumb to add at least a pinch or two when you start cooking and again at the very end. Your palate will be the ultimate guide here, so taste often.
Use plain Greek yogurt as a healthy substitute for mayo, sour cream, heavy cream and more.

Grit can ruin dish – so to clean it:


Protein – chicken, beef, fish, shrimp (frozen uncooked shrimp are good to have on hand)
Fresh oranges, lemons and limes
An assortment of fresh veggies, and don’t forget garlic and onion (store away from potatoes).
Frozen vegetables – corn, rice, peas and frozen edamame
Fresh ginger (this is usually near potatoes in the supermarket)
Apple cider vinegar, red white vinegar, white wine vinegar, balsamic vinegar and my fave if you like, fig vinegar.
Extra virgin olive oil, olive oil (for cooking), avocado oil if you like, canola oil, sesame oil
Potatoes (store in a cool spot away from onions and garlic)
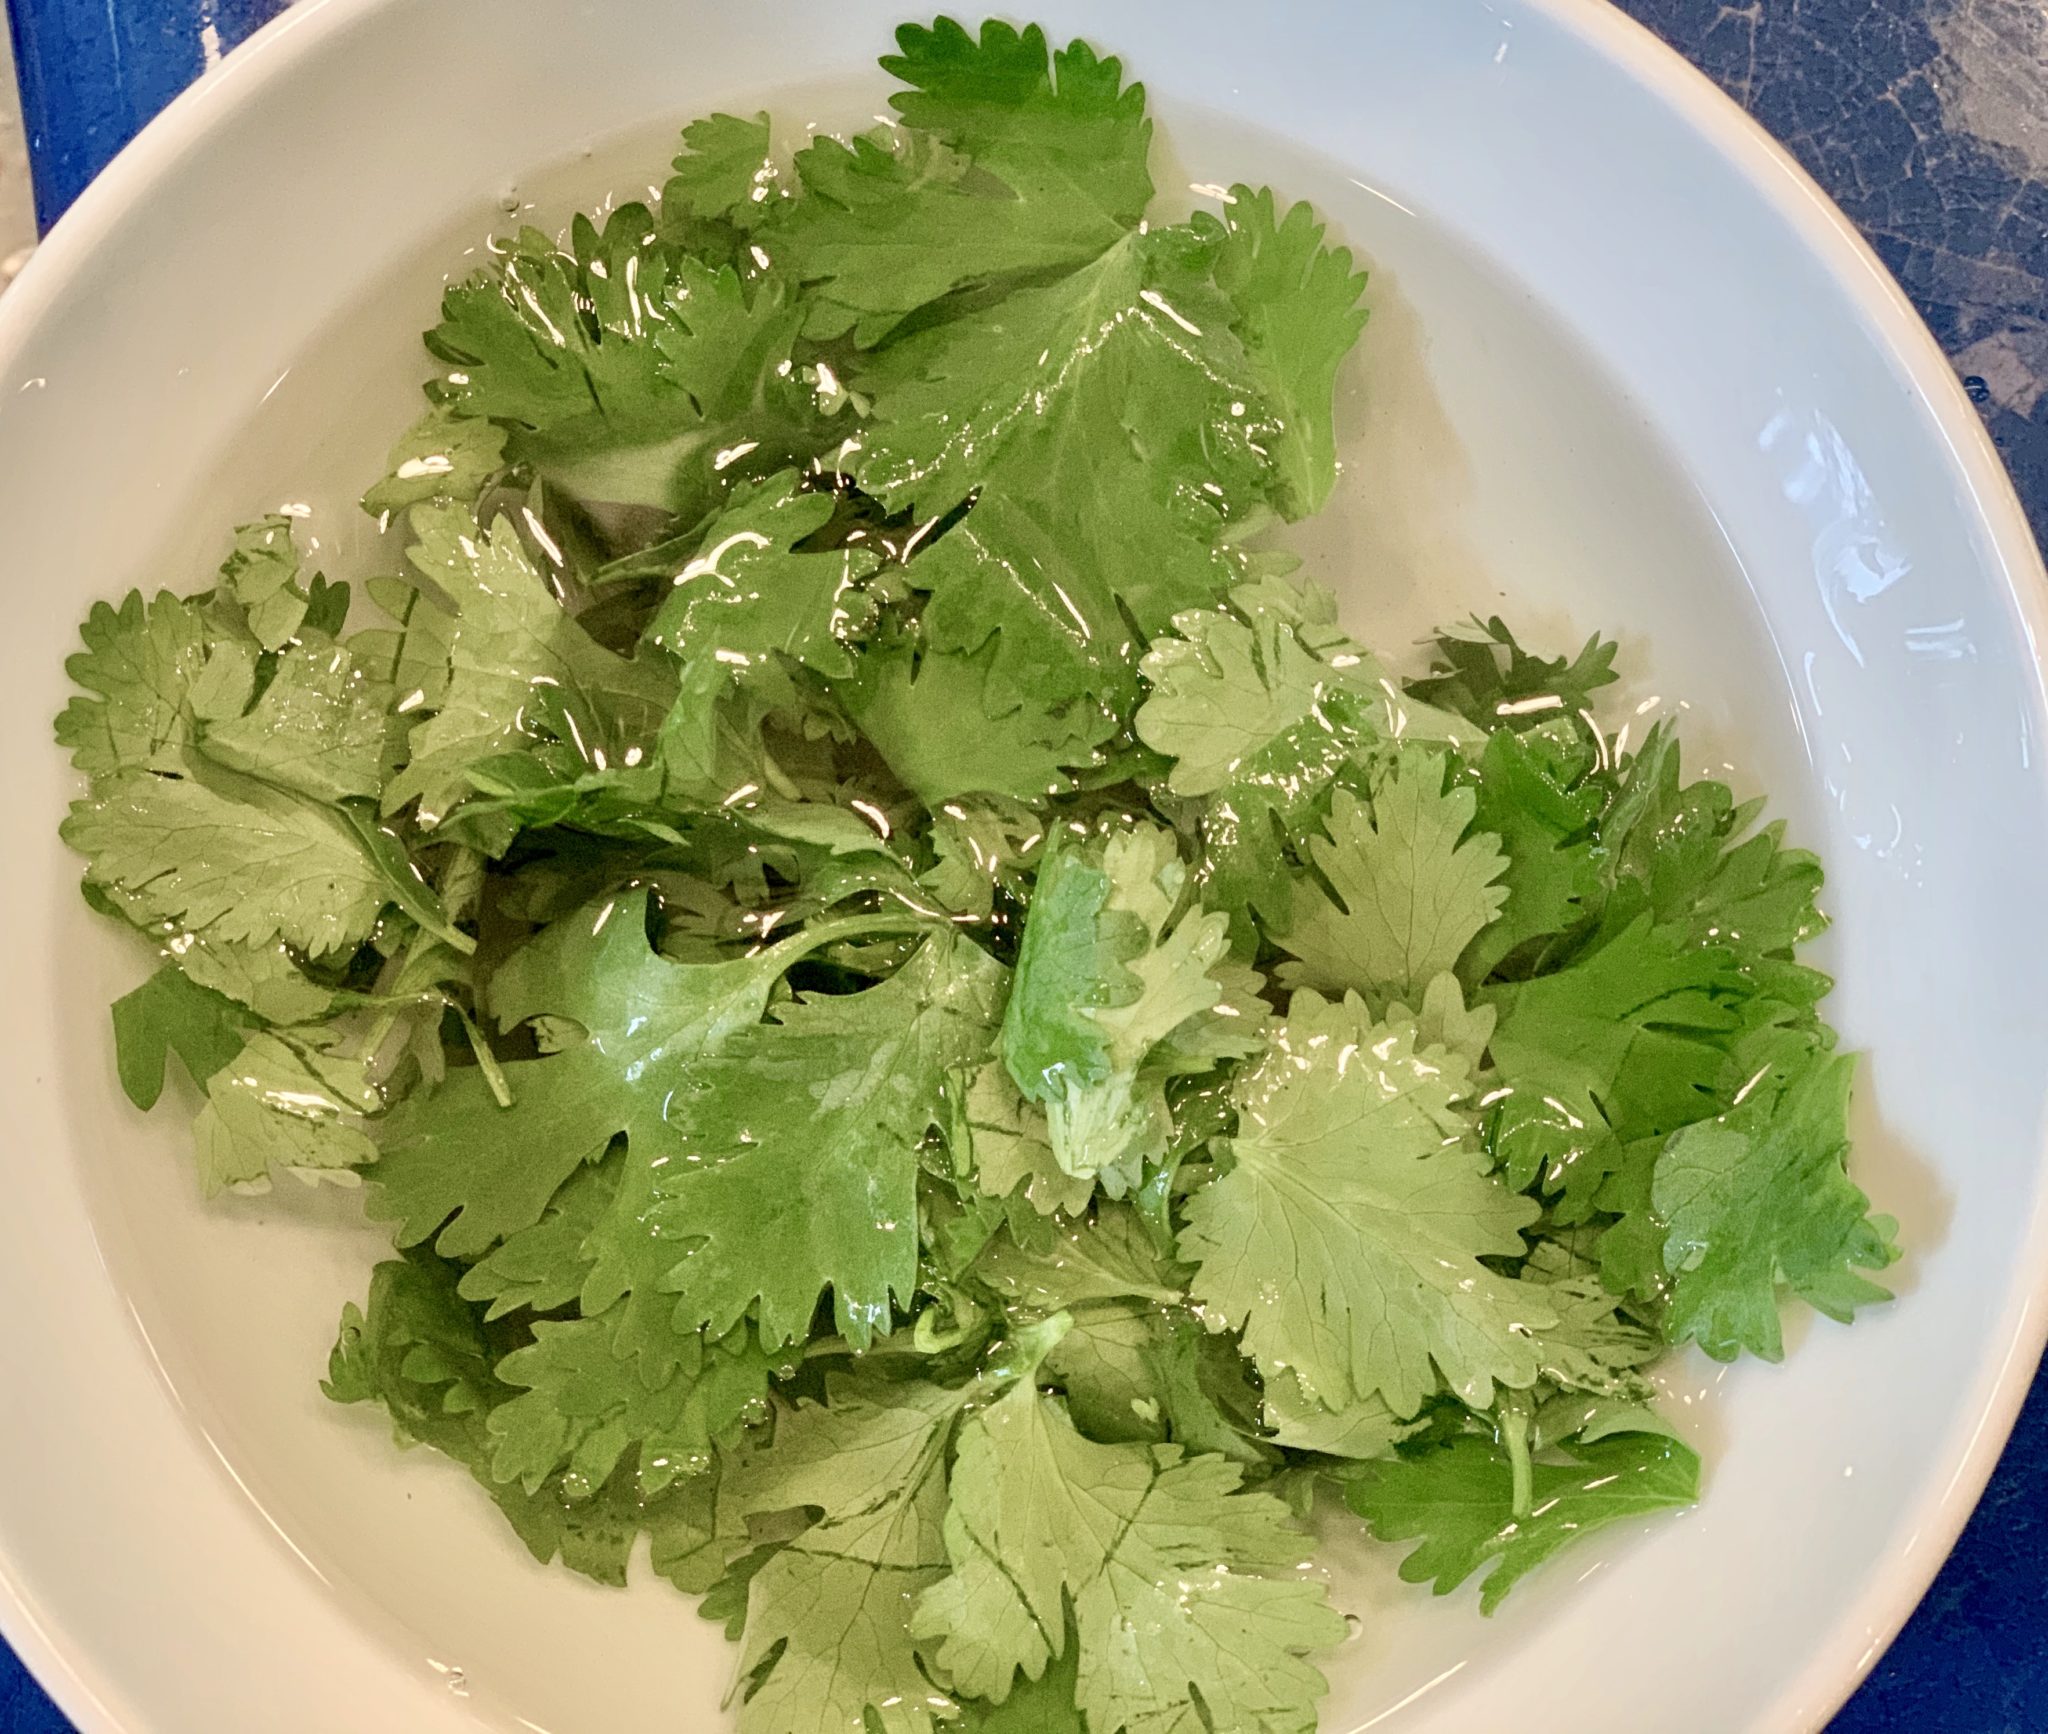
Fresh herbs (depends on your recipes for the week) I love basil and cilantro
Butter – unsalted (because you can always add salt yourself), Ghee if dairy free
Eggs (organic) if possible. Usually large
Milk. Sour cream or greek yogurt (esp for tacos)
Cheese – Manchego is really good in sandwiches or solo. Parmesan cheese. Mozzarella
Agave syrup (usually near the sugars and honey), Maple syrup, Honey
Brown sugars, sugar, confectionery sugar (if you plan to bake at all)
Flour – all purpose or GF
Breadcrumbs (whole wheat, seasoned and plain, white and panko – and assortment is great)
Spices – you can purchase as you need when a recipe calls for it – but good ones to have are: chile powder, cumin, cayenne, paprika, onion powder, garlic powder, Italian seasonings – basil, oregano, mustard powder, curry powder, coriander, thyme, rosemary, red pepper flakes
Ketchup, mustard, mayo
Capers and olives and pickles
Chiles in Adobo sauce. A few cans. Once you open one, put the rest in a small glass container in the fridge.
Tomato sauce, marinara sauce, crushed tomatoes, passata, fire roasted chipped tomatoes (in cans), tomato paste
Beef, chicken broth. If you can find frozen stock or bone broth that is even better.
Cornstarch, baking powder, baking soda
Diamond Crystal kosher salt, fresh pepper, Maldon sea salt (so good)
Pasta – whole wheat and white, Rice – brown, light brown
Apricot jam is great to cook with – especially a teriyaki chicken
Red and white wine – inexpensive but not too cheap – as you are enhancing your food.
Asian cooking:
Coconut milk
Thai red and green curry paste
Miso paste
Soy sauce, coconut aminos if GF
Hoisen sauce, oyster sauce
Rice vinegar – unseasoned
Mirin
Fish sauce! a must
If you are reading this and can think of other additions then please lmk –

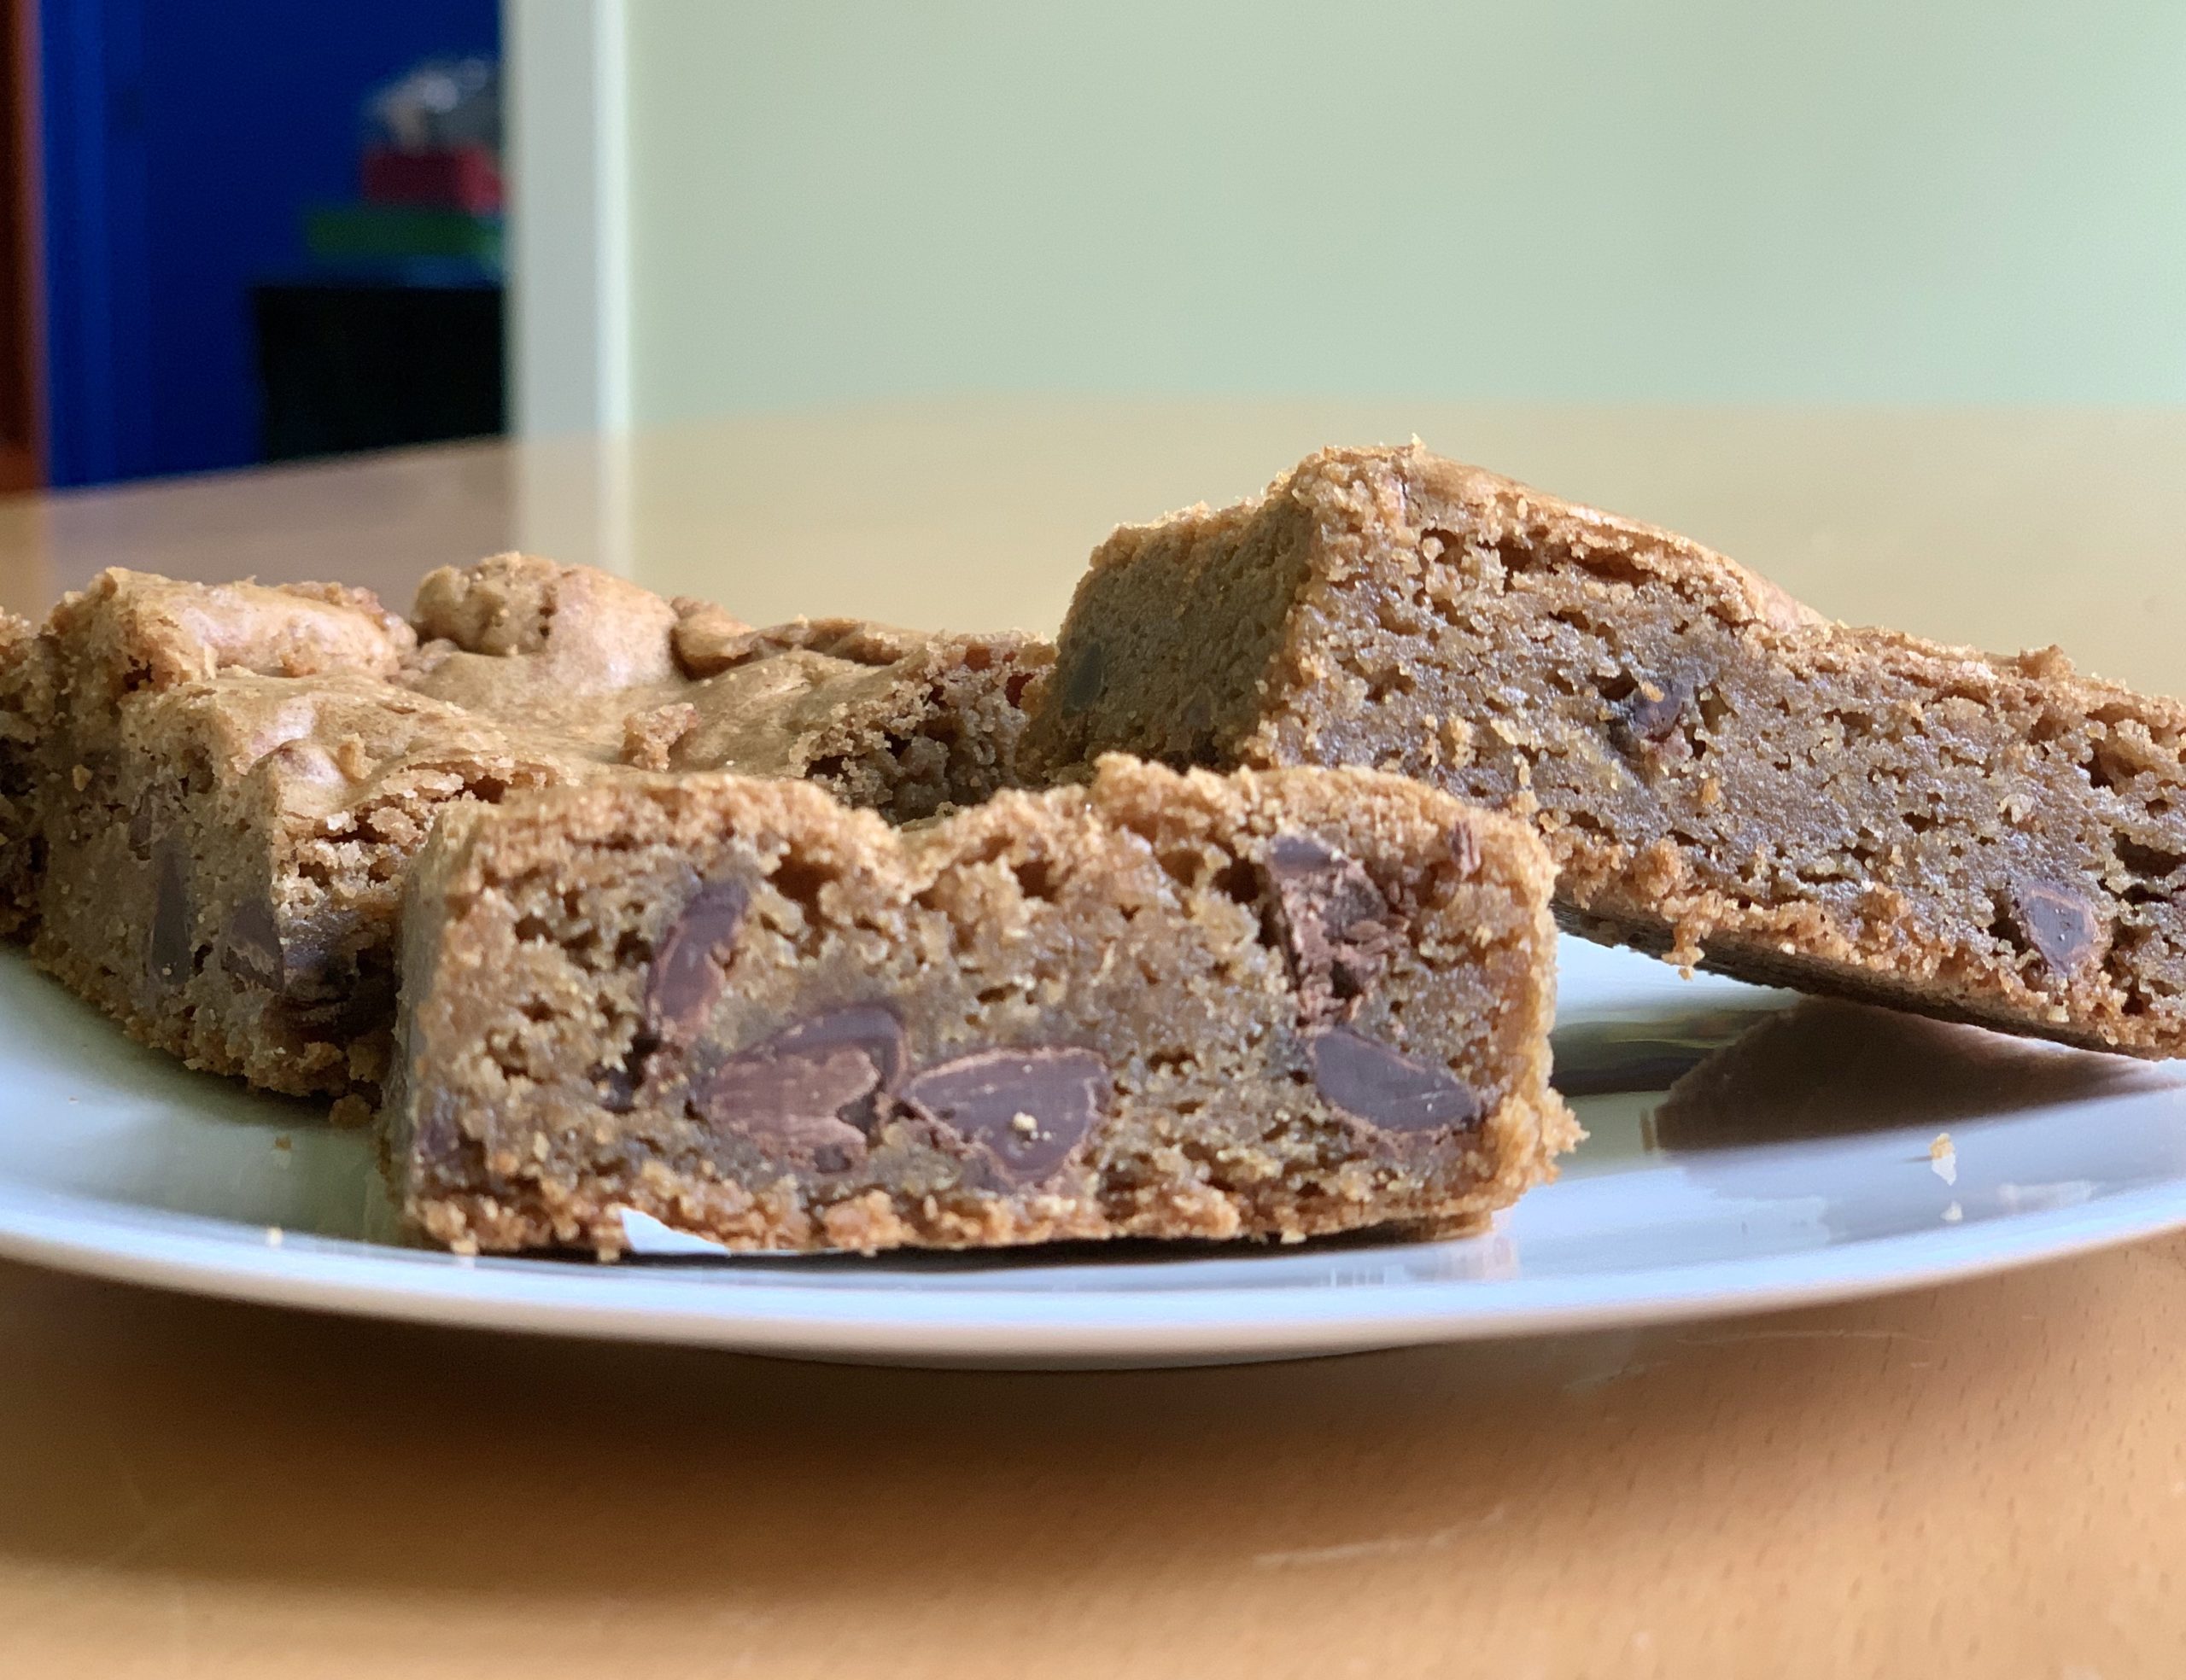
The title in the NY Times said “These Brownies are as sweet as candy” – chewy, salty and run through with brown butter… Well, come on, how could I not make them. My mom sent me the recipe oh, I don’t know maybe 6 different times. And I had already clipped it.
I love these. LOVE. They are not for everyone because they are definitely on the sweet side. I made them this summer for a hospital near by and I was told that they were a hit. They are incredibly easy and use only one bowl so they are ideal for bulk baking. Additionally they freeze well. The brownies can be made with or without chocolate chips and with or without nuts – but to me pecans and chocolate are ideal. There are choices too of vanilla, coffee or rum -and for me coffee hit the spot but you get to pick.
As mentioned – I found this in the NewYork Times and created by Melissa Clark.
Have a good time –
Preheat oven to 350 degrees. Grease or better yet foil a 9×9 pan or 9×13 pan. Let the foil have a nice overhang so you can use it to pull the brownies out of the pan.

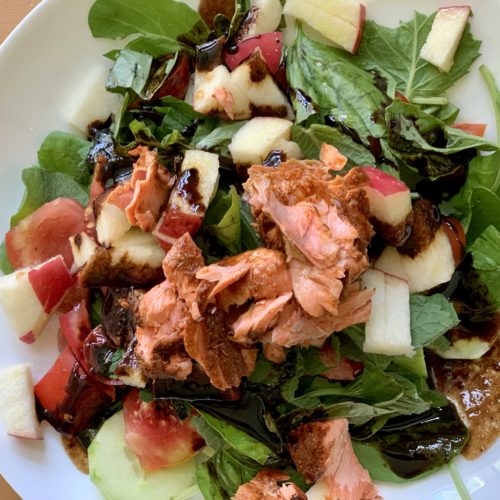
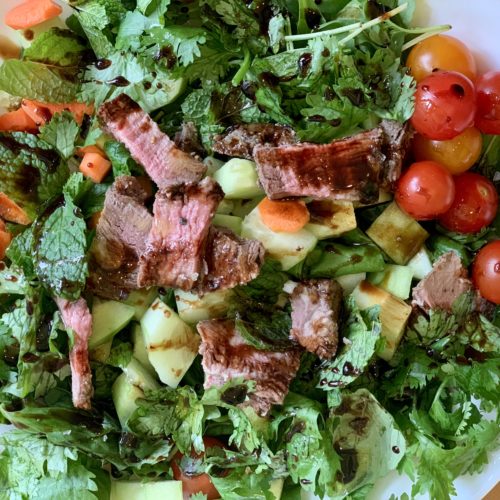
Not certain what I would do without this vinegar. It is great right out of the bottle – haha – no – I don’t actually do that, although truthfully I do lick my fingers sometimes. If on a desert island I might just have to bring it – with one of the salads above and some ice cream :).
As you can see above it is wonderful on my salmon salad and my steak salad. I basically make a variation of this salad almost every day for lunch. Today it was leftover chicken. I add herbs too and usually a diced apple. If I don’t have a leftover protein I’ll add a fried or boiled egg and add a few pistachios. Mmmm. Oh, and cheese is especially good on that steak salad. I’m sure most of you know all of this and I’m just rambling.
So, I drizzle this all over, add a tad of good quality extra virgin olive oil, Maldon sea salt and pepper and well….scrumptious. I’ve been using this vinegar for many years now and I do not tire of it.
It is also great drizzled on roasted brussel sprouts. Greg likes it mixed with honey and then drizzled on the sprouts. I used to buy this at a local specialty store but now I can get it online. Just google it and there are several choices – not just Amazon!


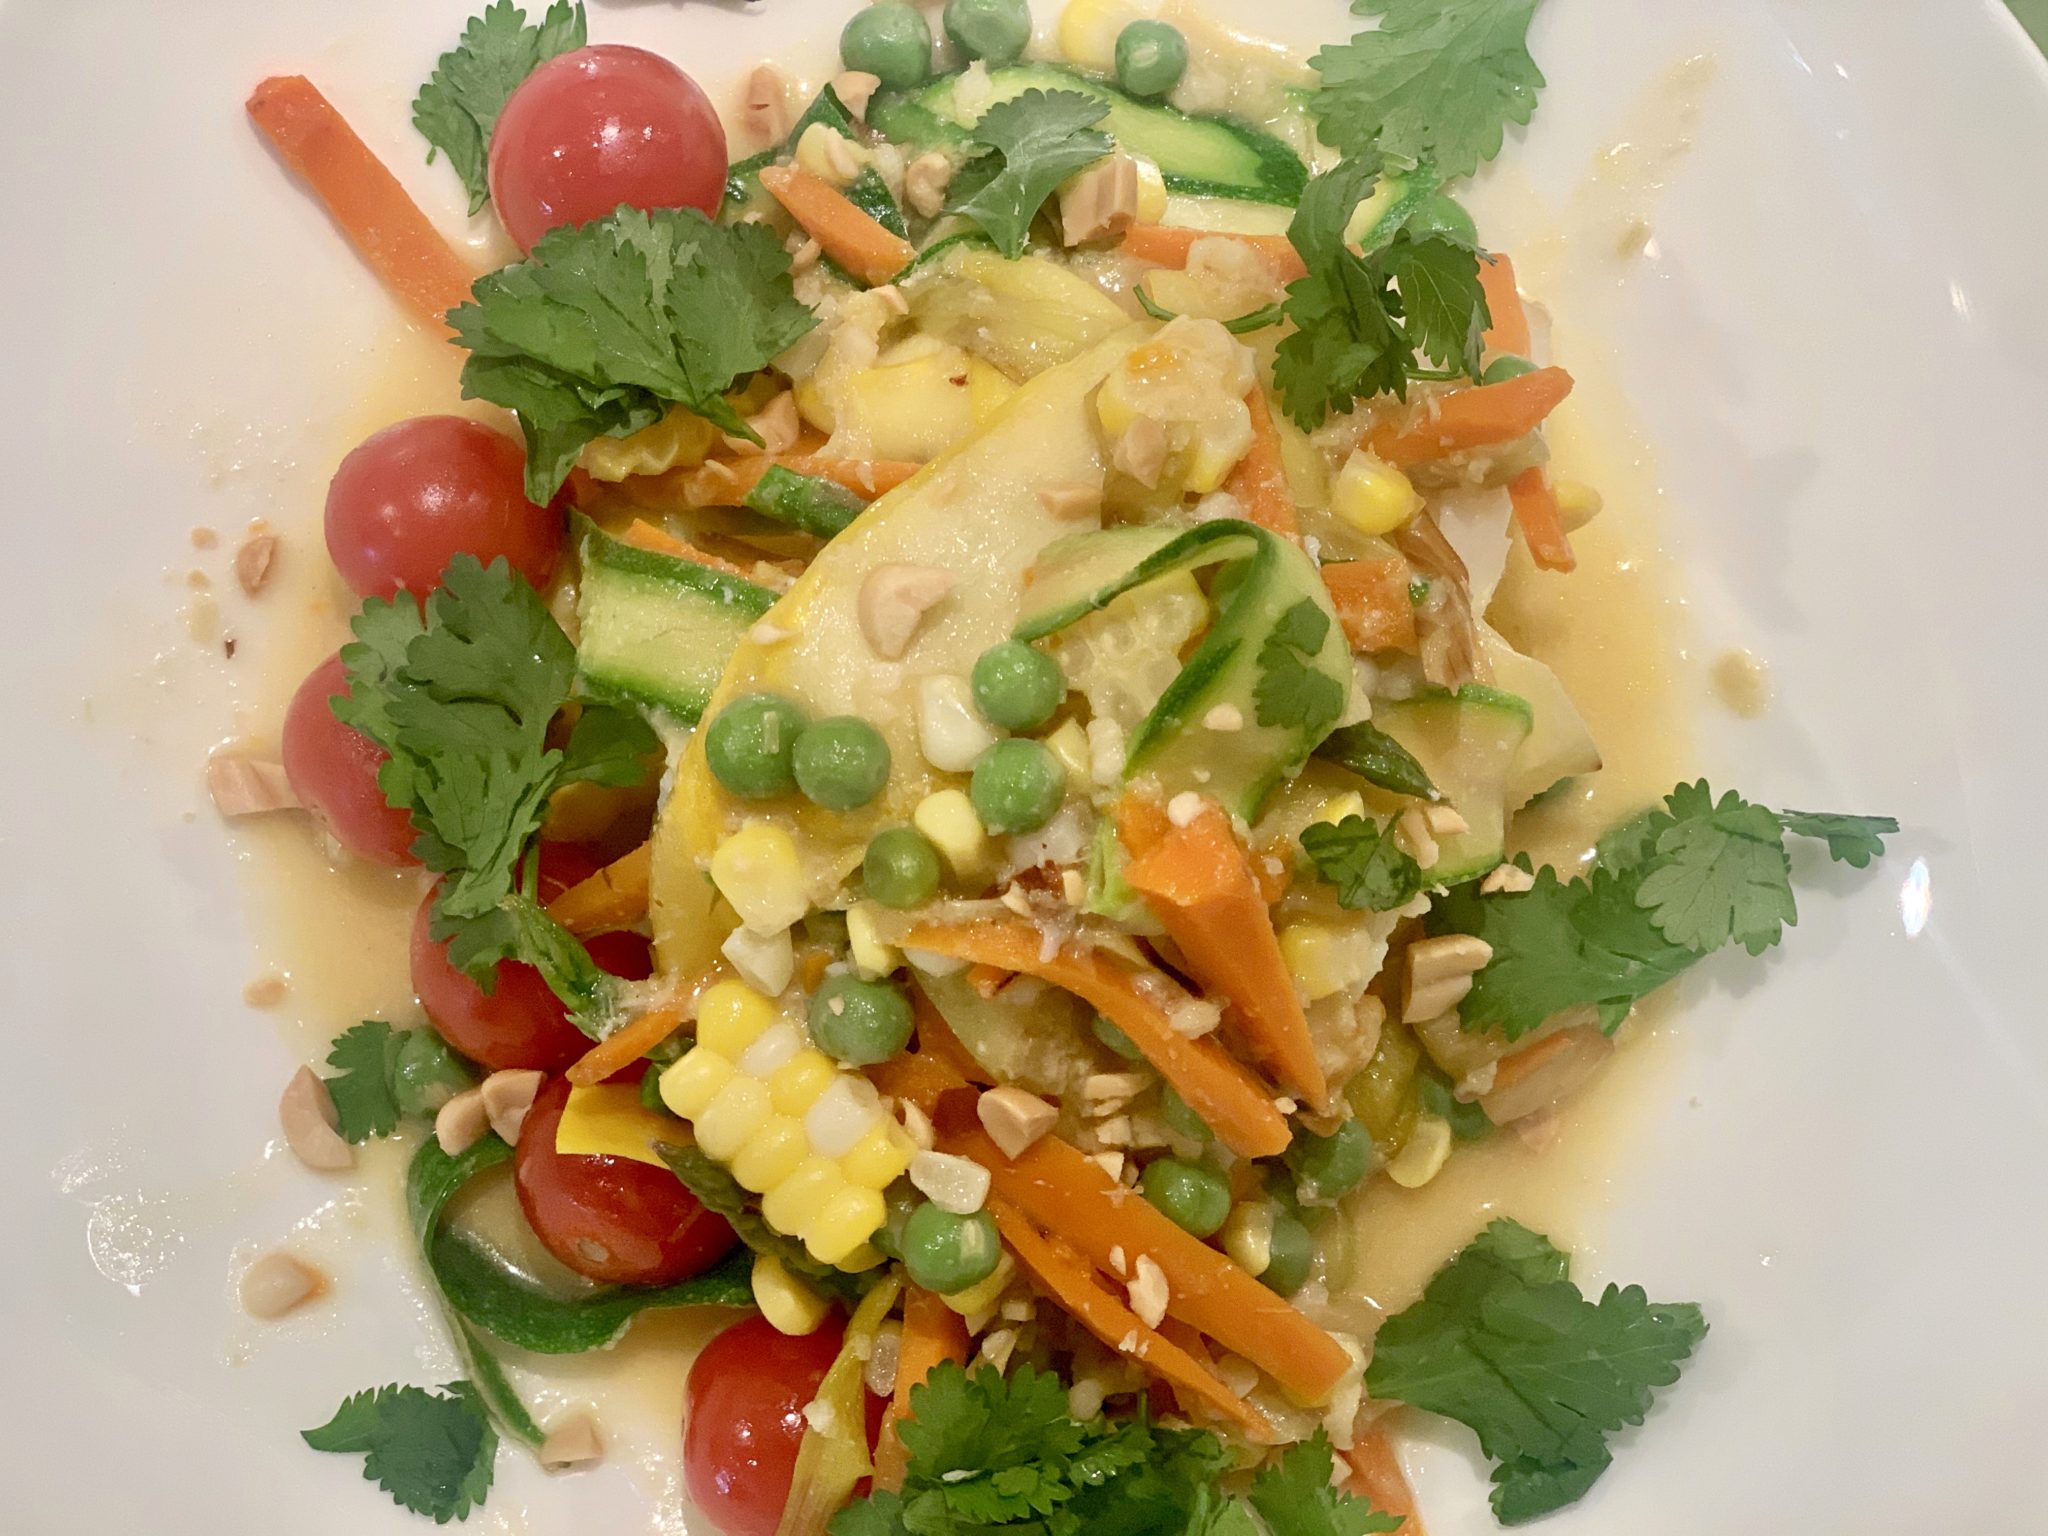
This is my third attempt preparing a fish dinner (since the kids left) and it is a recipe finally worth writing about. I added a ton of extra vegetables so it looks more complicated than it needs to be so please don’t be intimidated. I will give you the basic recipe with the option to add more vegetables. I love Thai flavors, lime, cilantro, lemongrass, ginger and fish sauce. This all comes together so nicely – the broth is flavorful and highlights the flakiness of the cod. I found this recipe in Foolproof Fish – America’s Test Kitchen – a cookbook that my mother suggested when I mentioned how little I know about preparing fish. The book is beautiful and filled with recipes as well as substitutions and tips on cooking methods. So give it a try if you think you might fancy it. I don’t get payment btw!
I used a lemongrass puree that I found in the vegetable aisle of my local supermarket because I couldn’t find fresh lemongrass.
Fish sauce is sold at most supermarkets these days – if you can’t find you can easily order online.
You can use light coconut milk, but the broth will be noticeably thinner and less rich.
This recipe serves 4 and you can substitute black sea bass, haddock, hake or pollock.
Set up your mis-en-place (ingredients):
Clean and slice leeks, mince garlic, peel and grate the ginger, wash, peel and cut carrots, bruise the lemon grass, squeeze the lime, crush the peanuts, wash the cilantro, cut the chile