Fruit Galettes

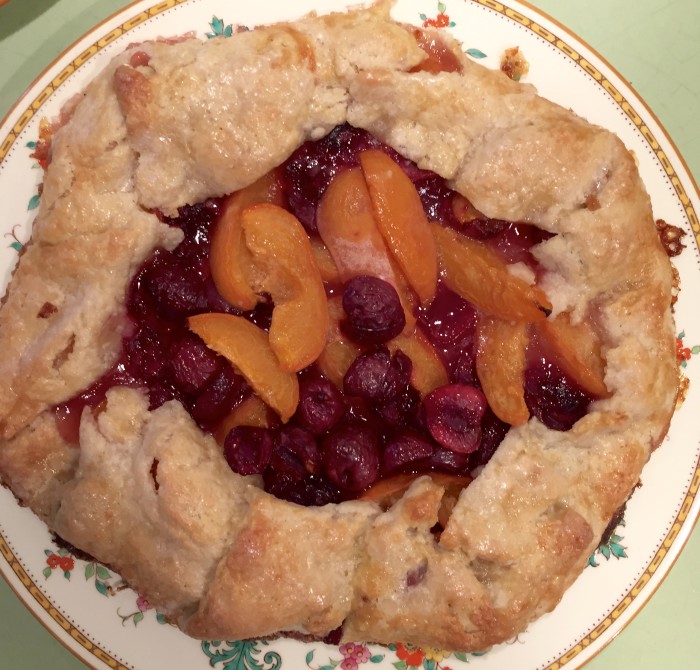
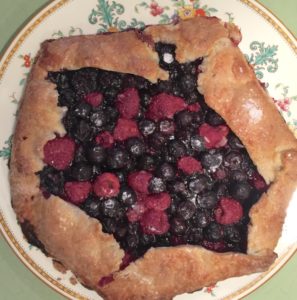
Yum – summertime fun and goodness all wrapped up in dough.  These galettes or rustic tarts are extremely easy to make and just delightful on the tongue.  I like them warm out of the oven but even more cold the next day (weird I know).  Made these for a IMG_9494dinner party and they were a hit.  Freshly whipped cream a top apricot and cherry – well, good stuff.  Berry galette too.  I didn’t change anything from Melissa Clarks recipes – and even though I know how to make these, I watched her video and it was terrific. You cannot go wrong!

banana cake and roll

I loved this.  I really loved it.  I gave it all away…and the scraps that I saved sat in my fridge because my family is really weird about “filling”.  But just trust me here.  This is a fun dessert to serve and make.  The light sour cream flavored filling is the perfect compliment to the sweetness of the tender, moist banana cake.  I loved it.  I said that.  But I do.  Then I put it in my vanilla ice cream and had a party.

I doubled the recipe btw – and made two rolls.  Might as well!  Also if you double the recipe – and you don’t want to make a roll, bake the (doubled) recipe in a 9×13 cake pan.  Or, make two 8 inch rounds and turn into a layer cake.  Again – you need to double the recipe to do that.

If for some reason your cake falls apart – then just make it into a trifle and then you can also add some freshly sliced bananas.

banana roll (from Flo Braker’s The Simple Art of Perfect Baking):

banana sheet cake
1 cup (100 g) sifted cake flour
1/2 teaspoon baking soda
1/8 teaspoon baking powder
1/8 teaspoon salt
1 large egg, room temp
1/2 cup (1 large) mashed ripe banana
1 table spoon sour cream
1 teaspoon lemon zest
5 1/2 tablespoons (2 1/2 ounces) unsalted butter, room temp
1/2 cup (100 g) sugar

filling
3/4 cup (6 ounces) heavy cream
2 tablespoons sour cream
1 tablespoon sugar
1 teaspoon vanilla
3 tablespoons powdered sugar (for top)
1 tablespoon sugar (to use on the sheet cake as you roll…you will see in the recipe)

Preheat oven to 375 and position rack in lower third of the oven.  Line the sheet pan (12-x-15x-1/2inch) with a non stick tray.  Place foil down on top and leave a 2 inch overhang on both short ends of the pan.  Lightly grease the foil too – with spray.

If you are making an 8 inch round, then grease that – and if a 9×13 pan (doubled recipe) then grease that!

Whisk together the flour, baking soda, baking powder and salt.  Crack the egg in a small bowl and gently break it up with a fork.

Mix together the mashed banana, sour cream and lemon zest.

Place the butter in the mixer with paddle attachment and beaton medium speed for a minute or so.  Add the sugar in a steady stream and continue to beat until light and fluffy about 4-5 minutes.

Add the egg now…slowly – and continue to cream another 2 minutes – scraping down the bowl at some point.

Remove from mixer and gently fold in half of the flour mixture, follow with the banana mixture and then finish with the remaining flour.

(If you are not making the roll, but making the 9×13 or 8 inch rounds, pour into those pans.  You can bake these at 350 instead of 375 as instructed for the thin roll.)

Scoop the thick batter onto 5 different areas of the sheet pan.  Then spread the batter so that it covers the entire pan.  It won’t seem like you have enough – but you do – spread as evenly as you can.

Bake for 8-10 minutes until the cake is a light golden brown and the sides are beginning to contract from the metal.
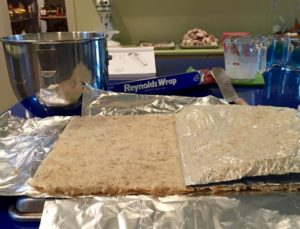
Remove cake from oven, and gently run a sharp knife around the any portion of the cake that is sticking to the long sides of the pan.

Pull up on the foil overhangs to gently and carefully lift the cake (with foil) onto a cooling rack.  Cover loosely with foil to keep moisture in, but also to help prevent sticking.

Cool for 30 minutes.  Then proceed below with filling as instructed below.

Combine the filling ingredients and whip with whisk until whipped.  Sounds silly.  Do not over whip.  The cream should appear soft, shiny and smooth.  It will coat the cake layer, sticking to it and staying in place when rolled.

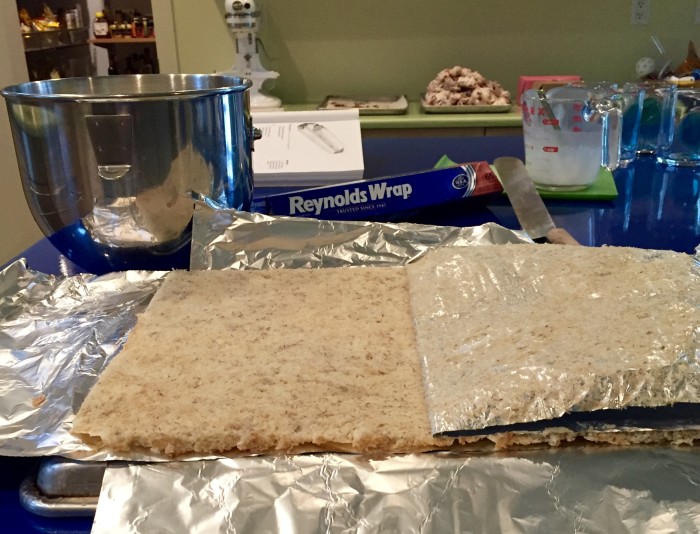
Ok – nowIMG_9174, sprinkle the tablespoon of sugar over the cake.  Then place two sheets of foil lengthwise on top of the sugared cake, one overlapping the other: then place a second sheet pan on top of the foil.
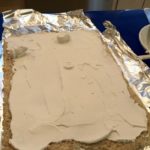
Invert the cake on it, and carefully peel the baking foil from the cake and try to aIMG_9175void tearing the thin layer.
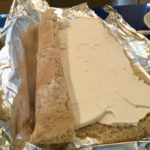
 Spread the filling all over the cake – leaving a 1 inch border of cake uncovered.  Then , with the aid of the foil roll the cake lengthwise until you reach the other end.  Use your hands to wrap and form a pretty round roll.

Cut each end on the diagonal for eye appeal.  Sprinkle the top with confectioners sugar and with a wide spatula or two – place onto a serving plate.  Yum.
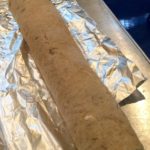
IMG_9177I forgot to take a photo of my finished cake.  Ugh.  Next time!

chocolate pudding alice medrich (no eggs)

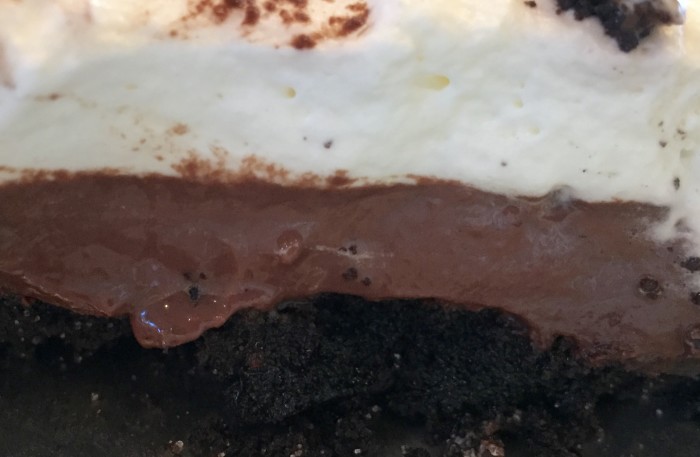
Oh, this pudding is DELICIOUS.  I absolutely LOVE it.  Really really good and quite easy to make!

It is so thoroughly chocolatey and not at all cloying like some puddings seem to be.  This one is different from the other chocolate pudding recipe on the blog in many ways, but most importantly, there are no eggs.  Yup.  So this is great if someone has an egg allergy and often can’t enjoy pudding.

chocolate pudding (from Sinfully Easy Delicious Desserts by Alice Medrich):
1/3 cup (2.33 ounces) sugar
1/3 cup (1 ounce) unsweetened cocoa powder (preferably natural and a high-end cocoa)
2 tablespoons cornstarch
1/4 teaspoon kosher salt
1 3/4 cup whole milk
1/4 cup heavy cream
4 ounces bittersweet chocolate or 3 ounces semisweet (not both)
1 teaspoon pure vanilla extract

Whisk the sugar, cocoa, cornstarch and salt together in a heavy medium saucepan.

Add about 30 tablespoons of the milk, and whisk to form a smooth paste.

Whit in the remaining milk and cream.

Over medium heat, bring to a boil, stirring constantly with a wooden spoon.  Try to get into the bottom edges of the pan especially as it almost reaches the boil.  Once it begins to thicken and bubble at the edges, cook for about 1 minute more on a simmer.  Add the chopped chocolate

and stir briskly until the chocolate is melted and the pudding is smooth.  (About 30 more seconds).  Remove from heat and add vanilla.

I made this into a pie – and you can too – or place in pretty glasses with freshly whipped cream.  Yum.  Check out an old post from April of… for a delicious crust and whipped cream topping.  Delicious.


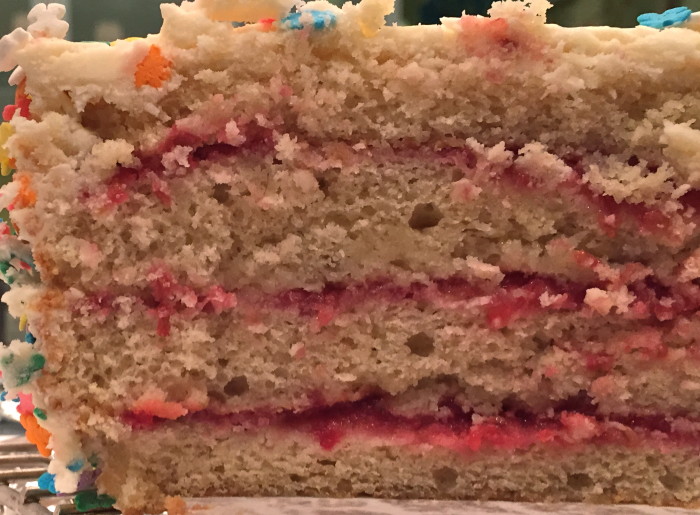
white cake with raspberry filling

Scrumptious white-ish cake, glorious raspberries, delicious icing…happy birthday to me!  This was one of two cakes that I made for myself (and shared!)  Loved it.  My mom, Marco, and Andy agree.  Others wouldn’t try it because well, I made a ridiculous ice cream cake that called to them instead and I guess hard to have both (although I did!)  There is not much more to say about this – save to tell you to make it!  It is a sturdy cake and easy to handle and the filling simple.  The buttercream is a bit more work, but worth it.  Andy, who used to be a chocolate lover declared that he no longer likes chocolate cake.  BTW, I froze half of the cake and it defrosted perfectly.  Enjoy –

Rob tells me it’s not great when I just send you to another webpage…but I’m going to do it today.  The instructions are as easy to follow as my own and I can move on to the other cake I made for my birthday!  I did not use their icing…I found a great icing from Alice Medrich which I will also share soon.  And lower on this page will be the raspberry filling.

Click here for the link — Lelite’s culinary.

raspberry filling:

1 1/2 cups raspberries, fresh or thawed frozen
1/4 cup sugar
1 tablespoon cornstarch
2 tablespoons fresh lemon juice

In a saucepan, combine the raspberries and sugar.  In a small bowl combine lemon juice and cornstarch.

Pour into raspberries.  Bring to a boil over medium heat stirring constantly, until thickened.

Let cool before use.


chocolate cake

Eric really loved this cake!  And that worked out perfectly because I made it for him.  For his 50th!  I took a chance (well, not really because Ina Garten is never too a risky choice).  She loves this cake, said it was one of her favorites, and it seemed fairly easy to whip it up before our long car trip to Maine to celebrate.  Eric asked for the recipe for Kathy to make (which is always a good sign) and I’m happy to oblige.  He was curious as to why he liked it so much – and we agreed in the end, that it was the coffee that put him over the edge from happiness to bliss (and thirds!)  Anyway, this is delicious.  Do not over bake.

beatty’s chocolate cake (from Barefoot Contessa at Home by Ina Garten):

1 3/4 cup all purpose flour (rem to read about flour measurement in baking tips)
2 cups sugar
3/4 cup good cocoa powder (I used Valrhona)
2 teaspoons baking soda
1 teaspoon baking powder
1 teaspoon kosher salt
1 cup buttermilk (shake first)
1/2 cup vegetable oil
2 extra large eggs at room temp  (I used large eggs and worked out well)
1 teaspoon pure vanilla extract
1 cup freshly brewed hot coffee

chocolate frosting

6 oz good semisweet chocolate such as Callebaut, Valrhona, Guittard
1/2 pound (2 sticks) unsalted butter, at room temp
1 extra large egg yolk (or pasteurized egg if raw scares you)
1 teaspoon pure vanilla extract
1 1/4 cups sifted confectioners’ sugar
1 tablespoon instant coffee powder
pinch kosher salt

Preheat oven to 350 degrees.  Butter two 8×2 inch round cake pans.  Line with parchment and butter again.  Flour too if you feel like it.

Sift the flour, sugar, cocoa, baking soda, baking powder and salt into the bowl of an electric mixer.  With the paddle attachment mix on the lowest speed to combing.

Mix together the buttermilk, oil, eggs and vanilla extract.  With the mixer on low add the wet ingredients to the dry and mix until combined.  Then add the hot coffee and mix until almost combined.  Finish mixing with a spatula and fold to combine.  Pour into cake pans and bake for 30-40 m.  You must check at 30 m.  Then continue to check every 5 to 3 to 2 minutes until cake is just done.  This step prob most important as you want a moist cake.

Let cool in pans, then run a knife around the edges – invert the pan, pull off the parchment and invert to right side up again.  Let cool completely before frosting the cake.

For the frosting, melt the chocolate in a bowl over a pot of barely simmering water.  Once melted remover from heat.  Do not cook it.

Beat butter on medium high speed with paddle attachment until light and fluffy about 3-5 minutes.  Add the egg yolk and vanilla and continue beating for another 3-4 minutes.

Turn the mixer to low and add the confectioners’ sugar and salt –  then beat at medium speed (scraping the bowl here and there) until smooth and creamy.

Dissolve the coffee into 2 teaspoons of the hottest tap water.  Add the melted chocolate and coffee to the mixture and beat until combined.  Do not whip.  Spread on cooled cake and enjoy –


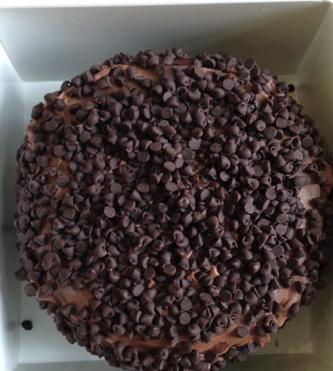
ice cream cake

If you make a cake that falls apart, save it.
If you make a cake and it is undercooked in the middle, save the edges.
If you make a cake that isn’t fabulously moist, save.
If you make cookies or brownies that are dry, save
If you have left over meringues, save as well.

(You can freeze all of these above to make your cake at a later date…)

MAKE AN ICE CREAM CAKE.  My fave.

Great thing about ice cream cake is that you can make it from all sorts of scraps and failures and it will still taste scrumptious.  You can also make an ice cream cake with your successes.

Line a spring-form pan with plastic wrap.  I have some 6 inch spring form pans that are perfect for this.  Place the cake, or pieces of the cake (and squish together) on the bottom making one solid layer.  Now fill with some softened ice cream.  You have fun with your flavors…maybe some coffee chip and vanilla (2 different layers) or chocolate and mint.  You can then add another layer of your failure…be it cookies, brownies, more cake…what ever you want.  Add another layer or two of ice cream.  And top with more failed attempts.  If you happen to have meringues, this is nice too – to mix into the ice cream or make the top layer (eventually the bottom).

Freeze until you feel like eating or serving it.

Unmold pan and peel off the wrap.  Place bottom side up as this should be the smoothest and easier to frost.

I like to then pour layers of ganache on my cake, eventually covering the whole cake.  And then decorate (while still wet) with goodies (sprinkles, chips, anything you like!)

Pull to room temp for a 25 m before you plan to serve.

Enjoy-

ganache
3/4 cup heavy cream
6 ounces chocolate (semi, bitter or milk)

Chop chocolate.  Heat the cream until just about boils.  Pour on top of the chocolate and let sit for a minute.  Stir to combine.


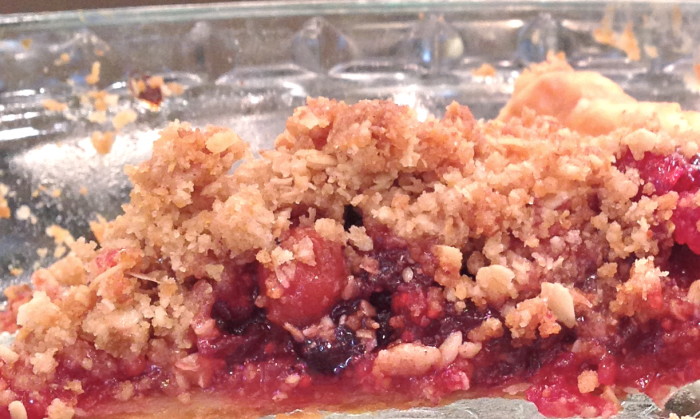
cranberry streusal pie

Ignore the lousy photo – forgot to take and this is just the messy leftover!

This has to be one of my favorite desserts.  I mean really and truly.  First, the color!  Wow.  Gotta love that bright red pie.  Second is the flaky buttery crust.  Really mouth-watering.  Next is the filling – I know, I know, it is cranberries and many seem to be put off by them, but I don’t get it.  I really don’t.  This filling is delicious – bursting with flavor both tart and sweet and against the crust it is fabulous.  And lastly – the streusel topping!  Streusel is the best and on top of a pie – well…again, wow.  Make this if you have some serious dessert lovers.  Sylvie said it was probably the best thing that I’ve made in a long while.  And Andy, he wouldn’t try it.  So…enjoy if you can and have willing company or family.

I think this is easiest if you make this in steps.  Make the streusel one day during the week – it will keep in the fridge.  Make the tart dough and even roll out (then place in freezer) until ready to bake.

That way, in the AM, you can blind bake your pie crust, while it is baking make the filling (so easy) and then you already have streusel.  Just less overwhelming that way.

cranberry streusel pie (from Smitten Kitchen):

crust

1 1/4 cups all-purpose flour (155 grams)
1 1/2 teaspoons sugar (6 grams)
1/2 teaspoon kosher salt  (3 grams)
1 stick cold unsalted butter, cut into chunks (4 ounces or 115 grams)
1/4 cup very cold water,  (60 ml) plus an additional tablespoon if needed

filling

4 1/2 cups fresh or frozen cranberries (from 1 1/2 12-ounce bags)
1 cup granulated sugar, plus 1 to 2 more tablespoons, if desired, to taste
a little bit of orange zest
2 pinches kosher salt
1 tablespoon cornstarch

streusel

2/3 cup rolled oats
1/2 cup all-purpose flour
1/3 cup sugar
1/3 cup light or dark brown sugar
1/2 teaspoon ground cinnamon
1/4 teaspoon kosher or sea salt
3/4 cup pecans, toasted first if you have the time
6 tablespoons unsalted butter, melted and cooled

Ok, so for the pie dough – I’m copying from Deb’s post – since she gives great detail and great direction.  I did the food processor method and the dough was perfection!  And I par baked the crust which she also suggests.

“the pie dough:

  • By hand, with my one-bowl method: In the bottom of a large bowl, combine the flour, salt and sugar. Work the butter into the flour with your fingertips or a pastry blender until mixture resembles a coarse meal and the largest bits of butter are the size of tiny peas. (Some people like to do this by freezing the stick of butter and coarsely grating it into the flour, but I haven’t found the results as flaky.) Add 1/4 cup cold water and stir with a spoon or flexible silicone spatula until large clumps form. Use your hands to knead the dough together, right in the bottom of the bowl. If necessary to bring the dough together, you can add the last tablespoon of water.
  • With a food processor: In the work bowl of a food processor, combine flour, salt and sugar. Add butter and pulse machine until mixture resembles a coarse meal and the largest bits of butter are the size of tiny peas. Turn mixture out into mixing bowl. Add 1/4 cup cold water and stir with a spoon or flexible silicone spatula until large clumps form. Use your hands to knead the dough together, right in the bottom of the bowl. If necessary to bring the dough together, you can add the last tablespoon of water.
  • Both methods: Wrap dough in a sheet of plastic wrap and refrigerate for at least one hour, or up to 48 hours, or you can quick-firm this in the freezer for 15 minutes. Longer than 2 days, it’s best to freeze it until needed.

Form the crust: On a floured counter, roll the dough out into a 12 to 13-inch circle-ish shape. Fold dough gently in quarters without creasing and transfer to a 9-inch standard (not deep-dish) pie plate. Unfold dough and trim overhang to about 1/2-inch. Fold overhang under edge of pie crust and crimp decoratively. Return to fridge until ready to fill.

[Optional: If you’d like to par-bake the crust, once you’ve rolled it out, freeze it for 10 minutes inside your pie tin, until solid. Prick unbaked crust with a fork several times. Line it with lightly buttered foil. Fill with pie weights, dried beans or pennies. Bake at 400°F (205°C) on rimmed baking sheet 15 minutes. Remove paper or foil and weights, and bake 5 to 10 more minutes until crust is golden brown and lightly crisp.]”

Ok, so heat oven to 375 degrees…or lower the oven if you just par baked.

For the filing, mix all the ingredients together.  And if cranberries are frozen, no worries, they will just take a few more minutes to warm up.   After about 5 minutes (or 10 if cranberries frozen), the cranberries will begin to leak juices.  Cook, stirring here and there until filling is loose.  You can crush some of the berries a bit too.  Transfer the filling to a bowl to let cool for a bit.

For the topping, place the oats (if you are using whole ones) in a food processor and grind until powdery.  Add toasted pecans and grind too.  Add flour, sugars, cinnamon and salt, and lastly, the butter, pulsing a few times to combine.

Sprinkle the streusel on top of the filling and bake the pie for about 45 to 50 minutes.  You want the juices to bubble.  If the pie browns to fast, just lay foil loosely on top.

When done, eat warm or cold (I like it cold!) with freshly whipped cream or vanilla ice cream.  Yum.


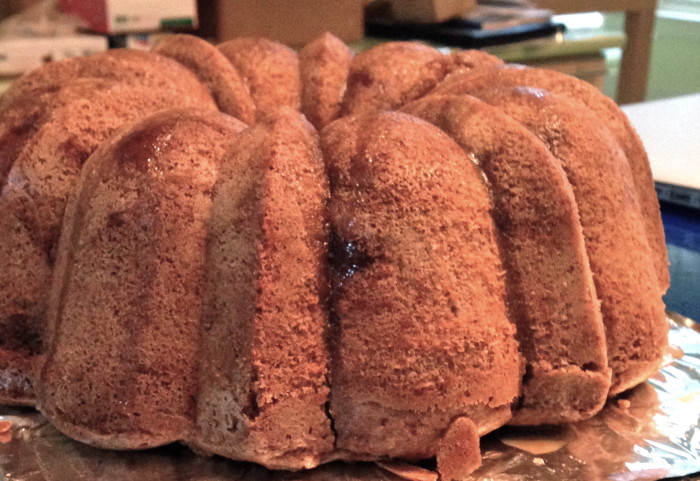
caramel apple cake

Make sure you check out a good photo of this cake on Mel’s Kitchen Cafe as this photo does not do it justice at all.

Different from other apple cakes, this one has a terrific cream cheese layer laced throughout as well as a yummy glaze on top.  I made it around Thanksgiving and I keep meaning to write about it as it was really quite good.  Eric asked what was in it, and I immediately got defensive (aggressively asking, why??) and he said that well, he just really liked it and was curious!  Jeez, I gotta calm down.  Anyway, it was good.  Really tasty and stayed moist and lip smacking good for several days.  I served it with a caramel sauce but it really isn’t necessary given the glaze.  If you want to make the sauce, just look at the link and directions are there.

Make this a day before you plan to serve it and don’t be put off by the long list of ingredients as it is really very simple to throw together.

caramel apple cake (from Mel’s Kitchen Cafe)

cake

3 cups all purpose flour
1 teaspoon baking soda
2 teaspoons cinnamon
1/2 teaspoon nutmeg
1/2 teaspoon kosher salt
3 medium apples (for about 3 cups chopped)
1 tablespoon lemon juice
3 tablespoons dark brown sugar
2 teaspoons vanilla, divided
1 1/4 cups canola oil
2 cups sugar
3 eggs

cream cheese filling

8 ounces cream cheese (not whipped) room temp
1/3 cup sugar
1/2 teaspoon vanilla extract
1 egg

glaze

2 tablespoons butter
2 tablespoons sugar
2 tablespoons brown sugar
2 tablespoons heavy cream
1/2 teaspoon vanilla extract

Preheat the oven to 350 degrees.  Generously grease a 9 or 10 inch bundt pan.  All over.

In a smallish bowl, whisk together the flour, baking soda, cinnamon, nutmeg and salt.

In another bowl, combine the chopped apples with the lemon juice.  Add the brown sugar and 1 teaspoon of the vanilla extract.

With hand held beaters or an electric mixer, beat together the oil, sugar and other teaspoon vanilla.  Follow with the eggs one at a time and mix well.  Add the dry ingredients and mix until just blended.

Strain the apples to remove any excess liquid and add to the batter mixing just to incorporate.  Do not over mix.

The batter will be thick – pour into the bundt pan and make the filling.

Mix together the cream cheese, sugar, vanilla and egg.  Mix well.  Place in a trench on top of the batter and try to scoop the batter around and on top of the cream cheese.  Then take a knife and swirl the cream cheese even more.

Bake for about an hour to an hour and 20 – really depends on the size of you pan and your oven.   You want a toothpick to come out with a few moist crumbs.

Make the glaze by mixing all the ingredients in a small saucepan.  Bring to a boil, then boil for about 60 seconds mixing constantly.  Remove from heat.

Once the cake is out of the oven, the recipe instructs you to pour the glaze on top of the cake (while still in the pan).  I struggled with this – and was worried that the cake would get stuck.  So I let the cake cool a bit, then inverted it and poured the glaze on top.  I suppose my cake isn’t as pretty because of it, but it didn’t fall apart.  See what you think and lmk if you have success.

Enjoy-


triple chocolate chip cookie

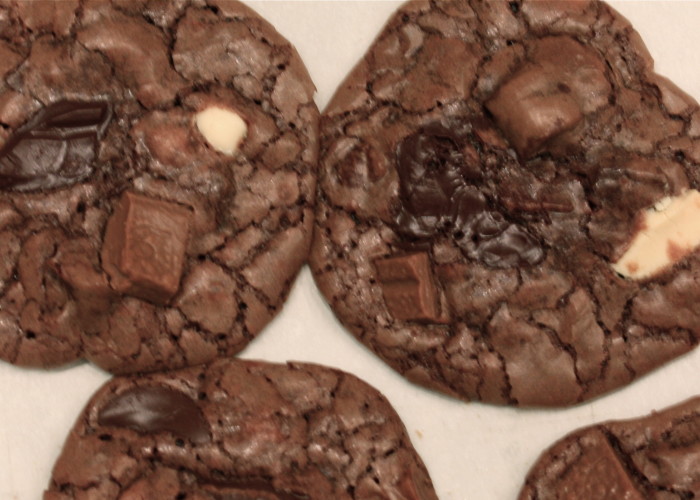
I really really really like these cookies.  A lot a lot a lot.  Right up my alley with milk, white and semisweet chocolate – these, in my vanilla ice cream…well, my mouth is watering right now as I think about it.  I’m not sure what the others thought because honestly, I wasn’t listening because I was eating.  Hard sometimes to do at the same time.  If you are opposed to white and milk chips, then obviously you can just put in your semi – but I do think these are special as they are and will round out a cookie platter very nicely.   Try not to over bake these — it can be hard with chocolate cookies but do your best.  Enjoy-

triple chocolate chip cookie (A Baker’s Field Guide to Chocolate Chip Cookies by Dede Wilson):

1/4 cup all purpose flour
1/4 baking powder
1/2 teaspoon salt
6 ounces semisweet chocolate, finely chopped
2 ounces unsweetened chocolate, finely chopped
6 tablespoons (3/4 stick) unsalted butter, softened
3/4 cup sugar
2 large eggs
1 1/2 teaspoons vanilla extract
2 cups semisweet or bittersweet chocolate chunks
3/4 cup milk chocolate chunks
3/4 cup white chocolate chunks

Preheat oven to 350 degrees.  Whisk together the dry ingredients.

Melt chopped semisweet and unsweetened chocolates and butter together in a non reactive bowl over a sauce pan of barely simmering water.  Let cool to room temp.

With the paddle attachment, beat sugar, eggs, and vanilla together on high speed until light and fluffy – 4-5 minutes.  Remove from mixer and gently fold in chocolate mixture and then gently fold in the flour until just incorporated.

Toss all the chocolate chunks together in a bowl, then set aside about one quarter of the mixture into another bowl (to place on top of cookies).  Fold the large portion of chunks into the batter.

Drop by generously rounded tablespoons onto parchment lined cookie sheets.  Take the leftover chips and place one of each kind on top of each cookie to show off the flavors.

Bake until cookies look a littler dryer on top – a little crusty on the sides, but still very moist inside.  (This can be tricky).  Somewhere around 10 m – but really can be more or less.  Remember to rotate your sheet pans and know it will take longer if you put a couple of pans in the oven.  The trick with baking is to figure out when to pull your cookies and cakes and this takes practice.

Enjoy-


caramel apple jam

Thanks mom for sending me this recipe!

MMMMmmmm….so delicious and warm and soothing and inviting.  Funny for a “jam” to be all that but it is!  Caramel, vanilla, and apples delightfully and simply combined.  Warm this up and pour over some vanilla ice cream and you have a winner.  Equally good on the savory side if you serve as a sweet side relish for pork or chicken.  Alison Roman, the creator of this apple jam, also suggests ice cream (like me) – but topped with crushed Nilla wafers.  And I say, sounds great, but make home made vanilla wafers (coming next)  and add a little whipped cream.

Use a variety of apples, makes for a more interesting outcome because different apples break down differently and this will provide texture and fun!

apple jam (from Bon Appetite Oct 24th):

Original recipe and write up are here.

1 cup sugar
3 pounds apples, use a variety if you can, peeled, cored and cubed about 3/4 inch thick.
1/2 vanilla bean (scraped)
1 tablespoon lemon juice
cinnamon stick or powder
kosher salt

Place 3 tablespoons water in a large saucepan.  Add the sugar and mix.  Heat on medium high and boil – and continue to cook until the sugar caramelizes.  It will turn a dark amber color – but be careful as it all happens very fast, and it is HOT.  Seriously hot.

Add the apples and the vanilla seeds and bean to the pot and cook on medium heat.  The caramel may seize up at the start (because the apples cool it down) but soon it will dissolve again.  Add a 1/2 cinnamon stick (if you don’t have a stick, wait and add some ground cinnamon to taste at the end.)

Continue to cook for about 20-25 m, stirring occasionally until some of the apples are translucent and some still have their shape, and most of the liquid is dissolved.  You can keep cooking btw, if you like your apples super soft, or remove them earlier if you like them super chunky.

Remove from heat.  Add lemon juice and a pinch of kosher salt.  Store in a glass jar or container for up to a month in fridge.