chocolate/caramel matzoh candy with sea salt

Many of my friends (and kids friends) keep Passover, so I wanted to try this recipe that I’ve heard about throughout the years.  I like the idea of a handy treat for those who celebrate.  My friend Stephanie happily shared the recipe from her “Passover Stuff” book and I must tell you that this is really good and I thank you (Stephanie).  Really good.  Sweet, yes, but I added some bittersweet chocolate and some delicious sea salt and I have to say this is better than I expected and utterly addictive.  I had friends over this weekend – none who happen to celebrate Passover and they were munching away and loving it.  I mentioned that it didn’t look so pretty but they were undeterred.  They all loved and commented on the salty caramel and nutty chocolate (the matzoh just holds it together).  I used toasted pecans…but really most nuts will do – walnuts, almonds, pistachios – maybe even some raisins too.  You can go really crazy here and have fun.  Serve for your family and friends who happen to celebrate (or not!)  Happy Passover.  Enjoy-

If you have time – find some Maldon sea salt.  It is great – flaky and tasty.  You can order online but pretty certain whole foods sells it.  (Great for salads too – with olive oil.)

chocolate/caramel matzoh candy with sea salt (slightly adapted from Stephanie’s “Passover Stuff”)

4 Matzoh boards (I used salted, but believe unsalted OK too)
1 cup (2 sticks) unsalted butter
1 cup packed dark brown sugar
2 cup chocolate chips or chunks (I used half semi and half bitter – but use what you like – Stephanie said she’s tried milk chocolate too)
1 cup (or more to taste) toasted pecans, walnuts, or almonds (raisins too optional)
1/2 teaspoon good quality flaky sea salt – or kosher salt

Preheat oven to 450 degrees.  Line a sheet pan with parchment.  (Reader Jessie said she made this without the parchment and the toffee spread to the underside…she said it was fantastic.)

Arrange matzoh in a single layer – break if necessary and try to cover the whole sheet pan.

Combine the butter and brown sugar in a small sauce pan over medium heat and bring to a boil – stirring constantly.  Cook until syrupy — about 3 minutes or so.

Pour the toffee mixture over the matzoh and spread it out evenly (this is hot be careful.)

Place in oven and bake until bubbly – about 4 minutes (now it is extra hot).  Remove from oven and sprinkle the chocolate over the hot bubbly mixture.  Place in the oven again for about 30-60 seconds more.  (The second time I made this I did not place the chocolate back in the oven.  I let it be…prettier appearance and the chips all over were delicious.)

Now you have a choice…leave as is – or you can spread the chocolate around.  Either way – its a matter of appearance.  I happen to like to see the chocolate chips and chunks.  Sprinkle the toasted nuts over and then the flaky salt.  (Reader Michelle used salted peanuts and said it was AMAZING.)

Refrigerate until the chocolate is firm about 30 minutes to and hour.  cut or break into pieces.  I happen to like this cold – so I store in the fridge.  The chocolate discolors over time, but it is tasty!

Save the crumbs for an ice cream topping.

Enjoy-

mendiants (chocolate rounds of goodness)

Lisi's Kitchen

Be creative and have fun!  Little chocolate pools covered with nuts, fruits, seeds and berries.  Bite sized treats for your friends and family.  These are GREAT for a party – you can make weeks prior and they present so well.  And most everyone loves a bit sized morsel of goodness.  I happen to LOVE pretzels and tart cherries, fig and peanuts and pepitas and cranberries.  Oh, and the sunflower almond!  These are really fun to make with your kids – creating all different tastes and colors.  You do need to temper your chocolate – so look at the Halloween peeps post and the Valentine chocolates for more direction and go to town.  Enjoy!

mendiants:

tempered dark, milk or white chocolate
nuts
seeds
dried fruits
cocoa nibs
m&m’s
pretzels

Drop tempered chocolate by teaspoonful onto parchment.  Smooth with the back of a spoon or a small palette knife.  Drop nuts, seeds and fruits as desired.  Add a little drop flaky salt if nuts are unsalted – creates a delicious sweet and salty flavor.

heath bar, m & m, cocoa nib or chocolate chip cookies

I happen to enjoy a good Toll House cookie and it is usually my go-to chocolate chip choice.  But I think I found another great one!  This recipe was listed as one of Joy’s favorite cookies in her blog… Joy the Baker.  I was curious about it because the cookie is made with bread flour and a little milk and she described it as being just the ultimate.  So off I baked and WOW these cookies are scrumptious.  I decided to make some with Heath Bars since I knew it was a sturdy batter – and boy, did they come out fabulous.  Jodi said these are “outta this world!” and Lauren commented that her M&M one was perfect, crispy on the outside yet soft on the inside.  My family too – all enjoyed.  I actually prefer them with Heath Bars and M&M’s although the chocolate chip were very good too!  I fiddled and added some cocoa nibs to some of the batter as well and this provided a more interesting cookie that was equally delicious.  Enjoy –

heath bar, m&m, cocoa nib or chocolate chip cookies (from Joy the Baker’s blog – and originally from Alton Brown)

2 sticks unsalted butter, melted
2 1/4 cups bread flour (make sure you fluff your flour and measure it correctly for this one – check in baking tips under flour)
1 teaspoon kosher salt
1 teaspoon baking soda
1/4 cup sugar
1 1/4 cup brown sugar
1 egg
1 egg yolk
2 tablespoons milk
1 1/2 teaspoons vanilla extract
mix in about 2 cups of the following (or divide the batter and make a few different kinds):

chopped heath bar/skor bar (keep some chunks big, vary the size)
m&m candies
chocolate chips
cocoa nibs (maybe 1 1/2 cups of these)

Preheat the oven to 375.  (I baked these in convection at 325 as I filled the oven with sheet pans, but both will work.)

Melt the butter over low heat or in the microwave.

Whisk together the flour, salt, baking soda and set aside.

Place the sugar and brown sugar in the bowl of your mixer.  Add the butter and with the paddle attachment beat on medium speed for a minute or two.

Add the egg and yolk, the milk and vanilla and mix, scrape bowl, and mix again until well combined.

Add the flour mixture on lowest speed until combined.  Remove from mixer and stir in mix-in of choice.

Chill the dough for 15-20 minutes then scoop or spoon onto parchment lined baking sheets.  I did big scoops – but spoon to your liking.  Just watch baking time.

My cookies took about 14 minutes in the convection.  If you bake in regular oven at 375 – make sure you rotate pans and racks for even baking.  They should take about 13-18 minutes – but check often and before for that perfect cookie!

Freeze the extra dough in logs as outlined in the bottom of the oatmeal cookie post.  Warm fresh cookies on the fly…

valentine chocolates (kid style)

I love dipped stuff.  Soon I’ll make more grown up chocolates – and dipped dried fruits and nuts, but oh, there is nothing like a chocolate covered Oreo, potato chip, pretzel, marshmallow or graham cracker… I love it all.  So do my kids, their friends and my friends and anyone who came over last week.  Conor happily took a bag home and Jodi and Mike loved their goodies.  Temper your chocolates (follow directions in the Halloween Peeps post) and go to town.  Look to the bottom of this post for a photo of untempered chocolate.  The sweet and salty thing is addictive and delicious.  My personal favorite is crunched up pretzels with white chocolate and dried tart cherries.  Wow.  I decided to sprinkle half with Valentine hearts and colors for an idea for Valentines day and left some plain just for munching.  This chocolate (if tempered) will keep in an airtight container for a while (well, the potato chips kind of loose their crunch).  So make ahead and let everyone know that you love them!  Enjoy-

chocolate dipped goodies (kid style):

tempered: white, milk, semisweet and/or bittersweet chocolate (there are some great tempering videos out there – just google it and if you love dipping then invest in a tempering machine.)

things to dip
marshmallows (big and mini)
kettle corn
crunched pretzel pieces, flat pretzels, pretzel rods, pretzels thin
Oreos (whole or crunched)
potato chips (I like Cape Cod)
dried fruits
graham crackers whole or smooshed
cocoa nibs (my new favorite!)
m & m’s
mini chocolate chips

I think you can figure most of this out.  But just in case, prepare a few sheet pans lined with parchment.

Oreos – if you have a mold you can cover them using it.  If not, simply dip them in the tempered chocolate.  Alternately, crunch them up and pour chocolate over them, mixing all together.  Scoop out little spoonfuls onto the parchment, or into cupcake liners.  Top with m&m’s if you choose or chocolate shavings or drizzle.

Graham crackers – individually dip – then add on m&m’s, or cocoa nibs, or really anything.  Alternatively, smash them up and combine  with chocolate and mini marshmallows and plop little spoonful down on parchment or again, in a cupcake liner.

Pretzels – dip the whole pretzel in the chocolate.  Leave as is, or coat chocolate with mini m&m’s or mini chips and let set.  You can also smash up the pretzels into bits, add dried cherries and pour chocolate over (esp good with white chocolate) – and drop by spoonful onto parchment (or into cupcake liners).

Cocoa nibs – I love love these.  I loved them simply mixed with white chocolate and then poured into mini cupcake liners.  Alternatively, add to dipped grahams or marshmallows for added texture and flavor.

Marshmallows – simply dip big ones 3/4’s way down into chocolate.  turn upright to set and top with a treat if you choose (m&m’s, mini chips, cocoa nibs).  As mentioned above, combine mini marshmallows, graham crumbs and chocolate and place by spoonful onto parchment.

Kettle Corn – spread some kettle corn on parchment and drizzle chocolate over it.  Delicious!

Potato chips – dip and place on parchment to set.

chocolate NOT tempered

If you do not temper the chocolate, it will take many hours to set – and even when set it will feel tacky and slimy.  The chocolate will streak and not have a good snap or bite.  The chocolate is not as viscous and is heavier to work with.  If you look carefully at the photo to the left and below, you’ll see streaks and spots on the chocolates.  Hopefully you can also see that the chocolates have a duller appearance than their tempered counterparts and just look pretty unappealing.  No one ate these!

the same Oreo a few days later...

chocolate popcorn

In my teens I loved go to the movies with my (then) new friend Pam (now old friend).  We both loved the movie theater popcorn and we both loved peanut and plain m&m’s – and we usually got it all and shared.  One day as we sat down, Pam turned to me, giggled and dumped the extra large packs of plain and peanut m&m’s into our humongous popcorn bucket!  Well…DELICIOUS.  The salty buttery popcorn mixed with the chocolate – oh my.  Seriously.  About 15 years later, when I was pregnant with Andy, I craved this concoction – so I made some popcorn and poured some chocolate chips into it.  They kind of melted and I salted them and oh, sold and forever addicted.  Over the years, I fiddle.  Today I made a milk chocolate popcorn (my favorite) – and one with mini m&m’s.  I also made a semi-sweet chocolate popcorn – one with peanuts and one with out.  Ideas are endless…you can melt and drizzle as I did or you can pour chunks into the warm popcorn.  You can add Raisinets to the melted chocolate or scatter Snow Caps on top.  Quite a movie treat!  Or an any-day treat.  Greg and his friend John sat down to two bowls of  it and were in heaven.  Andy is eating his now, and Sylvie and I keep munching away.  Melissa said…”yummy and so good.”  And Ali was thrilled to find chocolate in her popcorn.  Sadly Rob said, “not my thing.”  Oh well, not for everyone I suppose. There is no exact recipe but I’ll try let you know what I did and you can use as a guide with your own taste.  Enjoy this.  I REALLY do.

If you are looking for the best presentation, then temper the chocolate.  It will set faster, and for longer and have a prettier sheen.  I eat this up so fast I skipped it.  And I don’t mind if it is a little sticky or wet 🙂  – up to you.

chocolate popcorn:
popped popcorn (preferably with a little oil)
melted butter (unsalted) – optional
melted milk and/or semi-sweet chocolate
mini m&m’s (optional)
peanuts (optional)
kosher salt to taste

Make popcorn.  I really love my Whirly Pop popcorn maker.  I was able to use just 2 teaspoons of oil for about 3/4 cup kernels (why I’m worried about the oil is beyond me since I’m slathering with chocolate!)  I suppose you can make in an air popper but I do think that a little bit of oil goes a long way with popcorn.  I really do.

Spread popcorn onto a sheet pan lined with parchment or foil.  Melt and drizzle very very lightly with melted butter if you choose.  I did, just a little.  But really this is also very good with out butter (especially if you used oil in popping).  Lightly lightly salt the popcorn with kosher salt (You will salt again).

Melt chocolate in a metal bowl over a bit of barely simmering water (or double boiler).  Drizzle the melted chocolate all over the popcorn.  (Use as much as you like.  You can use a light touch or a heavy hand.  I go heavy but no surprise!)

If using m&m’s or peanuts, scatter them on top of the drizzled chocolate.  Lightly salt the popcorn with the chocolate (again).  The salt is sooo good with the chocolate.  Don’t skip!  (Save the extra chocolate for another use — if you have extra!)

Take a spoon, and gently mix the popcorn – or just leave as it is.  Again, up to you.  You can transfer to a big bowl if  it is easier for you to mix.  Let the popcorn sit and the chocolate will harden (although it is good wet!)  Set by an open window to speed up the process if you are eager.

Turn on the movie (or not), sit down, relax, eat and enjoy!!

peppermint stick ice cream

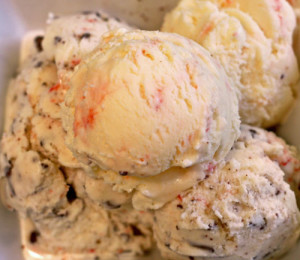
This is my old friend Dani’s all time favorite.  We were lucky growing up – in that both of our families went to Vermont during the winter weekends.  Dani from NJ, me originally from MA, these were very special times.  But oh, it wasn’t just me and “Eight is Enough” that made her smile – it was the holiday season – and Friendly’s featured Peppermint Stick ice cream – her absolute fave!  She requested it a few years ago – maybe for the birth of a baby or a different event (my memory is really fading, sadly) but needless to say she was thrilled.  I think I dipped Oreos in chocolate and then crunched them into the peppermint stick.  Wow.  A friend just mentioned that Trader Joes sells a peppermint version of an Oreo that sounds perfect.  Anyway, this ice cream is really very good.  I made half just peppermint and the other half with ground bittersweet chocolate.  I love that one.  Greg loves the pure peppermint and he’s lucky because no one else in our family will eat it, and Dani is still over that bridge!  Enjoy this – it is nice for the holidays and although rich, it is quite refreshing.

peppermint stick ice cream
2 1/4 cups heavy cream
3/4 cup milk
3/4 cup sugar
4 large egg yolks (room temp)
3/4 teaspoon kosher salt
2 peppermint candies (I used peppermint candies in this recipe because I thought they would be easier for the home cook to buy.  You can also use peppermint oil, or extract to taste if you prefer.  Just add 2 extra tablespoons of sugar if so.)

mix in
1/4 cup ground peppermint candies (ground coarsely or to your liking)
ground bittersweet chocolate (amount to taste – and optional)
crushed Oreos (also, to taste and optional)

Prepare an ice bath – a big bowl with ice and water.  In it, place another container or bowl with a strainer.  This is where the custard ice cream base will land once cooked.

In a medium heavy weight saucepan mix the cream, milk and half of the sugar.  Bring until almost a simmer…but do not boil.

In medium sized bowl, place the egg yolks, the other half of sugar, and salt and whisk well.

Slowly slowly ladle the hot liquid into the eggs and whisk well after each addition.  Keep adding the hot liquid until you’ve added it all to the eggs (again slowly so as not to cook the eggs).

Pour the whole mixture back into the saucepan and cook, over medium low heat stirring constantly with a wooden spoon until it thickens (reaches 175 degrees) and lightly coats the back of the spoon.

Strain the mixture into the prepared bowl and immediately add the two candies.  Mix until dissolved.  Let mixture cool in ice bath until it reaches room temp, then place in the refrigerator overnight.

The next day, churn the ice cream and when hard, add the ground peppermint candies (with or with out the chocolate or Oreos).

Place the ice cream in the freezer and oh, although soft, this is delicious the same day.  (If hard the following day, let sit in the refrigerator for 20 minutes to soften before you serve.)

Enjoy!

(moms) candied bacon

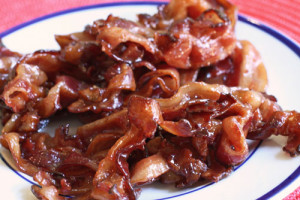
OK, so this isn’t dessert – I know, I do know…but I just had to put it in here because this bacon is scrumptious!  There is sugar in it – a lot of sugar so maybe it qualifies just a little bit for this baking blog.  My friend Melissa asked me to show her how to make it.  We had a bacon making date.  My mom makes a delicious salad with spinach, hard boiled eggs, onions and mushrooms.  The addition of this bacon is seriously to die for (and I don’t even normally use that expression).  She crumbles and adds it to the above ingredients and tops it off with a mayo/olive oil/mustard dressing that completes it.  My family loves this bacon in a turkey club – I surprise the kids and put it in their lunches for a treat once in a while.  It is great next to eggs and toast and can also hold its own alone.  I’ve made an endive, fennel and blue cheese salad with the bacon and oh…equally as good as my moms.  So – enjoy this sweet treat.  Experiment.  This bacon freezes well so make a bunch!

candied bacon:
2 packs bacon – I like to use a thick slice or center cut but anything works
3/4 cup light brown sugar (or more or less depending on your taste)

Spray aluminum foil with cooking spray or grease with a little bit of canola oil.

Place bacon in a large heavy duty skillet.  Layer it all around and fill the pan – overlapping when necessary.  Over medium high heat cook the bacon, stirring occasionally.  After about 3-4 minutes, take the fat out of the pan.  Tilt the pan to the side, and with a very big spoon, scoop out all the liquid fat that has been rendered from the bacon (sounds good, right?)

Keep cooking and rendering the fat for probably about 8 minutes in total.   Cook the bacon about 2/3’s of the way through.

Add the sugar by sprinkling it all around and over the bacon.  Turn the heat to low and continue to cook the bacon and sugar together.  Continue to scoop out the fat when needed…and just keep cooking and stirring occasionally for about 25 minutes.  This is best done over a watchful eye – so that the sugar doesn’t burn.  It’s over if it does.

You can tell the bacon is done and the sugar is “candied” when you see little strings of sugar form around the bacon.  Move the bacon around and touch it (with the fork) – see if you can pull these strings to see them…you should.  (Should have taken a photo here…will add one next time I make it!)  Cook the bacon a little bit more to get it crispier and more or less well done depending on your taste.

Once cooked, transfer bacon onto prepared foil.  Let cool or serve warm.  It will be VERY hot at first so please don’t pop into your mouth right away…even though you will want to!

To freeze, let cool and wrap the bacon in foil (you don’t have to spray it now) and place in freezer.  When ready to eat, place bacon on counter for 10 minutes or in refrigerator overnight – and then reheat for about 5-10 minutes in a warm toaster oven (or oven) at about 350 degrees.   Watch it because the bacon/sugar can still burn if re-heated for too long or at too high a temperature.  I like to freeze the bacon in units of 2-3 pieces – so that I can pull from the fridge the night before I make the kids their turkey clubs.  Ready to roll in the AM.  Enjoy!

halloween peeps

A plain Peep is not something that I love.  However…a chocolate covered Peep is divine.  Seriously.  I did a short stint at Chocolations (a local chocolate shop) last year and Maria, the owner, was dipping Easter Peeps in chocolate.  Well, that was it.  Done. Count me in.  My early resistance to Peeps was no more.  I lovingly dip, serve and eat them often.  Surprisingly it is not just the kids (and I) who love them.  Rob loves them coated in dark bitter chocolate – to cut the sweetness – and both milk and dark make me happy.  The ghosts are almost fully dipped in chocolate while the pumpkins are placed on a chocolate disk.  While I was at it, I decided to make some chocolate covered Halloween Oreo treats as well.

chocolate covered Halloween Peeps:

Tempering chocolate is vital in chocolate making.  Tempering allows the chocolate to dry and set with  a glossy sheen and snap when you break it.  If you don’t temper you may find that you have off color streaks in the chocolate (a whitish bloom) and sometimes the chocolate wont set unless you refrigerate.  The chocolate may also be grainy.

Tempering chocolate is crazy easy if you have a tempering machine – which if you are dedicated to dipping you may want to invest in.  I have the Rev1 Chocolate Temperer which is in the less expensive range – although they range from about $400-$2000!

It can  be hard to justify the cost of the machine, but if you do purchase, simply follow the instructions on the machine – dip ingredients (in dark, mild or white chocolate) and let set on a parchment lined baking sheet.  You can go crazy here – I’ve dipped so many things- nuts, fruits, cookies, potato chips, pretzels, and popcorn.

If you want to dip by hand, it is a little more labor intensive but still worth the effort.  It would be helpful to have a good chocolate thermometer. And follow instructions below:

Start with at least one pound of chocolate.  It is easier to work with a larger amount.  Chop the chocolate and reserve about 4 oz.  Place the remaining chocolate (12 oz) in a stainless steel bowl over simmering water.  (If you start with more chocolate — let’s say 2 pounds, then reserve about 8 oz.)  When about a half of the chocolate has melted, remove from the heat and stir.  Place chocolate back on the simmering water and continue to heat – until the chocolate registers 118-120 (for dark chocolate) and 116-118 degrees (for milk and white chocolate) on the thermometer.  Do not go above 120 degrees.

Remove chocolate from heat and add the reserved chocolate – stir until incorporated and let sit on counter stirring occasionally until the chocolate cools a bit and reaches 80 degrees.  This can take a while – so be patient.

Once the chocolate cools, return to the simmering water (barely simmering) and heat it until it reaches 88-90 degrees (for dark chocolate) and 85-87 degrees (for milk and white chocolate).  This shouldn’t take long…keep a very watchful eye because if it goes over 90 degrees, you will have to start all over again!

Now it is ready.  Take out those ghost Peeps and dip away.  For the pumpkins, drop a teaspoon (or desired amount) of chocolate onto the parchment and using the bottom of the spoon, flatten it – and then place the pumpkin on it.  You can even make Halloween bark.  Now wish I had.  Next time.

Whatever left over chocolate you have (if any, I can always find something to dip) save for next time you temper or in any other chocolate recipe.  Oh, and by the way, there are many many videos on-line for tempering chocolate by hand – which might be helpful if you are a novice or would like a visual.  The chocolate  Peeps last a long time in an airtight container.  Enjoy!