
 I love these bananas. I’m not even a fan of a raw banana – but oh…a sprinkling of sugar, a blow torch – and voila – magic banana. These are great in addition to most any dessert. Really and truly. I absolutely love them in an ice cream sundae. My favorite. The crisp topping is like a creme brulee – but underneath, a banana. Yum! These are a great snack when you’re craving something sweet – especially for the kids (well, me too). The hard sugary shell entices them (us) and while we are at it – eat a whole healthy potassium filled banana! (OK, yes, with some added sugar.) Actually these might be good cut into hot oatmeal for breakfast – just thought
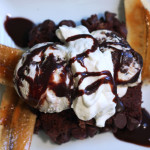 of that now. Hmmm…tomorrow. These are relatively easy to make if you have a blow torch – but sadly most people don’t? Blowtorches are easy to find
 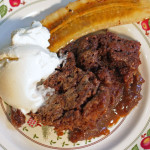 at your local hardware store – you don’t need anything fancy – but if you want a fancy one – especially styled for pastry, then by all means purchase. And don’t be scared – I know it sounds intimidating. The blow torch comes in very handy for caramelizing fruits, meringues and creme brulee. Unfortunately, unlike creme brulee – broiling these in the oven is really not quite as good. The banana “cooks” a bit and gets very mushy – but I guess it’s worth a shot if there is no other option. (OH, just got a note from Robert a friend and neighbor who says he cooks bananas in a nonstick pan over high heat with balsamic vinegar and some sugar. Yes, a pan friend banana may be the alternative way to go if you’re not daring enough for the blowtorch!)
caramelized bananas:
firm, just ripe, bananas
sugar
blowtorch–
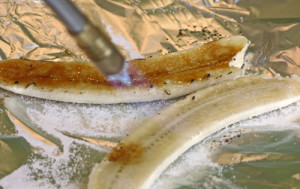 Slice each banana lengthwise. Place on foil or a foil-lined roasting dish or sheet pan. For each banana, sprinkle about a teaspoon of sugar (you can use more or less depending on the size of the banana and your personal taste) onto the cut side of the banana – and go to blowtorch town. Take your time…hold the blowtorch about 3-5 inches away and slowly move the flame around the banana. Keep the blowtorch moving all over and over and over again until the sugar caramelizes and turns a lovely shade of nutty brown. Delish.
broiler–
Follow directions above (but I would try a less ripe banana) – then place in oven – and broil. This will probably take under a minute so watch it carefully. I tried at home – but pretty unhappy with my results – but practice and see if maybe you can do better…I will try again – just hard to waste my bananas when my blowtorch is so close by!
Enjoy-

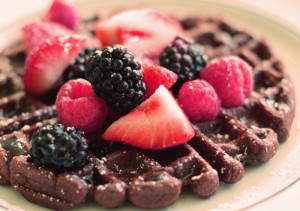
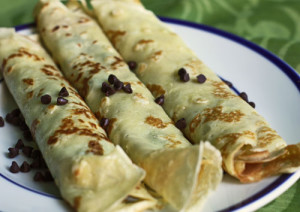 If you read this regularly, you know that Andy, my 10 year old, is a huge fan of chocolate in the morning. Last year he came home very happy and full after a sleepover with his twin friends Zach and Davis. He excitedly told me that their father made these Danish pancakes – and that they were delicious. I immediately called Tracy (my friend, their mom) and got the recipe. My brother-in-law Patrick who is French does not understand why they are called Danish Pancakes – he seems somewhat irritated by this and claims that they are simply French crepes! Oh well, either way, they are good and fairly easy to make once you get the hang of it. Oh, and we fill them with cinnamon sugar and mini chips – but my Nutella loving nephew Daniel fills them with…Nutella. Be creative, have fun – skip the chocolate if not for you and add fresh fruit or jam, or eat plain with confectioners’ sugar. Enjoy!
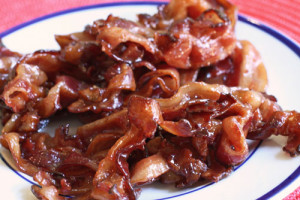 OK, so this isn’t dessert – I know, I do know…but I just had to put it in here because this bacon is scrumptious! There is sugar in it – a lot of sugar so maybe it qualifies just a little bit for this baking blog. My friend Melissa asked me to show her how to make it. We had a bacon making date. My mom makes a delicious salad with spinach, hard boiled eggs, onions and mushrooms. The addition of this bacon is seriously to die for (and I don’t even normally use that expression). She crumbles and adds it to the above ingredients and tops it off with a mayo/olive oil/mustard dressing that completes it. My family loves this bacon in a turkey club – I surprise the kids and put it in their lunches for a treat once in a while. It is great next to eggs and toast and can also hold its own alone. I’ve made an endive, fennel and blue cheese salad with the bacon and oh…equally as good as my moms. So – enjoy this sweet treat. Experiment. This bacon freezes well so make a bunch!
 Sometimes the recipe that comes in the instruction manual is actually pretty good! In this case, very good. You may know (from a
  14 – 6 inch waffles. I wrapped each individually in plastic wrap and then into a freezer bag. (I just read about
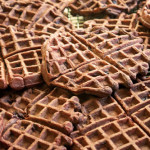

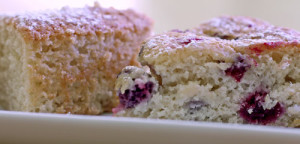 I loved the write-up of this recipe in Cake Keeper Cakes – in that you usually have the ingredients for it on hand. This is a great simple plain cake. One that my son Greg loves. He said “mom, this is amazing – it is just perfect for me!” Every day this week there was a piece in his lunch – and he was a very happy person. Laura Chattman’s recipe calls for the cake plain which is delicious, but I happen to have some mixed frozen berries and I added them to half the batter (I doubled the recipe and made two cakes). The result was equally as great. Greg’s friend Jamie was over and exclaimed that he loved berries and cake and “oh, Lisi, this is really really good.” My daughter Sylvie loved the berries in it too. I like this cake because there is no butter, and the low fat yogurt and eggs somehow make this feel like a healthy treat despite the sugar and white flour. (So I didn’t scold my au pair Alisa for eating it for breakfast.) Enjoy!
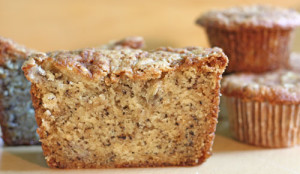 This recipe was given to me by my sis-in-law Sandy and it is a keeper! I make it for bake sales, morning coffees, afternoon snacks and dessert. I make it with or with out chocolate chips or nuts and in various sizes and shapes. My kids seem to love them in a muffin shape and that helps with quantity control – otherwise they just might eat the loaf. Zach and Lauren were over and that trick didn’t work, as Zach who’s 13 tried to convince me that I should cut into the loaf and that he should get thirds. I gave in!
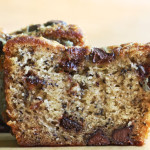 Pre-heat oven to 325 degrees. Butter or spray your loaf pans and line bottom with parchment. (As you are cutting, cut some extras for the next time you bake.) If using muffin pans, line with cupcake liners.

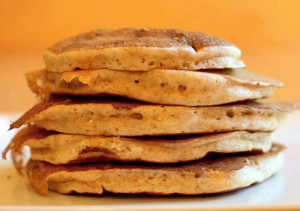 I think because my mom often sent me to school with a kiss and a cold pop-tart (sorry mom), I am now one of those moms who really insists that we all eat something healthy in the mornings and that we all sit together to eat it! It can be a challenge to make it happen since all three kids have school at different times, but we usually can manage 5-7 minutes together. The harder problem is Andy — who unlike his brother Greg and sister Sylvie, really dislikes cereal. Not only that, he refuses most breakfast items unless they happen to have chocolate or chocolate chips in them. That being said, I’m always on the look out for healthy pancakes. Of course I mess that up a bit with some added chocolate chips but I hope that the benefits of merely eating, and eating together will somehow win the fight over the chocolate in the AM. So I decided to try Ellie Krieger’s Whole Wheat pancakes for a change. They were a hit! Especially with the chocolate. Oh, and Andy just read this and said, “I’m eating whole wheat pancakes?!” – guess they are good. Ellie serves these with an delicious looking strawberry sauce, but Andy eats them plain (well with chips) and no need for syrup.
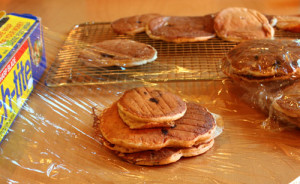 I like to double the recipe and make many extra. Once cool, I wrap the pancakes in groups of 3-4 pancakes and place in a plastic bag or airtight container and freeze. (I just read about