tools

Kitchen Tools 1

If you are interested, here are some great tools to have in your kitchen.

It’s great if you have a stand mixer for cakes and cookies.  It is easier and more efficient than a hand mixer and more sturdy.  Although hand mixers are great for meringues and lighter batters.  Shop around when there are sales and invest in a good one that should last forever.

Quality baking sheets.  I use them for baking and cooking.   I like to use restaurant quality half sheet pans.  And parchment paper sheets – sized to the half sheet pan.  Saves time, and waste.  Peek here but look around for deals and savings online and in your town.

Cardboard cake rounds are so helpful to move your cake and ice it too.  Peek at youtube and watch a demo on icing a cake and you will likely see that a cake round is used.

Offset spatulas are one of my favorite tools.  They are great for spreading brownies and bars in pans or for frosting cakes.

Bowl scrapers are great too because they help you get every last bit of batter out of a bowl.  Which is important – no waste and easier clean up and of course more sweets to eat.

Bench scraper great for picking up scraps of dough, cutting butter and cleaning your counter.

An extra big spatula is one of my favorites for folding batters.  I use mine all the time.

Whisks in different sizes.  Pastry brushes.  Wire racks.

Lemon reamer very helpful and will save your hands.

kitchen scale is also important for measuring ingredients.  Purchase a simple scale that has a “tare” button – which is a simple way to reset the scale to zero when you’ve placed a mixing bowl or a cup on top of it.

A grater – the microplane grater is great for zesting fruits, grating fresh nutmeg or for garlic and ginger in savory cooking.  It is a great tool!

Food processor – to ground nuts, doughs and cookies

Ice cream machine – they are so easy to use and affordable these days.  In addition to ice cream, you can make sorbets, sherbets, frozen yogurts and slush drinks.  I happen to like Cuisinart’s 2 quart model – it is on sale for 50.00 bucks.  The 1.5 quart model is also good.  And if you have a kitchen aid mixer – there is an ice cream attachment that you can purchase and your done!

Plastic wrap – Stretch-tite plastic wrap is the best one around – and I just read about Freeze-tite which is even better protects your baked goods in the freezer.  I leaned that  there are little microscopic holes plastic wrap that allow air to circulate – to help your produce from spoiling.  But these little airholes are not great for the freezer.  So Freeze-tite was born.  I just ordered it online.

Cake boxes can found at sugarcraft.com 

Obviously many other tools, but these are stand outs to me.

marvelous marble cake

Terrible photo I’m aware.  But don’t let it deter you.  This cake is tasty and although simple, has an elegance to it.  Dress it up with whipped cream and berries and you have an even prettier dessert.  This is also a good cake to nibble on throughout the day (as we all did!)

Enjoy –

marble pound cake (from xxx by Lauren Chattman):

3 ounces semisweet or bittersweet chocolate, finely chopped
4 large eggs, room temp, lightly beaten
2 teaspoons vanilla extract
1 1/2 cups cake flour
3/4 teaspoon baking powder
1/2 teaspoon kosher salt (use half if using table salt)
1 cup (2 sticks) unsalted butter, softened
1 1/4 cups sugar

Preaheat oven to 325 degrees.  Grease and flour a 9×5 loaf pan (other sizes fine too just adjust baking time).  Alternatively, grease the pan and line the bottom with parchment.

Place an inch of hot water in a saucepan and bring to a boil.  Then reduce to a simmer.  Place chocolate in a stainless bowl big enough to rest on top of the saucepan.  Please make sure the bowl does not tough the water.  (Or use a double boiler if you prefer.)  Don’t burn the chocolate, just melt it.  Once melted, remove from heat to cool.

Combine the eggs and vanilla and lightly beat.  In a small bowl, place the cake flour, baking powder, and salt.

With the paddle attachment of the mixer, bet the butter and sugar on medium high heat until lighter and fluffy.  5 m or so.  Scrape down sides and beat again to incorporate.

Turn speed to medium low and slowly pour the egg/vanilla mixture into the butter.  Scrape down the bowl and beat again.

On the lowest speed, add the flour mixture and mix until incorporated.

Scoop out half of the batter into another bowl and add the melted chocolate.  Stir until combined.

Scrape half of the yellow batter into the pan.  Then scrape half of the chocolate batter on top.  Repeat with other halves.

Run a knife through the batter to create marbling (if you like).

Bake until cake is golden and a toothpick comes out just clean.  Recipe says and hour and 15 m – but check before and after.  I recently learned that my oven temp is off – and many are, so follow your instincts and bake until your cake is done.  This will take practice but it is one of the most important factors in baking.

Let cake cool in pan for 10 m or so.  Then gently invert on rack to cool completely.

Yum.


be prepared to bake

Your shopping list might not seem as overwhelming if you generally stock some of the following items.  Just pay attention to how much you bake.  Many items in pantry and refrigerator expire (some sooner than later) so if you are not baking often, wait and shop as you need.  But if you are an avid baker, go for it.

Pantry: flour, sugar, brown sugar (more light than dark) baking soda, baking powder, salt, cocoa (natural and unsweetened, black cocoa), chocolate chips and chocolate bars (milk, semi, white, bitter, extra bitter, unsweetened) cornstarch, whole wheat flour, cake flour, oatmeal (quick cooking and old-fashioned), canola or vegetable oil, dried fruits, a variety of nuts, molasses, graham cracker crumbs, marshmallows, shredded and flaked coconut, spices (cinnamon, ground ginger, allspice, ground cloves, cardamom, ground nutmeg), instant espresso powder, vanilla extract, and vanilla beans, sweetened condensed milk, evaporated milk…

Fridge: large eggs, unsalted butter, sour cream, plain yogurt, buttermilk, milk, heavy cream, block cream cheese, lemons and other assorted fruits

Freezer: frozen berries and stone fruits, puff pastry, fillo dough, ice cream

brown butter brownies

Baked these brownies for a charity and they wrote to say how much they looooovvved them!  The mattress delivery men were eyeing the brownies as they went up and down the stairs…and were happy to leave with their goodie bags.  They said best brownie they ever had.  Wow.  (Although these are very good, I’m thinking they were hungry).  But it is amazing what a little treat can do for someone.  That is prob my favorite part of baking.  The delight (my own, and others).  My family prefers the “favorite fudge brownies” and although I too love those, they can be a bit rich at times.  These are chewier and have a shiny top which is fun for some reason.  If you can, add the walnuts because the texture and taste is definitely heightened and you can get a good dose of omega-3 fats too (making them healthy?!)  🙂

You will need a little muscle for this recipe.

brown butter brownies (from Alice Medrich’s Sinfully Easy Delicious Desserts):

10 tablespoons unsalted butter
1 1/4 cups sugar
3/4 cup (2.4 ounces) unsweetened cocoa powder, preferably natural
rounded 1/4 teaspoon salt
2 teaspoons water
1 teaspoon vanilla extract
2 cold large eggs
1/3 cup plus 1 tablespoon (1.78 ounces) all purpose flour
1 cup (3.5 ounces) walnut pieces
chocolate chips (optional)

Toast your walnuts if you have time – 350 degree oven for about 10 min – plus or minus — basically until fragrant.  Set aside to cool.

Preheat oven to 325 degrees.

Line the bottom and sides of an 8 inch square baking pan with tin foil and spray with  a non stick spray or rub some butter on it.

(In case you don’t remember the easiest way to line the pan, turn the pan upside-down and place the foil on top gently folding around the edges and sides.  Turn pan right side up and now you have a “mold” so to speak that you can easily push into the pan to prevent the foil from tearing.)

Melt the butter in a medium saucepan and cook until it melts, and then turns golden brown.  Then quickly remote pan from heat and add the sugar, cocoa powder, salt and vanilla extract.  This will stop the butter from burning.  Mix well and let cool for 5 minutes or so.

Add the eggs, one at a time and beat very well after each addition.  Add the flour and mix well again.  Once the flour is incorporated, beat the mixture with a wooden spoon – about 50 times.  Yup.  Hard, fast and vigorously  — you want the mixture to get good and shiny.

Fold in the nuts and if  you are using chocolate chips, add as well.

Pour into the foil lined pan and bake until done.   A toothpick should come out just clean.  Alice says 20-25 m – but check before and after.  I just learned that my oven is off by 25 degrees – and yours might be too, so bake them until you think done, not the timer.

Let cool.  Then remove brownies by carrying them with the foil onto a cutting board and slice.  You can also invert them and gently peel off the foil first as it will be sticky.

Enjoy –


vanilla

Use good quality – and not artificial vanilla.  I love the double strength vanilla extract from Penzey’s spices.  You can order it on-line from penzeys.com.  (As well as many other spices and salts).  It is probably better to skip the vanilla if you don’t have the real thing.

To scrape and seed a vanilla bean, place the long bean on a cutting board.  With your paring knife, slice the bean lengthwise – from top to bottom all the way down and through.  Open it up and you will see soft brown inside.  With the back of your knife, scrape the seed gently (while holding the end of the pod) collecting all the goodness from inside.  These are the seeds and they should be on your knife.  The pod contains more flavor and seeds and is often added to marinating liquids or ice creams – and pulled out later.  You can purchase at the grocery or get a bunch from penzeys.com – store  them in an airtight container or they dry out.

avoid dry and crumbly cookies

I found the difference between a heavily packed cup of flour and lightly packed cup o flour was a bit more than an ounce!  This is a lot in the baking world.  Go to baking tips to see how to measure flour and if you have a scale, use it.  Do you know how to use the “tare” button on your scale?  If not, read the directions or google it.  Makes baking life easy.  Your friends will thank you (for even better cookies and cakes)!

IMG_5554

cranberry streusal pie

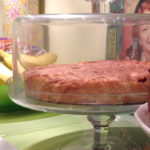
Ignore the lousy photo – forgot to take and this is just the messy leftover!

This has to be one of my favorite desserts.  I mean really and truly.  First, the color!  Wow.  Gotta love that bright red pie.  Second is the flaky buttery crust.  Really mouth-watering.  Next is the filling – I know, I know, it is cranberries and many seem to be put off by them, but I don’t get it.  I really don’t.  This filling is delicious – bursting with flavor both tart and sweet and against the crust it is fabulous.  And lastly – the streusel topping!  Streusel is the best and on top of a pie – well…again, wow.  Make this if you have some serious dessert lovers.  Sylvie said it was probably the best thing that I’ve made in a long while.  And Andy, he wouldn’t try it.  So…enjoy if you can and have willing company or family.

I think this is easiest if you make this in steps.  Make the streusel one day during the week – it will keep in the fridge.  Make the tart dough and even roll out (then place in freezer) until ready to bake.

That way, in the AM, you can blind bake your pie crust, while it is baking make the filling (so easy) and then you already have streusel.  Just less overwhelming that way.

cranberry streusel pie (from Smitten Kitchen):

crust

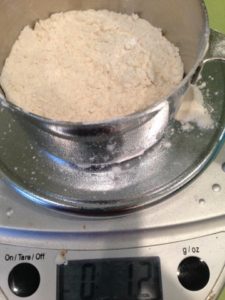
1 1/4 cups all-purpose flour (155 grams)
1 1/2 teaspoons sugar (6 grams)
1/2 teaspoon kosher salt  (3 grams)
1 stick cold unsalted butter, cut into chunks (4 ounces or 115 grams)
1/4 cup very cold water,  (60 ml) plus an additional tablespoon if needed

filling

4 1/2 cups fresh or frozen cranberries (from 1 1/2 12-ounce bags)
1 cup granulated sugar, plus 1 to 2 more tablespoons, if desired, to taste
a little bit of orange zest
2 pinches kosher salt
1 tablespoon cornstarch

streusel

2/3 cup rolled oats
1/2 cup all-purpose flour
1/3 cup sugar
1/3 cup light or dark brown sugar
1/2 teaspoon ground cinnamon
1/4 teaspoon kosher or sea salt
3/4 cup pecans, toasted first if you have the time
6 tablespoons unsalted butter, melted and cooled

Ok, so for the pie dough – I’m copying from Deb’s post – since she gives great detail and great direction.  I did the food processor method and the dough was perfection!  And I par baked the crust which she also suggests.

“the pie dough:

  • By hand, with my one-bowl method: In the bottom of a large bowl, combine the flour, salt and sugar. Work the butter into the flour with your fingertips or a pastry blender until mixture resembles a coarse meal and the largest bits of butter are the size of tiny peas. (Some people like to do this by freezing the stick of butter and coarsely grating it into the flour, but I haven’t found the results as flaky.) Add 1/4 cup cold water and stir with a spoon or flexible silicone spatula until large clumps form. Use your hands to knead the dough together, right in the bottom of the bowl. If necessary to bring the dough together, you can add the last tablespoon of water.
  • With a food processor: In the work bowl of a food processor, combine flour, salt and sugar. Add butter and pulse machine until mixture resembles a coarse meal and the largest bits of butter are the size of tiny peas. Turn mixture out into mixing bowl. Add 1/4 cup cold water and stir with a spoon or flexible silicone spatula until large clumps form. Use your hands to knead the dough together, right in the bottom of the bowl. If necessary to bring the dough together, you can add the last tablespoon of water.
  • Both methods: Wrap dough in a sheet of plastic wrap and refrigerate for at least one hour, or up to 48 hours, or you can quick-firm this in the freezer for 15 minutes. Longer than 2 days, it’s best to freeze it until needed.

Form the crust: On a floured counter, roll the dough out into a 12 to 13-inch circle-ish shape. Fold dough gently in quarters without creasing and transfer to a 9-inch standard (not deep-dish) pie plate. Unfold dough and trim overhang to about 1/2-inch. Fold overhang under edge of pie crust and crimp decoratively. Return to fridge until ready to fill.

[Optional: If you’d like to par-bake the crust, once you’ve rolled it out, freeze it for 10 minutes inside your pie tin, until solid. Prick unbaked crust with a fork several times. Line it with lightly buttered foil. Fill with pie weights, dried beans or pennies. Bake at 400°F (205°C) on rimmed baking sheet 15 minutes. Remove paper or foil and weights, and bake 5 to 10 more minutes until crust is golden brown and lightly crisp.]”

Ok, so heat oven to 375 degrees…or lower the oven if you just par baked.

For the filing, mix all the ingredients together.  And if cranberries are frozen, no worries, they will just take a few more minutes to warm up.   After about 5 minutes (or 10 if cranberries frozen), the cranberries will begin to leak juices.  Cook, stirring here and there until filling is loose.  You can crush some of the berries a bit too.  Transfer the filling to a bowl to let cool for a bit.

For the topping, place the oats (if you are using whole ones) in a food processor and grind until powdery.  Add toasted pecans and grind too.  Add flour, sugars, cinnamon and salt, and lastly, the butter, pulsing a few times to combine.

Sprinkle the streusel on top of the filling and bake the pie for about 45 to 50 minutes.  You want the juices to bubble.  If the pie browns to fast, just lay foil loosely on top.

When done, eat warm or cold (I like it cold!) with freshly whipped cream or vanilla ice cream.  Yum.


cranberry cookies

Greg’s friend from school joined us for Thanksgiving.  We urged him to come having found out that he was on campus with out a turkey plan.  We had a terrific meal and a great variety of desserts.  I made these little gems, but I don’t think anyone in Rob’s family tried them.  So they sat there and I thought that I would still post them, because I loved them…and that was enough.  But lucky for me, I found another white chocolate cranberry cookie lover in Jay!  When asked what his favorite dessert was for a goody bag he quickly replied with “those cranberry cookies!”  Well, I was delighted (seems too strong of a word, but I was).  When home and a box of cookies went to Ali’s house…she texted saying “cranberry cookie one of my new faves.”   Make them if you are willing!

cranberry cookies (slightly adapted from A Taste Of Home)

1  cup unsalted butter (2 sticks), softened
1 1/2 cups sugar
2 eggs
1 teaspoon pure vanilla extract
2 cups all purpose flour
1 teaspoon baking powder
1/2 teaspoon kosher salt
1/4 teaspoon baking soda
2 cups rolled oats
1 cup raisins
1 cup fresh or frozen cranberries, chopped
2 teaspoons grated orange zest
8-10 ounces good quality white chocolate chunks or chips
pecans would be nice in here too if you like

Preheat oven to 375 degrees.

With paddle attachment of your mixer (or with hand held beaters) cream the butter and sugar together on medium speed until light and fluffy.  About 5 minutes.

Continue on medium speed, and add the eggs one at a time and then the vanilla.

Whisk together the flour, baking powder, baking soda, salt and oats and add to the mixture.  Mix on the lowest speed until just combined.

Remove from mixer and mix in raisins, cranberries, zest and white chocolate.  (I used my clean hands).

Line baking sheet with parchment.  Bake from 8-14 minutes depending on the size of your cookies.  I made big ones…you do what you like!

Enjoy-


almond torte

So moist, so flavorful.  This is so unexpectedly good!  I forget who was really delighted with this cake the other night.  But I do remember that person urging others to “try that cake!”  With a delicate crumb, a buttery feel, and deep almond flavor, this cake seems decadent and fancy.  In reality it is quite simple to make.  I was told by Alice (in the recipe!) that the flavor and texture are best if you make the cake at least one day in advance.  So like a good little lamb, I did just that.  The cake was spectacular on day 2, but equally delicious on day 3, 4 and 5.  I’m not exaggerating.  I’m really not.  I kept it in a cake dome and that seeIMG_5165med to really help.  Try this with freshly whipped cream and berries.  Or fresh apples  and pears.  Or drizzle with chocolate sauce and serve with ice cream.  Or simply serve on it’s own with some really good coffee.  The possibilities are endless.  Enjoy-

Alice gives us weighted measurements to, so if you have a scale, use it.  Much more precise.

almond torte (from Alice Medrich’s Sinfully Easy Delicious Desserts):

3/4 cup plus 2 tablespoons blanched or unblanched almonds (or 4.375 ounces)
1 cup plus 2 tablespoons of sugar (or 7.875 ounces)
1/4 teaspoon kosher salt
1/2 teaspoon pure almond extract
1 stick (8 tablespoons, or 4 oz) butter – cut into chunks and slightly softened
1 tablespoon kirsch (optional)
3 large eggs
1/3 cup flour (or 1.5 ounces)
1/4 teaspoon baking powder

Preheat the oven to 350 degrees and place rack in the lower third of the oven.  Butter the sides and bottom of an 8×2 round cake pan (I used 9 inch – and mine was flatter and took less time to cook…)  Line the bottom with parchment.  Butter that.

Place the almonds, sugar, salt and almond extract into a food processor and process until the nuts are pulverized.  Add the butter and kirsch (if using) and pulse until blended.

Add the eggs and process until thoroughly blended.  Add the flower, baking powder and salt and plus until just combined.

Scrape the batter into the prepared pan and place in the oven.  Cook until the cake is a lovely golden brown and a toothpick comes out just clean.  Let cool in the pan.

Run a sharp knife around the edges of the pan and invert onto a cake platter.  Peel off the parchment and turn right side up.  Serve with simple powdered sugar – or any of the ideas above…and I’m sure many more.

Enjoy-

Wrap this and it will last nicely for several days.  It also freezes well.


caramel apple cake

Make sure you check out a good photo of this cake on Mel’s Kitchen Cafe as this photo does not do it justice at all.

Different from other apple cakes, this one has a terrific cream cheese layer laced throughout as well as a yummy glaze on top.  I made it around Thanksgiving and I keep meaning to write about it as it was really quite good.  Eric asked what was in it, and I immediately got defensive (aggressively asking, why??) and he said that well, he just really liked it and was curious!  Jeez, I gotta calm down.  Anyway, it was good.  Really tasty and stayed moist and lip smacking good for several days.  I served it with a caramel sauce but it really isn’t necessary given the glaze.  If you want to make the sauce, just look at the link and directions are there.

Make this a day before you plan to serve it and don’t be put off by the long list of ingredients as it is really very simple to throw together.

caramel apple cake (from Mel’s Kitchen Cafe)

cake

3 cups all purpose flour
1 teaspoon baking soda
2 teaspoons cinnamon
1/2 teaspoon nutmeg
1/2 teaspoon kosher salt
3 medium apples (for about 3 cups chopped)
1 tablespoon lemon juice
3 tablespoons dark brown sugar
2 teaspoons vanilla, divided
1 1/4 cups canola oil
2 cups sugar
3 eggs

cream cheese filling

8 ounces cream cheese (not whipped) room temp
1/3 cup sugar
1/2 teaspoon vanilla extract
1 egg

glaze

2 tablespoons butter
2 tablespoons sugar
2 tablespoons brown sugar
2 tablespoons heavy cream
1/2 teaspoon vanilla extract

Preheat the oven to 350 degrees.  Generously grease a 9 or 10 inch bundt pan.  All over.

In a smallish bowl, whisk together the flour, baking soda, cinnamon, nutmeg and salt.

In another bowl, combine the chopped apples with the lemon juice.  Add the brown sugar and 1 teaspoon of the vanilla extract.

With hand held beaters or an electric mixer, beat together the oil, sugar and other teaspoon vanilla.  Follow with the eggs one at a time and mix well.  Add the dry ingredients and mix until just blended.

Strain the apples to remove any excess liquid and add to the batter mixing just to incorporate.  Do not over mix.

The batter will be thick – pour into the bundt pan and make the filling.

Mix together the cream cheese, sugar, vanilla and egg.  Mix well.  Place in a trench on top of the batter and try to scoop the batter around and on top of the cream cheese.  Then take a knife and swirl the cream cheese even more.

Bake for about an hour to an hour and 20 – really depends on the size of you pan and your oven.   You want a toothpick to come out with a few moist crumbs.

Make the glaze by mixing all the ingredients in a small saucepan.  Bring to a boil, then boil for about 60 seconds mixing constantly.  Remove from heat.

Once the cake is out of the oven, the recipe instructs you to pour the glaze on top of the cake (while still in the pan).  I struggled with this – and was worried that the cake would get stuck.  So I let the cake cool a bit, then inverted it and poured the glaze on top.  I suppose my cake isn’t as pretty because of it, but it didn’t fall apart.  See what you think and lmk if you have success.

Enjoy-