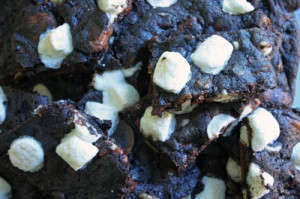
These are incredible. They are very very strong in coffee flavor – made with ground espresso beans that give them great chewy/crunchy texture. Lauren – a 10 year old exclaimed that “they taste like Starbucks.” I love them – the icing is sweet and delicious and although the brownies are very rich, they are addictive. I nibbled throughout the day. And now I’m full of caffeinated energy! (I’m writing very late for me…after watching the entire Sound Of Music with my daughter…she ate them too!) I also made an espresso brownie ice cream by chopping the brownies into small bits and adding them to freshly churned vanilla ice
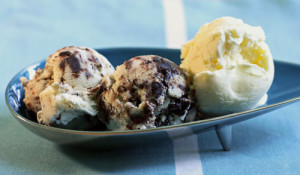 cream. So very good! I found these brownies in Saveur Magazine. The article listed three different and highly regarded brownie recipes. Since I was familiar with the first two (Nick Malgieri’s and Kate Hepburn’s) and loved both, I decided that I had to try these – developed by Krystal Stone – an assistant at Saveur. I tweaked the recipe just a little here and there. There are a few special pantry items that you’ll need: chocolate covered espresso beans as well as instant espresso powder – so purchase before you decide to bake. But they are well worth a trip to the store or a visit on the Internet. Reserve a little extra time – they are not difficult but a little more time consuming than a regular brownie.
frosted espresso brownies (adapted from Saveur Magazine):
3/4 cup medium to fine ground chocolate covered espresso beans
1/4 cup water
2 1/2 tablespoons instant espresso powder
3/4 cup sugar
1/4 cup light brown sugar
1/2 cup cocoa powder
1/2 cup canola oil
1 1/2 teaspoon vanilla extract
2 eggs (beaten)
1/2 cup flour
1 teaspoon salt
1/4 teaspoon baking powder
icing–
4 tablespoons butter
1/4 cup milk
1/2 cup sugar
1/2 cup light brown sugar
1/3 cup cocoa powder
1 teaspoon vanilla extract
1/2 teaspoon salt
Preheat the oven to 325 degrees and line a 8 or 9 inch square pan with tin foil. These brownies are gooey and hard to get out of the pan – so line the pan with foil so that it comes all the way up the sides of the pan. Once baked and cool, you can simply lift the whole big brownie out of the pan, flatten the foil, and cut as desired. I might try them in mini muffin pans next time. Try if you like.
Grind your espresso beans in a food processor. Whisk together the flour, salt, and baking powder and set aside.
Bring 1/4 cup water to boil and whisk in instant espresso and dissolve. Pour into a medium sized bowl. Add the ground beans, sugar, brown sugar, cocoa, oil and vanilla and mix well. Add the eggs and mix again, then add the dry ingredients and mix until just combined.
Pour the batter into the prepared pan and spread evenly and bake for about 42-50 minutes. As usual check often and before. Let cool for about 10-15 minutes.
In the meantime, make the icing. Bring the butter, milk, sugars, cocoa, vanilla and salt to a boil in a small saucepan. Continue to stir and whisk as it comes to a boil.
Pour the icing over the warm brownie (you may not need all of it) and let set and harden. I found it easier to let sit overnight – but dig in when you like. This is great in a light vanilla ice cream. I think I’ll mix it into my next batch.
Enjoy!

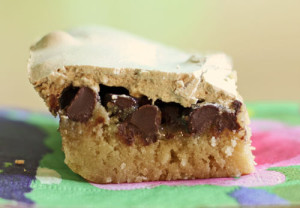 These bars were my favorite childhood dessert. I recently asked my mom for the recipe – but being that she is so neat and tidy (which is great), she often throws things away (not so great). I suffer the same affliction at times. Anyway, luckily my very good friend Michelle also loved these as a child (we were family friends so she was treated to my mom’s sweets). And Michelle held onto the recipe! It is a weird recipe and I had some doubts as I made them – but they were the same ones from my childhood. I should tell you that these are very very sweet. Not for the tame hearted sugar eaters here – but oh…for me – they are decadent and heavenly. Rich and gooey. I cut one up and put it in my vanilla ice cream last night and really, I felt so content. My kids wouldn’t eat them the first night. I said ok everyone – time for something new…my favorite… and I was met with groans of “more dessert?” And “can’t we just have a little candy tonight” Oh boy. The second night they tried it – and loved it – especially Sylvie and our neighbor Danika. Greg said it tasted like cookie dough. My friend Suzanne said a tiny square with her tea was all she could eat because she felt the sugar on her teeth (although she reported she’s excited to eat another small bite with lunch). And her husband Jamie said yes, sweet, but good – and ate a hearty slice. Again, this is not for everyone.
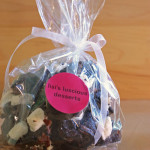
 This stuff is heaven. I really truly mean it. Moist, very chocolaty cookies, filled with various chips, nuts and marshmallows all creating a mouthwatering texture and taste that seriously rivals most cookies I’ve eaten. The free form shape adds to my delight (for reasons I can’t explain). I made these for the last school fair and they were a serious hit. I always double the recipe (the recipe below is doubled) and freeze a bunch for my son Greg who is normally not a crazy chocolate lover. He takes these from the freezer and pops them in the microwave and eats them warm and gooey. He groans with pleasure and raves and raves and thanks me for making them. Gotta love that at 13. I like them with vanilla ice cream (what else is new). This recipe is adapted from The Baker’s Field Guide to Chocolate Chip Cookies by Dede Wilson. She calls them Heavenly Hash Break-up Bars, but Greg (my son) quickly named them Cookie Bark but no matter what you call them they are good. Seriously good. So bake them soon and enjoy!! *Reader – order the
  nderbaked this last batch and they were really really good, although a little bit harder to handle. Getting them off of the parchment was a little tricky, so I picked the whole piece of parchment (with cookie attached) and flipped it over a piece of tin foil and just peeled back the parchment. That did the trick. You can cut before or after. These are great gifts as well. I was baking for Gilda’s Club and decided to package them up in a little bag – nice for the holidays or just a little treat for a friend or family.